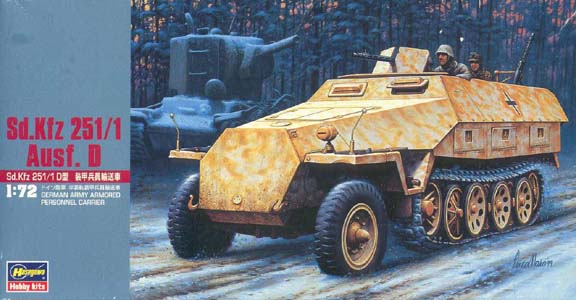
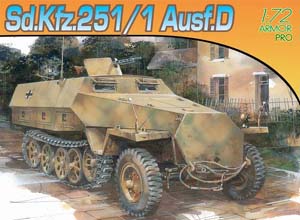
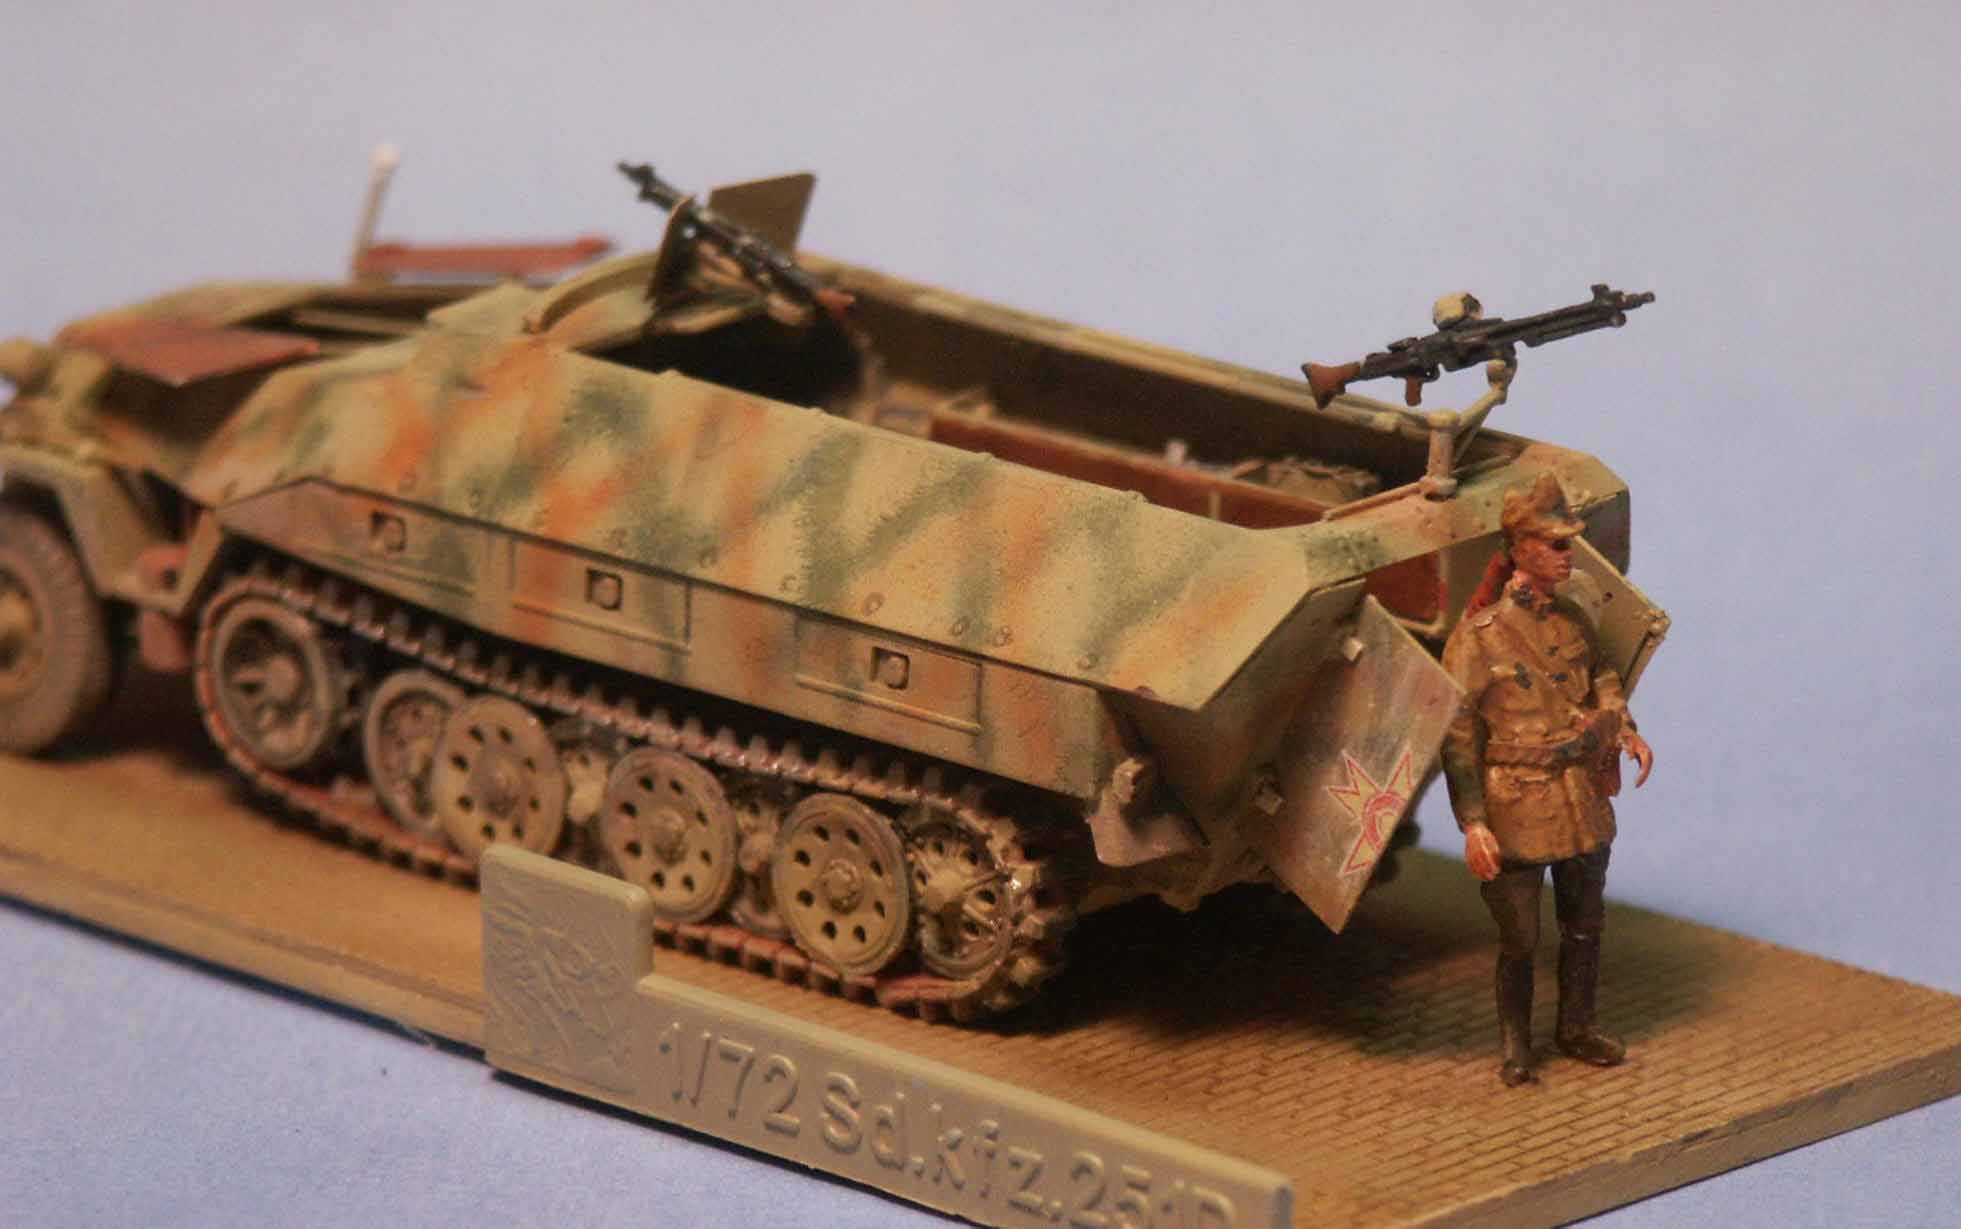
Sd.Kfz. 251 Ausf. D mittlerer Schützenpanzerwagen by Stephen 'Tank Whisperer' Brezinski
sbrez(at)suscom-maine(dot)net
Edited by Rob Haelterman

Sd.Kfz.251 Ausf. D mittlerer Schützenpanzerwagen
(medium armored troop carrier Version D)
A Compare & Contrast Review In 1/72 scale

vs


I. Introduction

This review covers two 1/72 scale German halftrack kits in 1/72 scale, the Sd.Kfz.251 Ausf.D version from the Japanese firm Hasegawa, and from the Chinese firm Dragon Models Limited [a.k.a. DML or just Dragon]. The Ausf.D, or D model, was the final and most widely produced variant in 22 different versions, from infantry carriers to engineer vehicles to self propelled artillery. The D version differed in having a simplified hull compared to the Ausf.C to allow an increased production when the war began to go bad. There is so much information in books and on the web that I will not go further into history and use during this review.
Until the past few years there have been no good 1/72-scale plastic model kits of this important vehicle. First, Hasegawa released their good interpretation of the Sd.Kfz.251/1 personnel carrier [Schützenpanzerwagen, or SPW], the Sd.Kfz.251/9 self propelled infantry gun, and the Sd.Kfz.251/22 self-propelled Pak 40 anti-tank gun. In 2007 Dragon released their own version using more advanced molding techniques in both the C and D versions. With this review we’ll take a look at both releases of the Ausf.D models of the Schützenpanzerwagen infantry carrier version so you can choose what kit is best for you.


Hasegawa has always released nice box art that also serves as a color guide for painting. I found this box art amusing in that there were no Soviet KV-2 tanks [visible in the background] active when the Sd.Kfz.251 Ausf.D was manufactured in 1943. In the box art we see the panzer dark yellow [Dunkelgelb] color, the accurately portrayed open driver’s visor and the lack of side visors and side engine hoods or ventilation flaps common to the Ausf.A, B or C versions.


Dragon also offers very nice box art which does not appear to me to be computer generated as with some of their other box artwork. The MG42 forward machine gun is evident, replacing the MG34 common to earlier variants. The towing cable hanging from the front is not included within the kit. Like the Hasegawa box art, DML’s can be used as a guide for painting & markings.


II. Assembly Instructions

Both manufacturers give us the standard black and white, exploded-view type of assembly instructions with clear sprue and part numbers.


Hasegawa offers the standard black & white instructions and are clear and easy to follow. The sprue letter precedes the part numbers. Since the kit floor [part B4] is used for the three versions that Hasegawa has so far released, remember to drill out the appropriate locating-holes in the floor for seats [parts D4-D7], a gun mount or bins, etc., before gluing the floor into the lower hull [part B4]. At right is the marking and painting guide. Most 251 D’s had wooden slat crew seats rather than the earlier leather padded seats. Hasegawa gives us a greater number and more accurate interior parts for the 251 halftrack than ESCI had. Good news is that the Hasegawa floor and other fittings drop into ESCI-Italeri’s 251 Ausf. C hull for a very good fit.


This scan shows us assembly steps for DML’s suspension [Step 1 & 2] and the interior [Step 3 & 4]. I found assembly and placement of the front steering linkage B1 and B2 to be confusing. This assembly is actually not even included in the ESCI and the Hasegawa 251 models. At first I was not fond of how parts B6 and B7 were done, as these parts are the inner wheels connected together as sets of three wheels and four wheels. Using this method actually makes it much easier to get all the wheels on straight, and the connections cannot be seen when assembled. Like with the Hasegawa kit, make sure you open up the appropriate holes in the kit floor [A8] for the seats, etc. before you glue the floor into the lower hull. DML gives us more, and less-simplified parts for the driver’s area, such as the three shift & brake levers. Little of this interior can be seen when the model is complete; so on versions such as the Sd.Kfz.251/9 and Sd.Kfz.251/22 this detail can even be left out.


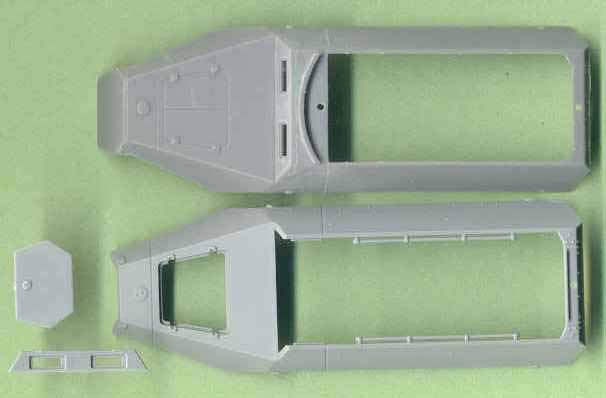
III. The Superstructure Parts

At the top is the Hasegawa hull superstructure consisting of parts A6 and the front driver’s plate [B6] with open visors already glued in. Below Hasegawa's superstructure is the DML superstructure [part A1] in the slightly lighter gray styrene, also with separate front plate with open visors [part A18], and separate nose armor plate [part A13].


A separate driver’s roof [B16] and the engine compartment doors [parts A6 & A7] are not shown. [Note that the engine doors for Dragon’s Ausf D are not interchangeable with the doors for the Ausf C.] Both kits compare well in length and width. An obvious difference between the two manufacturers is the long crew compartment handles that DML molds into the top edge of their hull, and that DML offers an open engine compartment. Depending on the version DML instructs us to remove these handles. If so, save the handles for the Hasegawa or ESCI kits.


This is the real boring, uninteresting part of the vehicle. At top and middle are two lower hulls [part A5] and suspension [torsion bar] arms [parts B1 & B2] for the Hasegawa 251/D model. The top one is partially assembled with the front axle and suspension arms [B1 & B2] attached. Hasegawa offers no steering linkage like DML does, which is no big issue for little of this can be seen unless the model is displayed on its side. What appears to be an engine oil pan is interesting. I have not yet seen this feature in any diagram or photo of this area of the 251; the Sd.Kfz.251 bottom looks more like what DML portrays. Perhaps what DML portrays is an armor cover over the engine bottom and Hasegawa models it without the armored cover? Hasegawa offers rear doors that can be modeled open but we must cut the two doors apart.
At the very bottom is Dragon’s one-piece lower hull with torsion bar arms molded in, thanks to slide molding. There is a lot of nice detail. The rear plate [part A16] is separate as are the two rear doors, parts A14 & A15. On both kits these rear doors are much too thick for a good display model when open. They can be replaced with several etched brass sets or scratchbuilt with thin sheet plastic; an easy job.


Here are PART’s etched brass frets: at the top for Hasegawa’s Sd.Kfz.251/9 Ausf. D, and the fret below common for all three of Hasegawa’s Ausf. D kits. The set comes with new front fenders, rear doors, side storage bins, interior visor parts, new textured floor, nose plate, storage bins, steering wheel and hand tools, etc. The hand tools are flat and in my opinion look worse than the kit parts. The steering wheel and fenders are a nice addition.


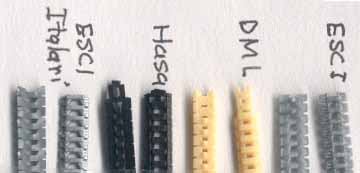
IV. The Suspension

The Sd.Kfz.251 had interleaved roadwheels and rubber padded lubricated tracks common to most German halftracks of the time. In 1944 the Germans experimented and soon dropped the idea of steel padded tracks so as to save on scarce rubber. Both DML and Hasegawa have the correct 14 roadwheels; the rear roadwheel doubles as the idler wheel.

Second from right are DML’s cream colored soft band tracks. DML’s detail is very good top and bottom, they have accurate guide teeth, and wrap around the wheels and sag well and glue easily. They are narrower than ESCI’s tracks [at the very left and right, for comparison].
I’ve heard many modelers deride DML for not offering link and length hard styrene tracks for their 1/72 scale kits. My philosophy is not what it’s necessarily made of but how well it’s done. DML’s soft tracks are very well detailed and are easy to work with. From a marketing point I suspect the band tracks are more attractive to the average modeler. The ESCI and resin link & length tracks are real hard to get straight and evenly spaced; a careless job will look awful. One of my DML tracks was a little short and had to be stretched over the wheels, but glued down to the wheels well.
Second from the left are Hasegawa’s tracks for their Sd.Kfz.251 in soft black plastic. Hasegawa gives us good detail and guide teeth on the inside surface, though no inside link detail. Their tracks glue down to the wheels easily allowing for realistic sagging.

Building Tip: Paint the tracks and wheels before assembling them to the model. Leave bare or sand clean the areas that will be glued.

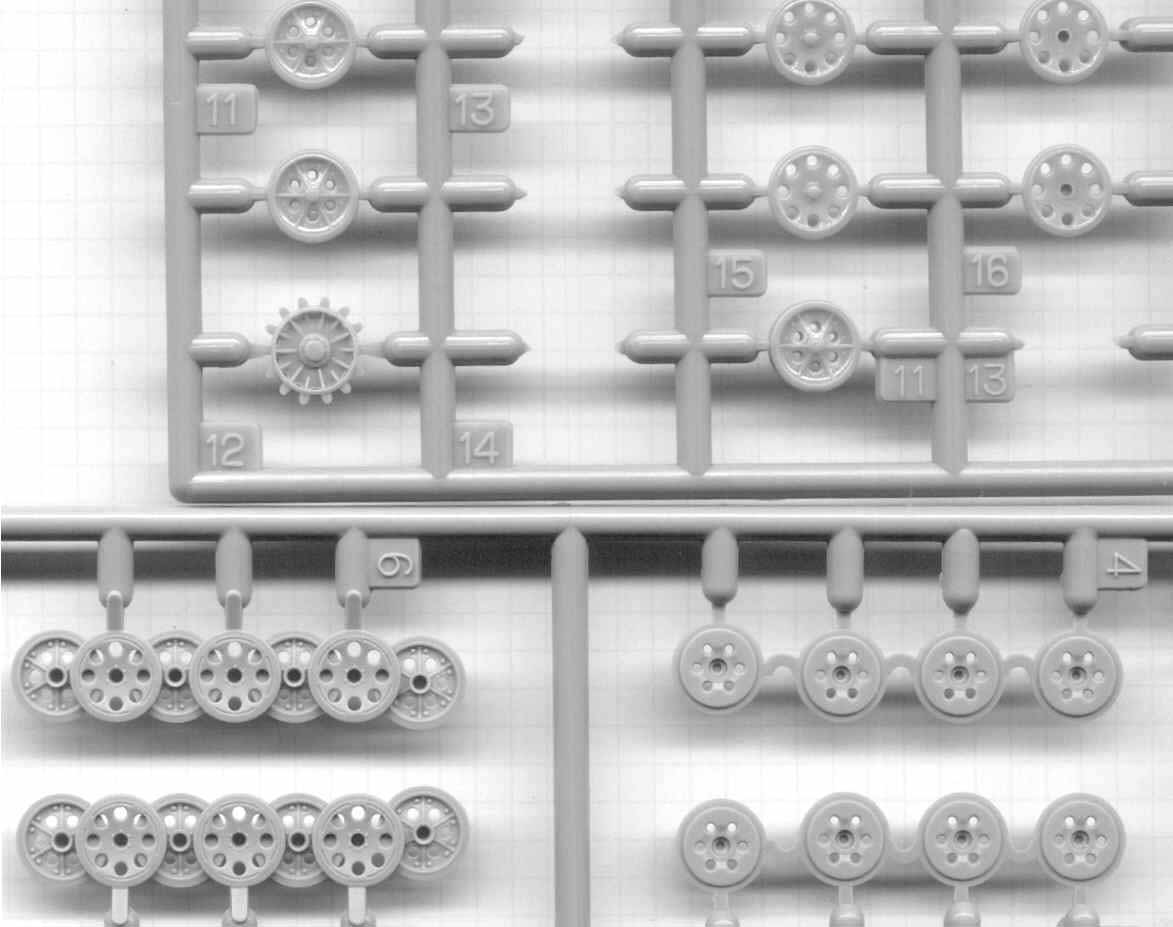
At the top are Hasegawa’s wheels with the two-piece sprocket [part D12 & D14] (parts D14 have in this case been already cut off). The Sd.Kfz.251 had four rows of interleaved roadwheels. Note how the center wheels [parts 11 & 13 on the Hasegawa sprue, and parts 4 & 5 on the DML sprue] have six holes and spokes. The very inner and outer wheels [parts 15 & 16 etc. on the Hasegawa sprue and parts 6 on the DML sprue] have eight holes. Both DML and Dragon got their wheels correct.

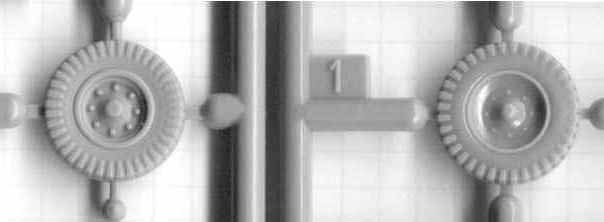
At right is Dragon’s front wheel, common to all their 251 kits. Hasegawa’s wheel has smaller bolt detail but larger tire tread. Both, I feel, are reasonable reproductions.


This scan shows the front axle and spring suspension, Dragon at left and Hasegawa’s at right. At right center is Dragon’s steering linkage part B22 that’s not included in the Esci or Hasegawa kits.


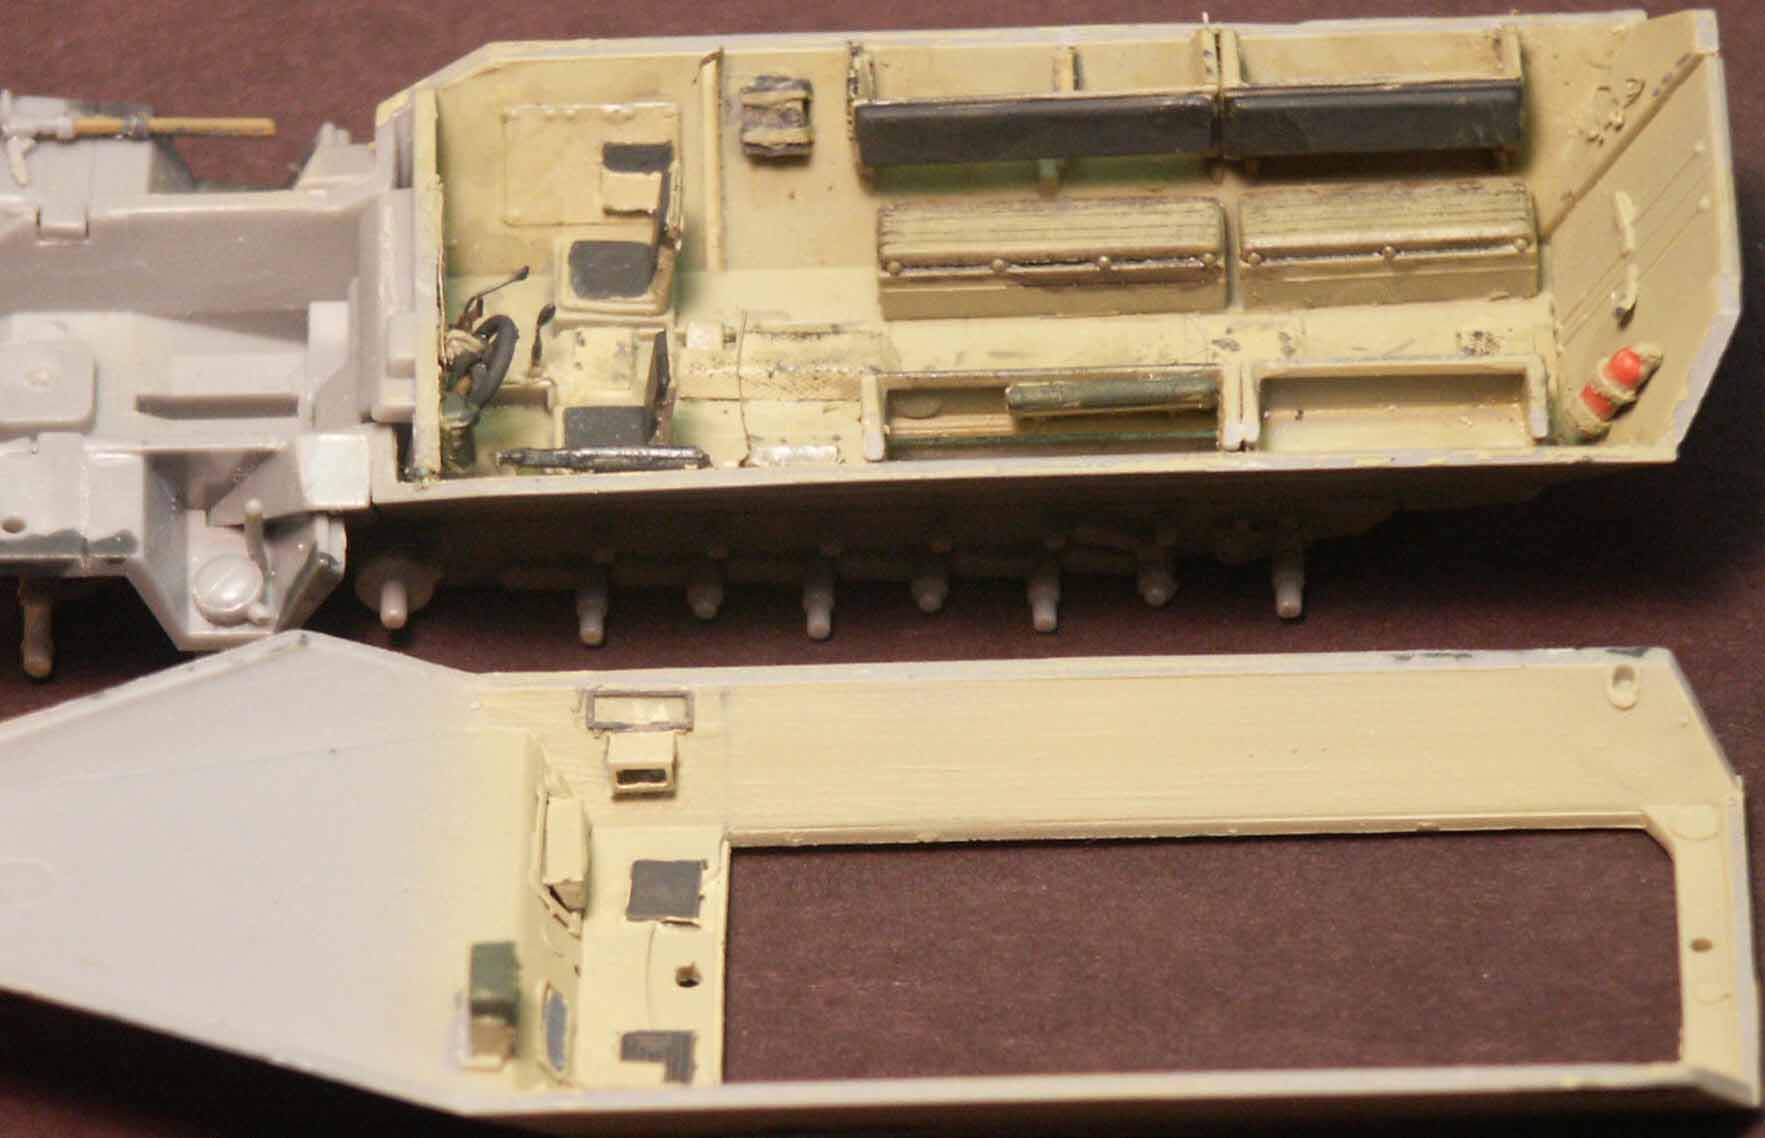
V. The Interior

a) Hasegawa

Here is a view of Hasegawa’s interior dressed up with a few PART brass pieces and spare parts from Dragon’s 251 kits. Evident is some brass floor plates to add some extra texture to the deck. PART actually offers a complete new etched brass floor with nice tread texture in their 251 upgrade
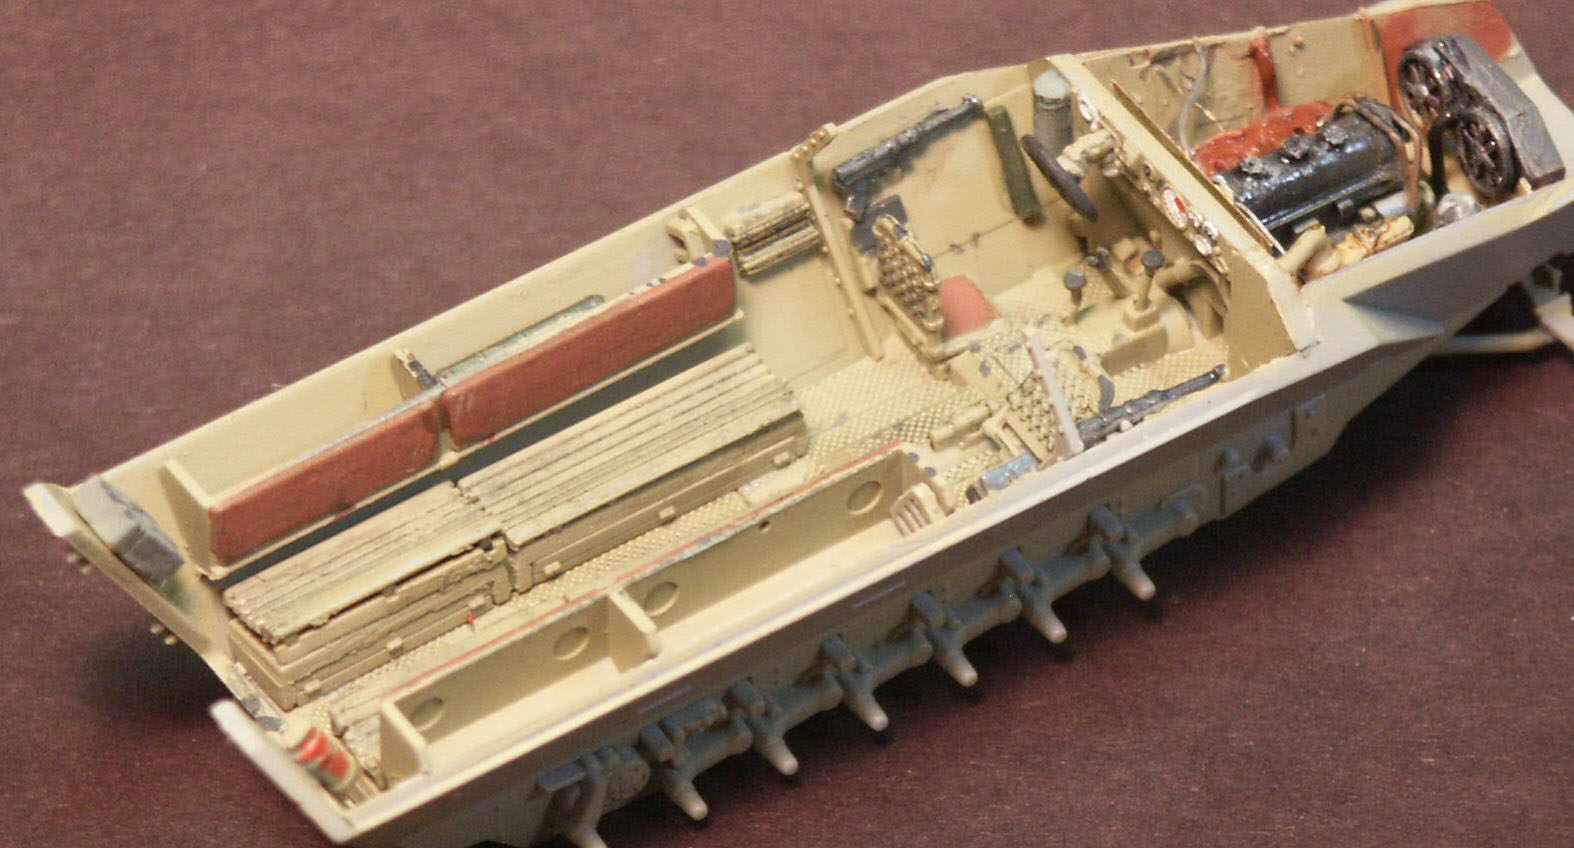
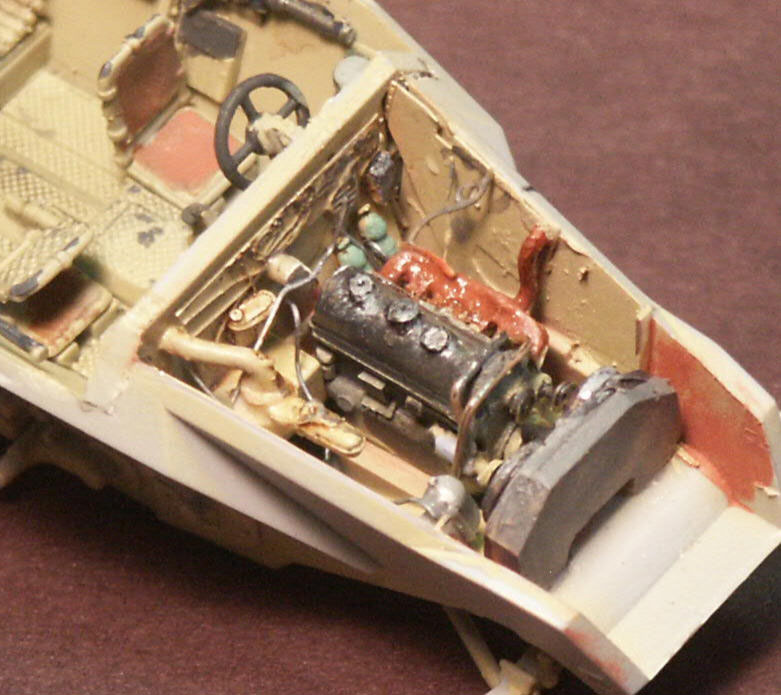
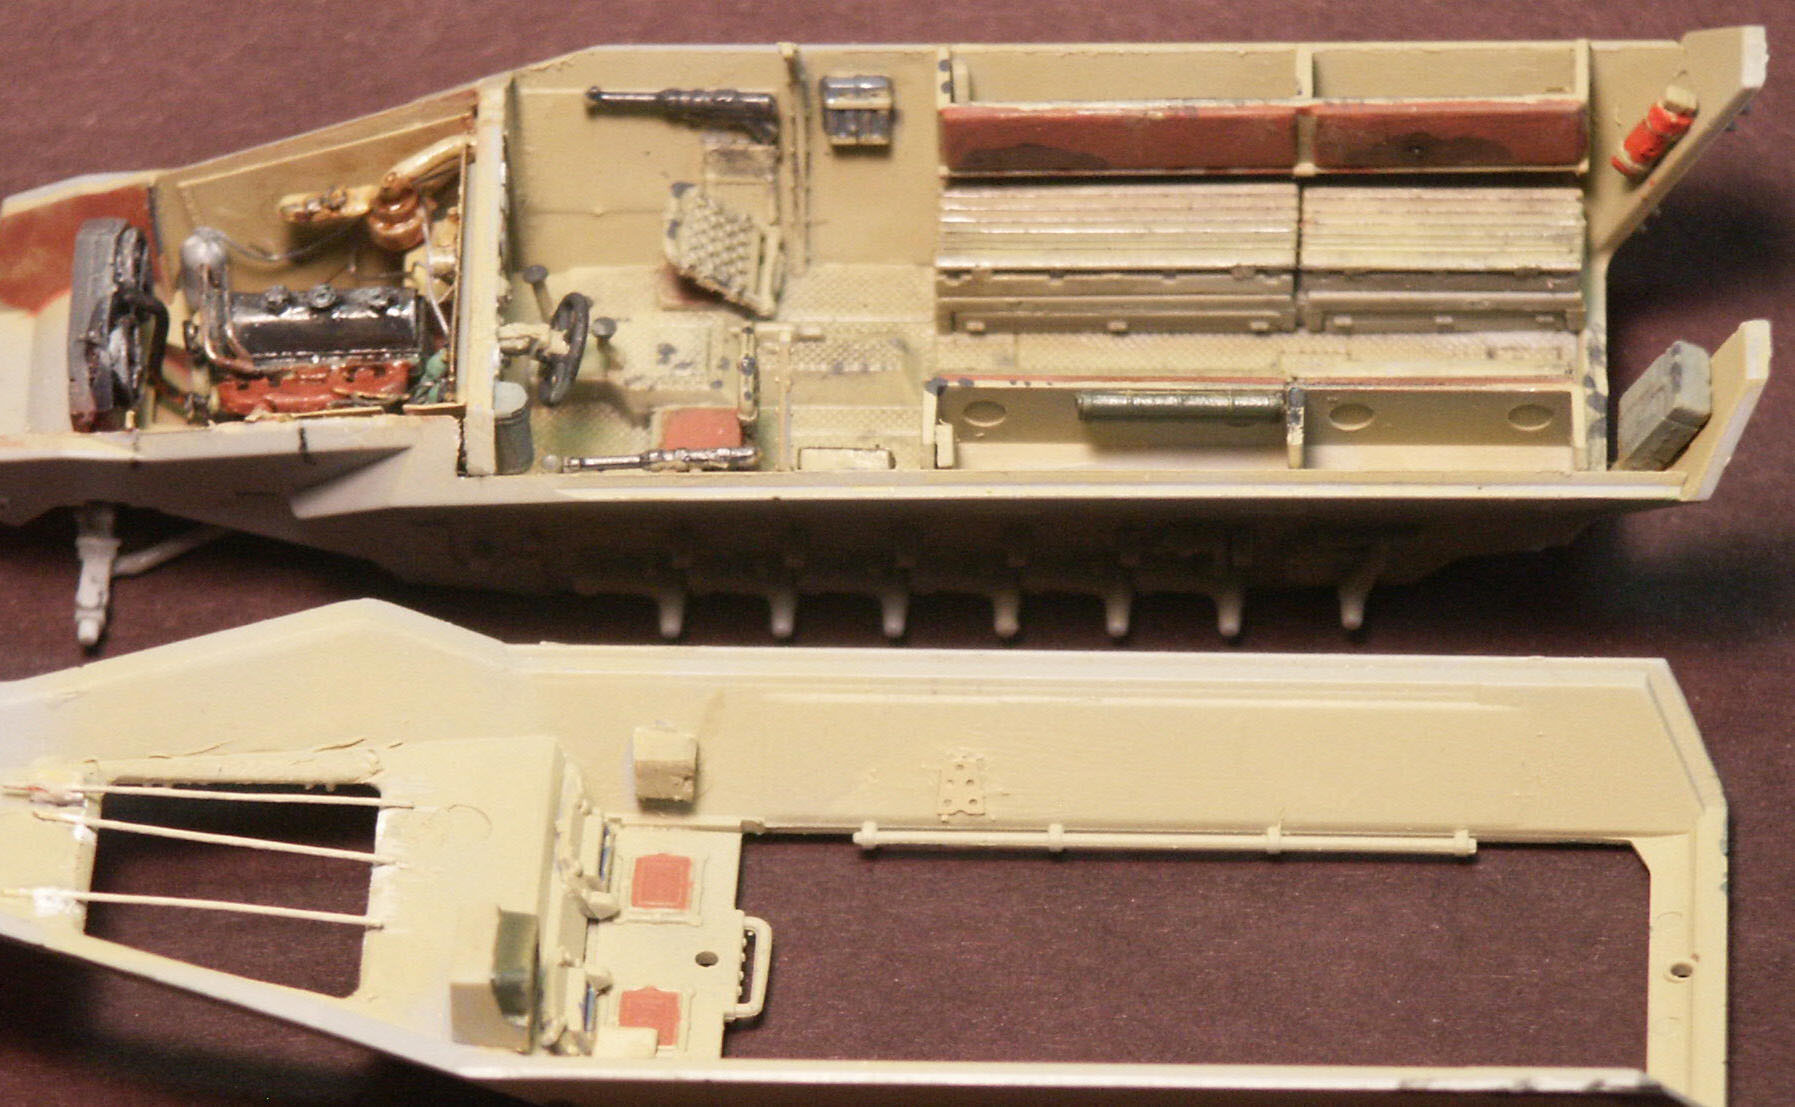
 frets for the Hasegawa kits.
The earlier Ausf. C version of the 251 halftrack had leather-covered cushioned seats. With the simplification of the design and production with the Ausf. D, the rear back seats were changed to wood slats with an s-shape profile. The slatted seat was hinged at the back and could be raised in the front for travel and lowered so the sitting soldiers had a lower profile. I prefer the bench seats in the DML kit. The design of DML’s seats [parts C10 & C11] allows the seat to be in the lifted or lowered positions.
As Dave Showell put it in his construction article, Hasegawa’s bench seats [parts D6 & D7] look like a cross between the thick padded seats but with a slat-like texture and without the S-shape side profile. [See the below photos & http://www.onthewaymodels.com/reviews/DShowellSdKfz251R-35rev.htm .]


Hasegawa’s interior left side following painting and a little weathering. The fire extinguisher at the left was painted red since inside the vehicle it would not normally be seen. I’ve seen more than one discussion as to the color of a panzer’s fire extinguishers. It’s generally accepted that extinguishers outside the vehicle were the color of the vehicle exterior. The Sd.Kfz.251 Ausf.D bench seats were wood slats that are commonly displayed in natural unpainted wood color but photos and common sense say the seats were the same Dunkelgelb color as the interior. The backrests and driver seats were done as black leather or leatherette. Hasegawa gives us a simplified driver’s area so items like the shift and brake levers had to be added.

b) Dragon

Dragon’s lower hull left-side interior built out of the box [except for the engine compartment]. The engine is from Extratech (set EXK72020).

Dragon’s interior has more parts and more accurate details. Here we see the wooden bench seats in the rear, crew MP40 submachineguns, the upper hull fittings with handrails, and the ExtraTech engine in the front. The bench seats correctly match the references and can be set in raised or lowered position. The spring texture on the back of the driver’s seats, for example, is beautiful. The padded backrests are done as brown leather. There are big ejector pin marks on the inside of the bins (backrests) that cannot be seen after the upper superstructure [part A6] is glued on. DML includes the important flanges [parts C9] present on the interior where the driver’s area bolts to the rear crew compartment.

This view is of Hasegawa’s lower right side of the hull with the underside of the upper hull. On the upper hull we can see the vehicle radio and interior sides of the visors, made from etched brass in this case. Most of the driver’s area features are not visible once the two hull sections are assembled.


As seen in the picture above, Dragon’s interior has more details.


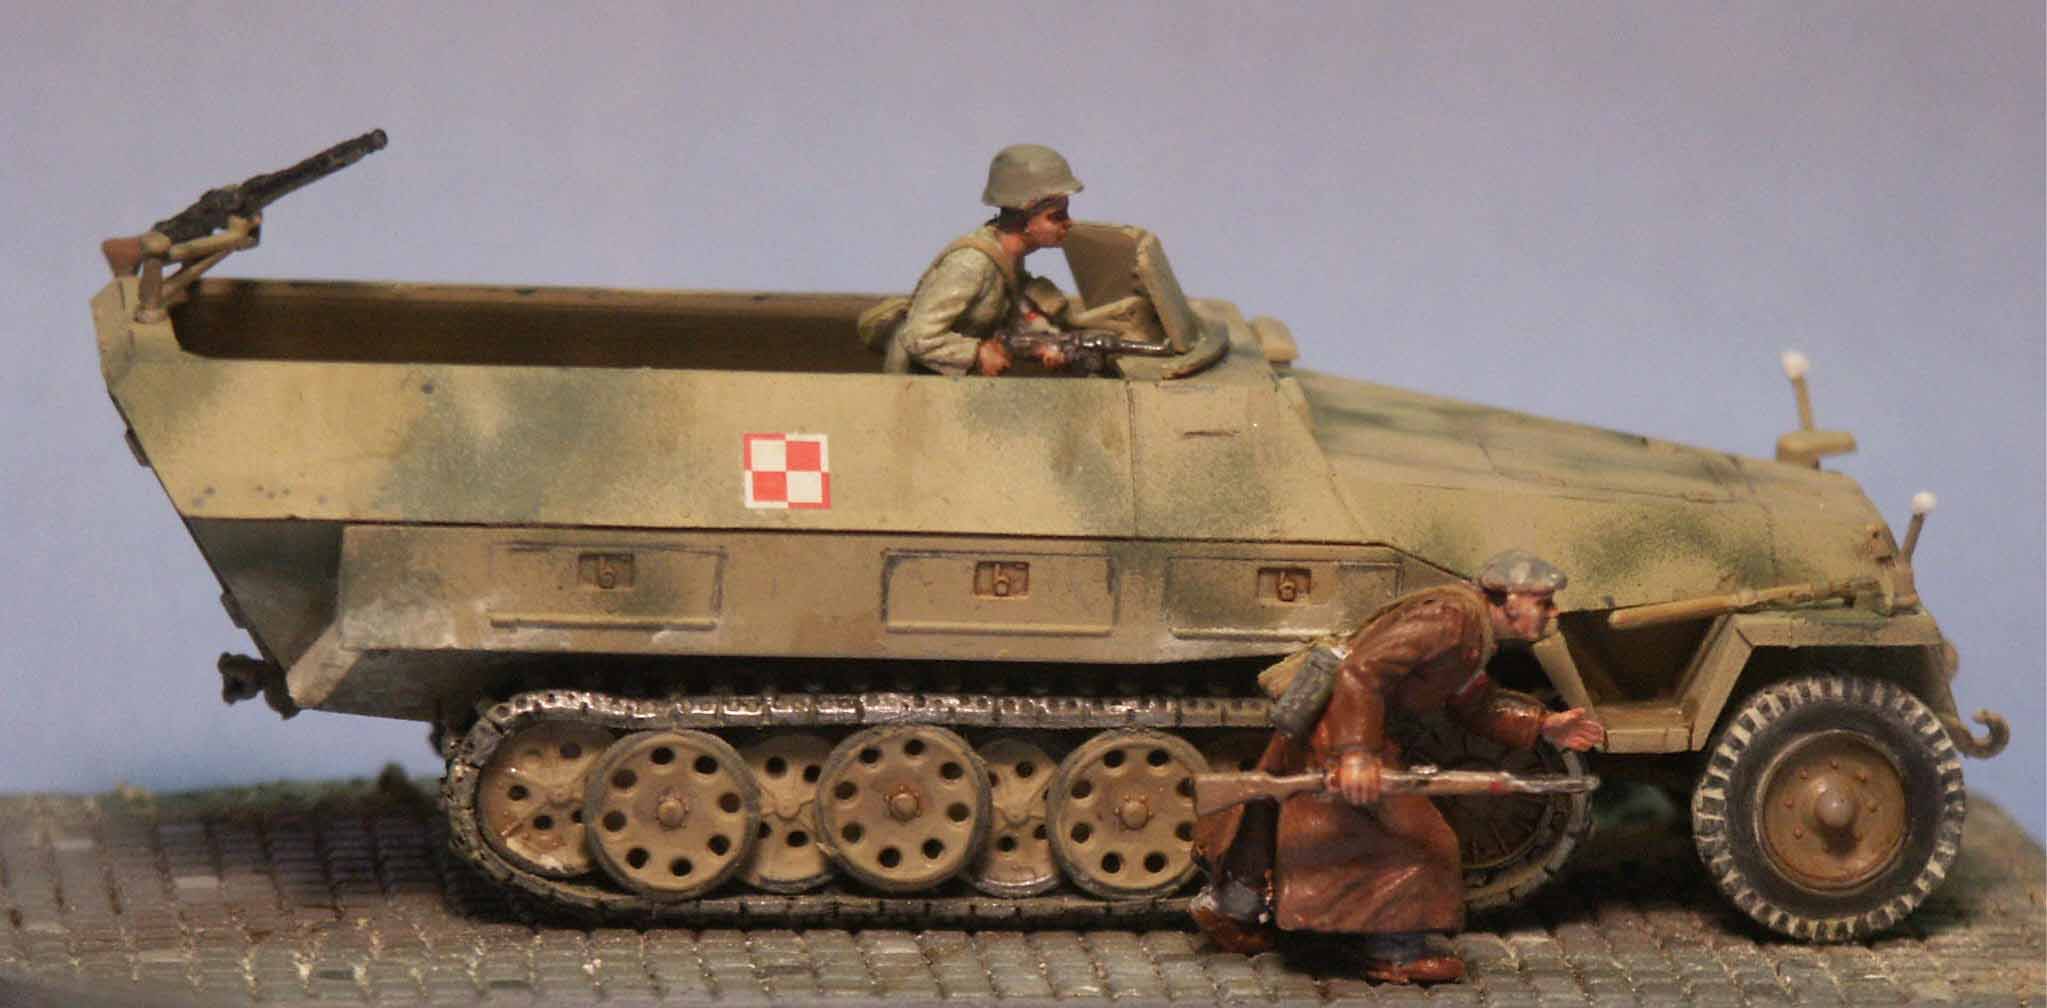
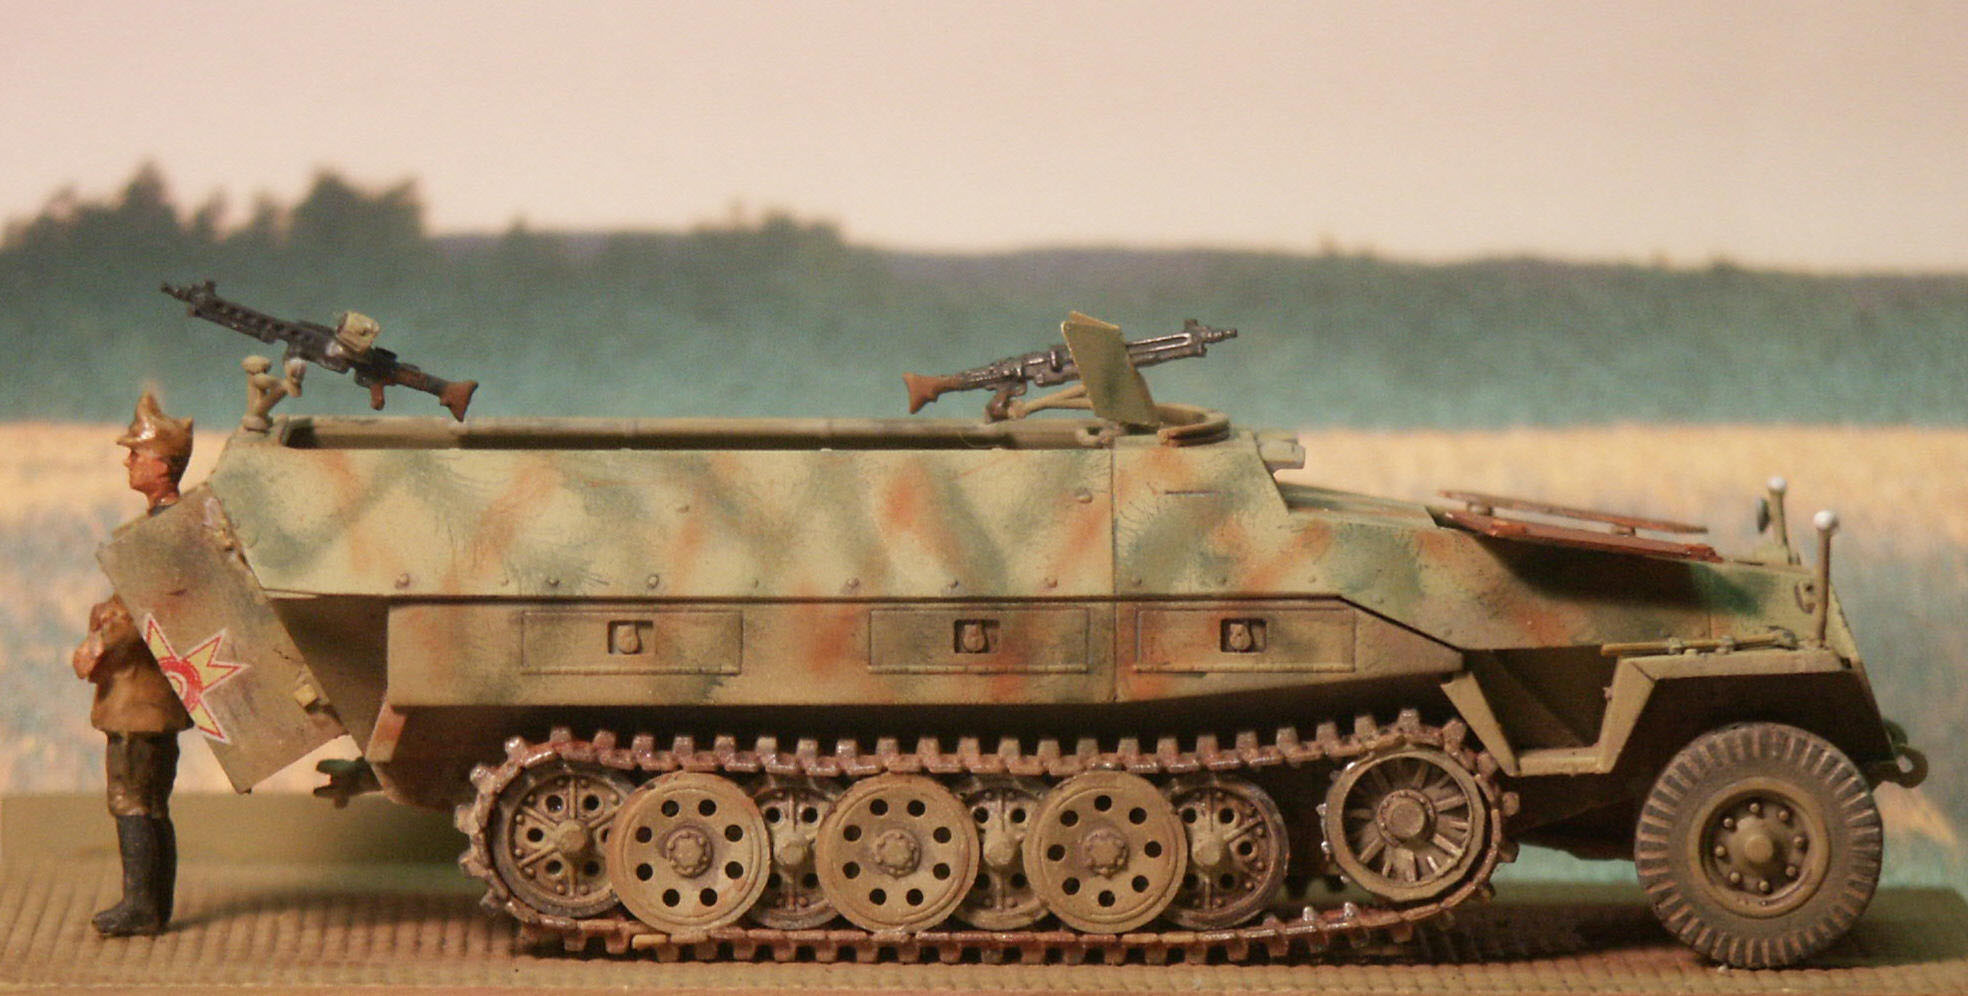
VI. Painting & Markings

DML offers full color three view drawings for all their depicted vehicles, which is great. Many diagrams are of vehicles that appear based on single, rare black & white photos, so I would take the accuracy of the scheme and markings with skepticism. For example, many WW2 era vehicle photos show only two oblique sides at best, so knowing the markings and colors on all four sides is artist’s license. You do the best you can do, and who can prove you wrong?

Except for Hasegawa’s color box art, their color & markings instructions are in black and white and are adequate. If you use Dragon’s color chart take note that they describe the base vehicle color H66/19 as RLM Sand Gelb 79 (a Luftwaffe color). From all my references I understand this should be Dunkelgelb nach Muster (later numbered RAL 7028) which is also a tan color. Dunkelgelb was used from February of 1943 till the war’s end in 1945. Sand Gelb RLM 79 was a darker and more tan color used in North Africa and the Sd.Kfz.251 Ausf.D was never used in Africa.

As for the vehicle interior; prior to the February 1943 change, the interior of the Sd.Kfz.251 as well as the Sd.Kfz.250, was painted off-white in the forward driver’s area, and the exterior gray color aft of the flange holding the front to the rear. After the switch to Dunkelgelb [dark yellow] the driver’s area was the same panzer yellow as the rest of the vehicle.


In the above Painting & Markings guide note the smaller blue decal sheet for the halftrack license plates. Note that rather than ready made license plates for each suggested vehicle, they give us blank white plates and then separate numbers and letters. Good luck getting the numbers on straight!


Hasegawa’s Sd.Kfz.251 Ausf.D finished in DML’s decals for the halftrack ‘Starowka’ captured in 1944 by the Polish Home Army. Though DML portrays the green camouflage as hard edge, period photos from the Warsaw uprising in 1944 show it to be a hastily applied soft edge pattern. One thing evident here that I do not like is the front visors are recessed into the front plate [part B5]. DML’s visors are more accurately portrayed.


Right side of the Hasegawa model.


DML’s Sd.Kfz.251 in Romanian markings of 1944 while Romania was still allied with Germany. The decals are from Aleran Miniatures, set AX-1 Axis Minors - Hungarian, Rumanian.
The figure is from a set #7625 from EXO KIT, now sold as Retrokit FR, # R72822. The set contains an officer, sergeant and soldier in resin, with separate limbs, heads and weapons.

Picture above: DML’s 251D with scratchbuilt open engine doors of thinner plastic.


VII. Conclusions

Both the Hasegawa and the DML kits build into satisfactory 1/72 scale Sd.Kfz.251 models. DML gives us more and more delicately molded parts; generally speaking this should make a better display model. A wargamer though may prefer the Hasegawa kit for its simplicity and quicker assembly.


VIII. References

[1] PANZER TRACTS No 15-3 mittlerer Schuetzenpanzerwagen Ausf. C & D, By Thomas Jentz & Hilary Doyle. A superb softcover on the production, variants, organization and employment history of the Sd.Kfz.251 from 1943 to 1945, with scale drawings and sharp black & white photos. The Panzer Tracts books are probably the most accurate English language source for information on German WW2 vehicles. Highly recommended for the modeler and historian.

[2] PANZER TRACTS No 15-2 mittlerer Schuetzenpanzerwagen Ausf. A to C, 1939 to 1942 , by Thomas Jentz & Hilary Doyle. This is a companion book to Panzer Tracts No. 15-3, and both books expand on and have replaced Panzer Tracts No. 15.

[3] Hanomag Sd.Kfz 251 website http://www.geocities.com/MotorCity/Pit/3515/251/index.htm (currently off-line). The excellent website dedicated to the Sd.Kfz.251 halftrack, by Piet van Hees. [According to Jentz & Doyle, ‘Hanomag’ was never an official or slang term for the 251, but apparently is a post war term based on one of the many manufacturers of this vehicle.]

[4] Sd.Kfz 251 In Action, Squadron/Signal Armor No. 21, by Charles Kliment & Don Greer (1981). An old book with some old disproved information, but inexpensive and containing great photos, color plates and sketches. Very recommended.

[5] SCHUTZENPANZERWAGEN War Horse of the Panzer Grenadiers, by Horst Scheibert (1992), Schiffer Military History. An inexpensive softcover with period photos and coverage of the Sd.Kfz.251 and its smaller cousin the Sd.Kfz.250.

Back to Article List Back to Home Page
Article Last Updated: 03 August 2009