| Detailing Dragon's StuG IV | ||||
| Kits 7235 & 7260 | Article
by Stefano
Dell'Acqua
- s(dot)dellacqua(at)brightsolutions(dot)it | |||
| Detailing Dragon's StuG IV | ||||
| Kits 7235 & 7260 | Article
by Stefano
Dell'Acqua
- s(dot)dellacqua(at)brightsolutions(dot)it | |||
| Disclaimer
The finished model should represent
a mid-to-late Stug IV "mit Zimmerit".
The basic hull is dimensionally correct.
I used the late hull with early front- and side plates so that I
had to modify the return roller mounting plates (from three to four),
placing them according to the J-D plans. I did that because I wanted
the late-style suspension stops (which anyway I removed and scratchbuilt
at a later stage- these are oversimplified, rather thick, and misplaced,
so I choose the scratchbuilding approach).
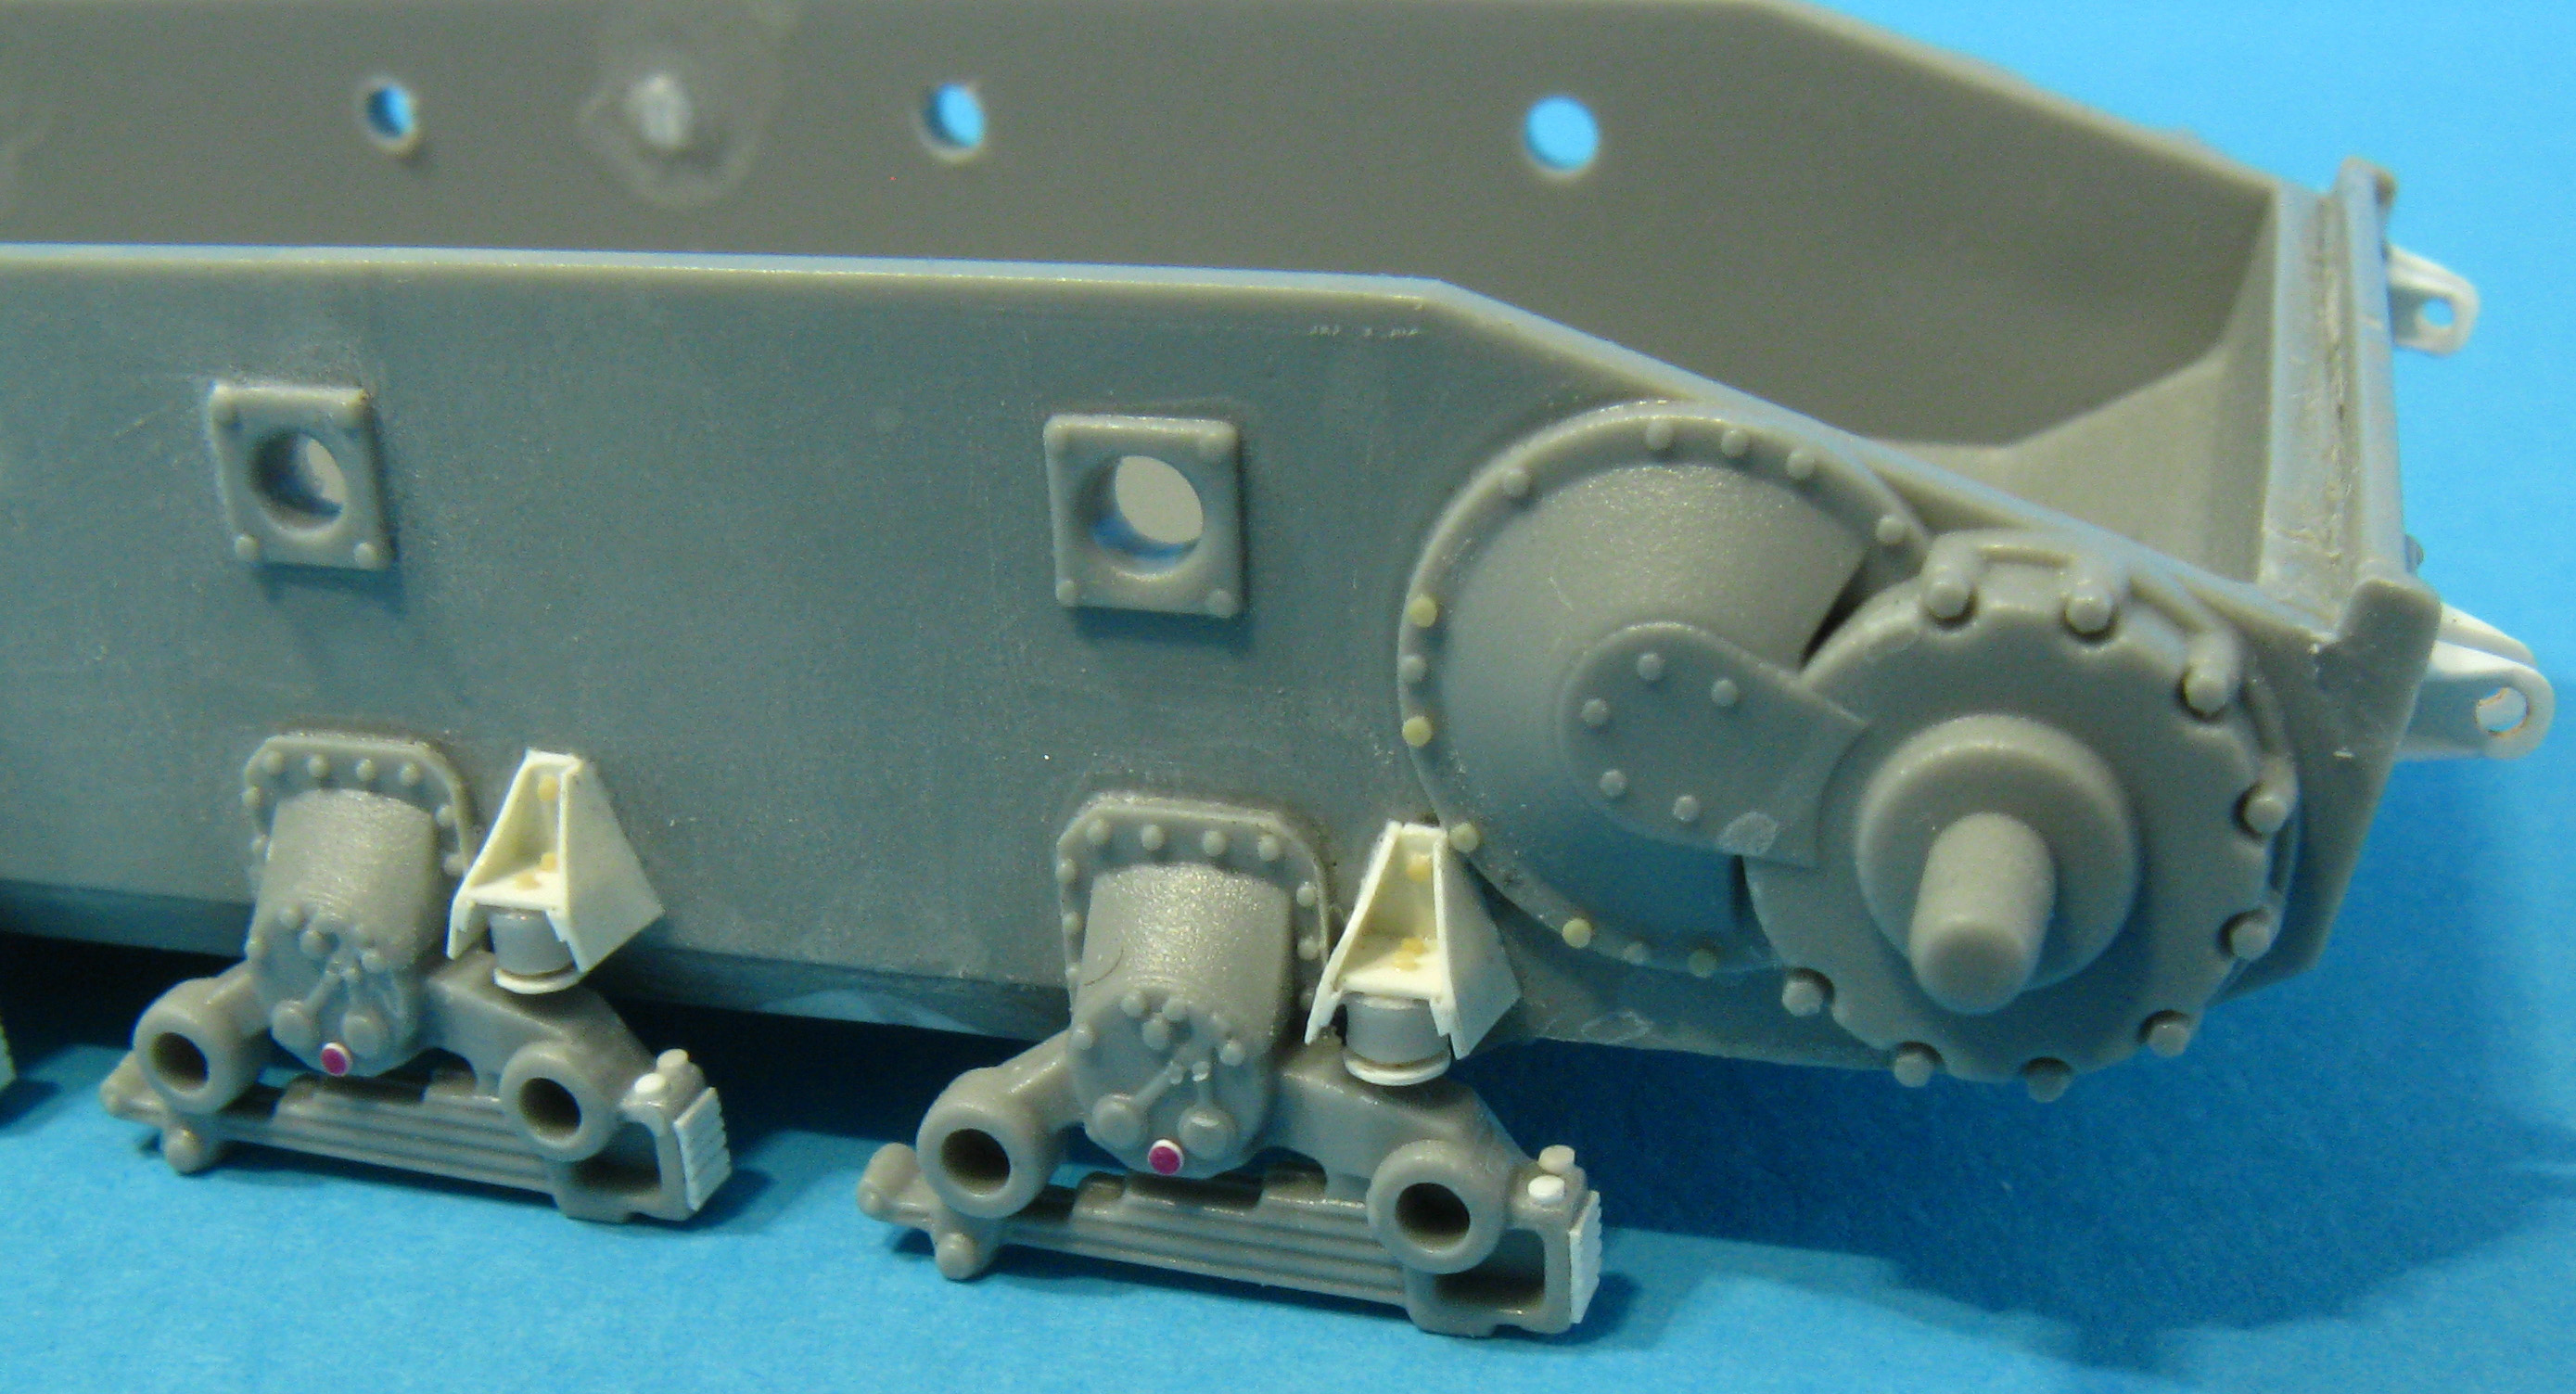
I added some bolts (sliced stretched
styrene) to the transmission cover (some are misplaced in the kit),
and detailed the suspension assemblies with bolts and leaf-spring
ends.
Some more bolt heads were added:
I used both punch-and-die and sliced sprue techniques.
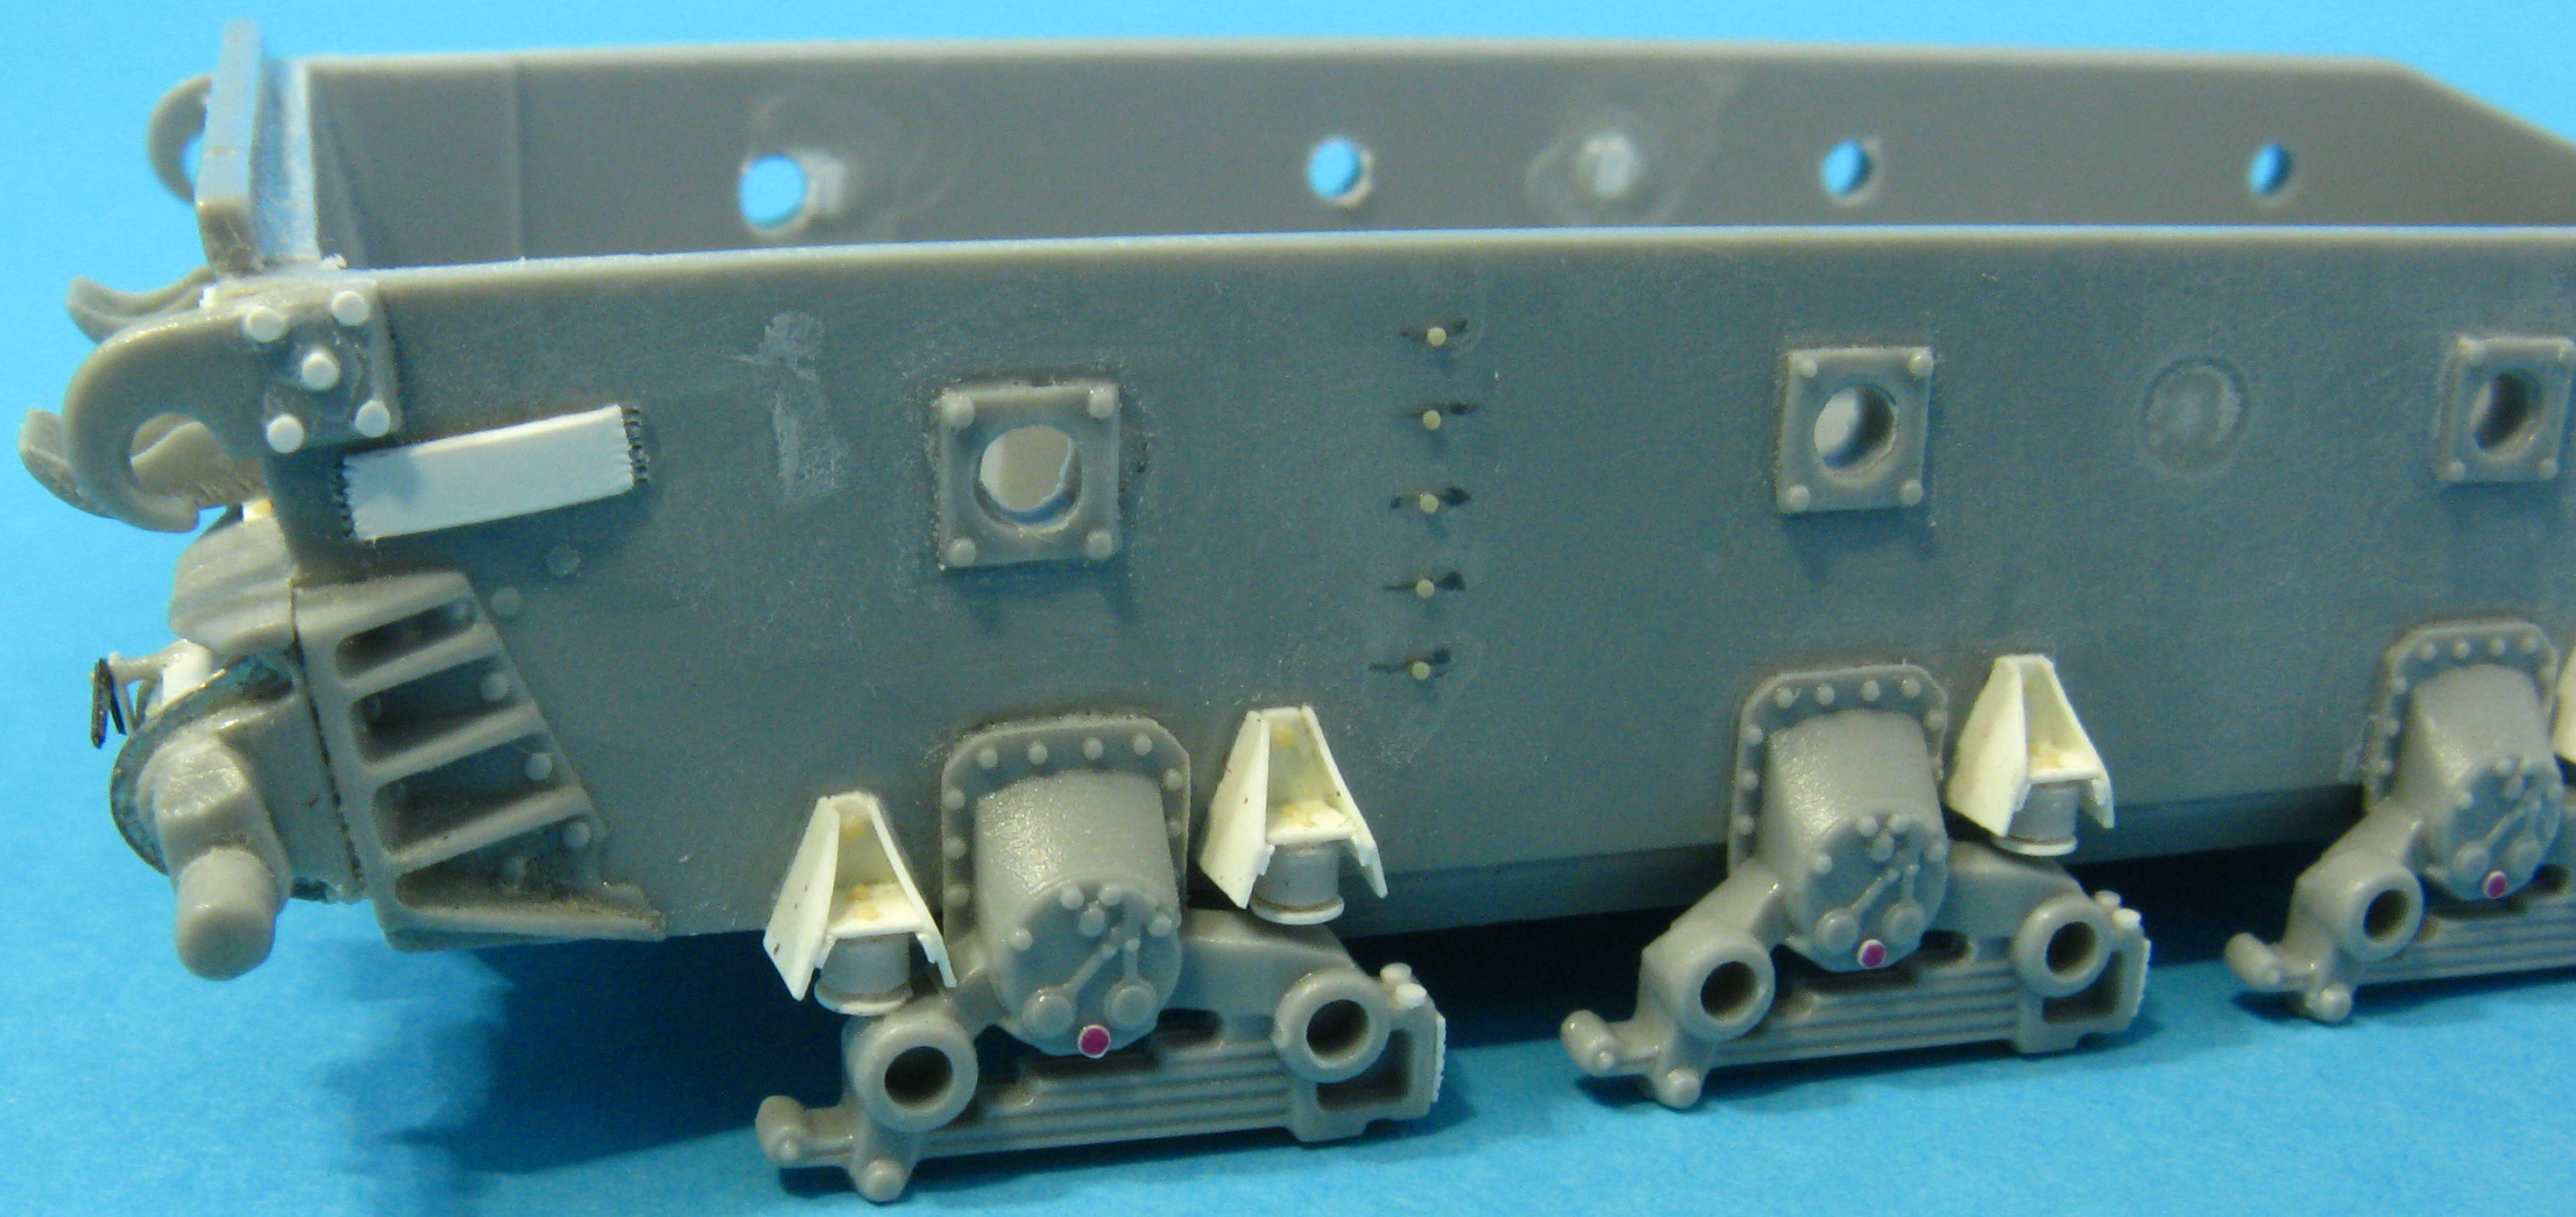
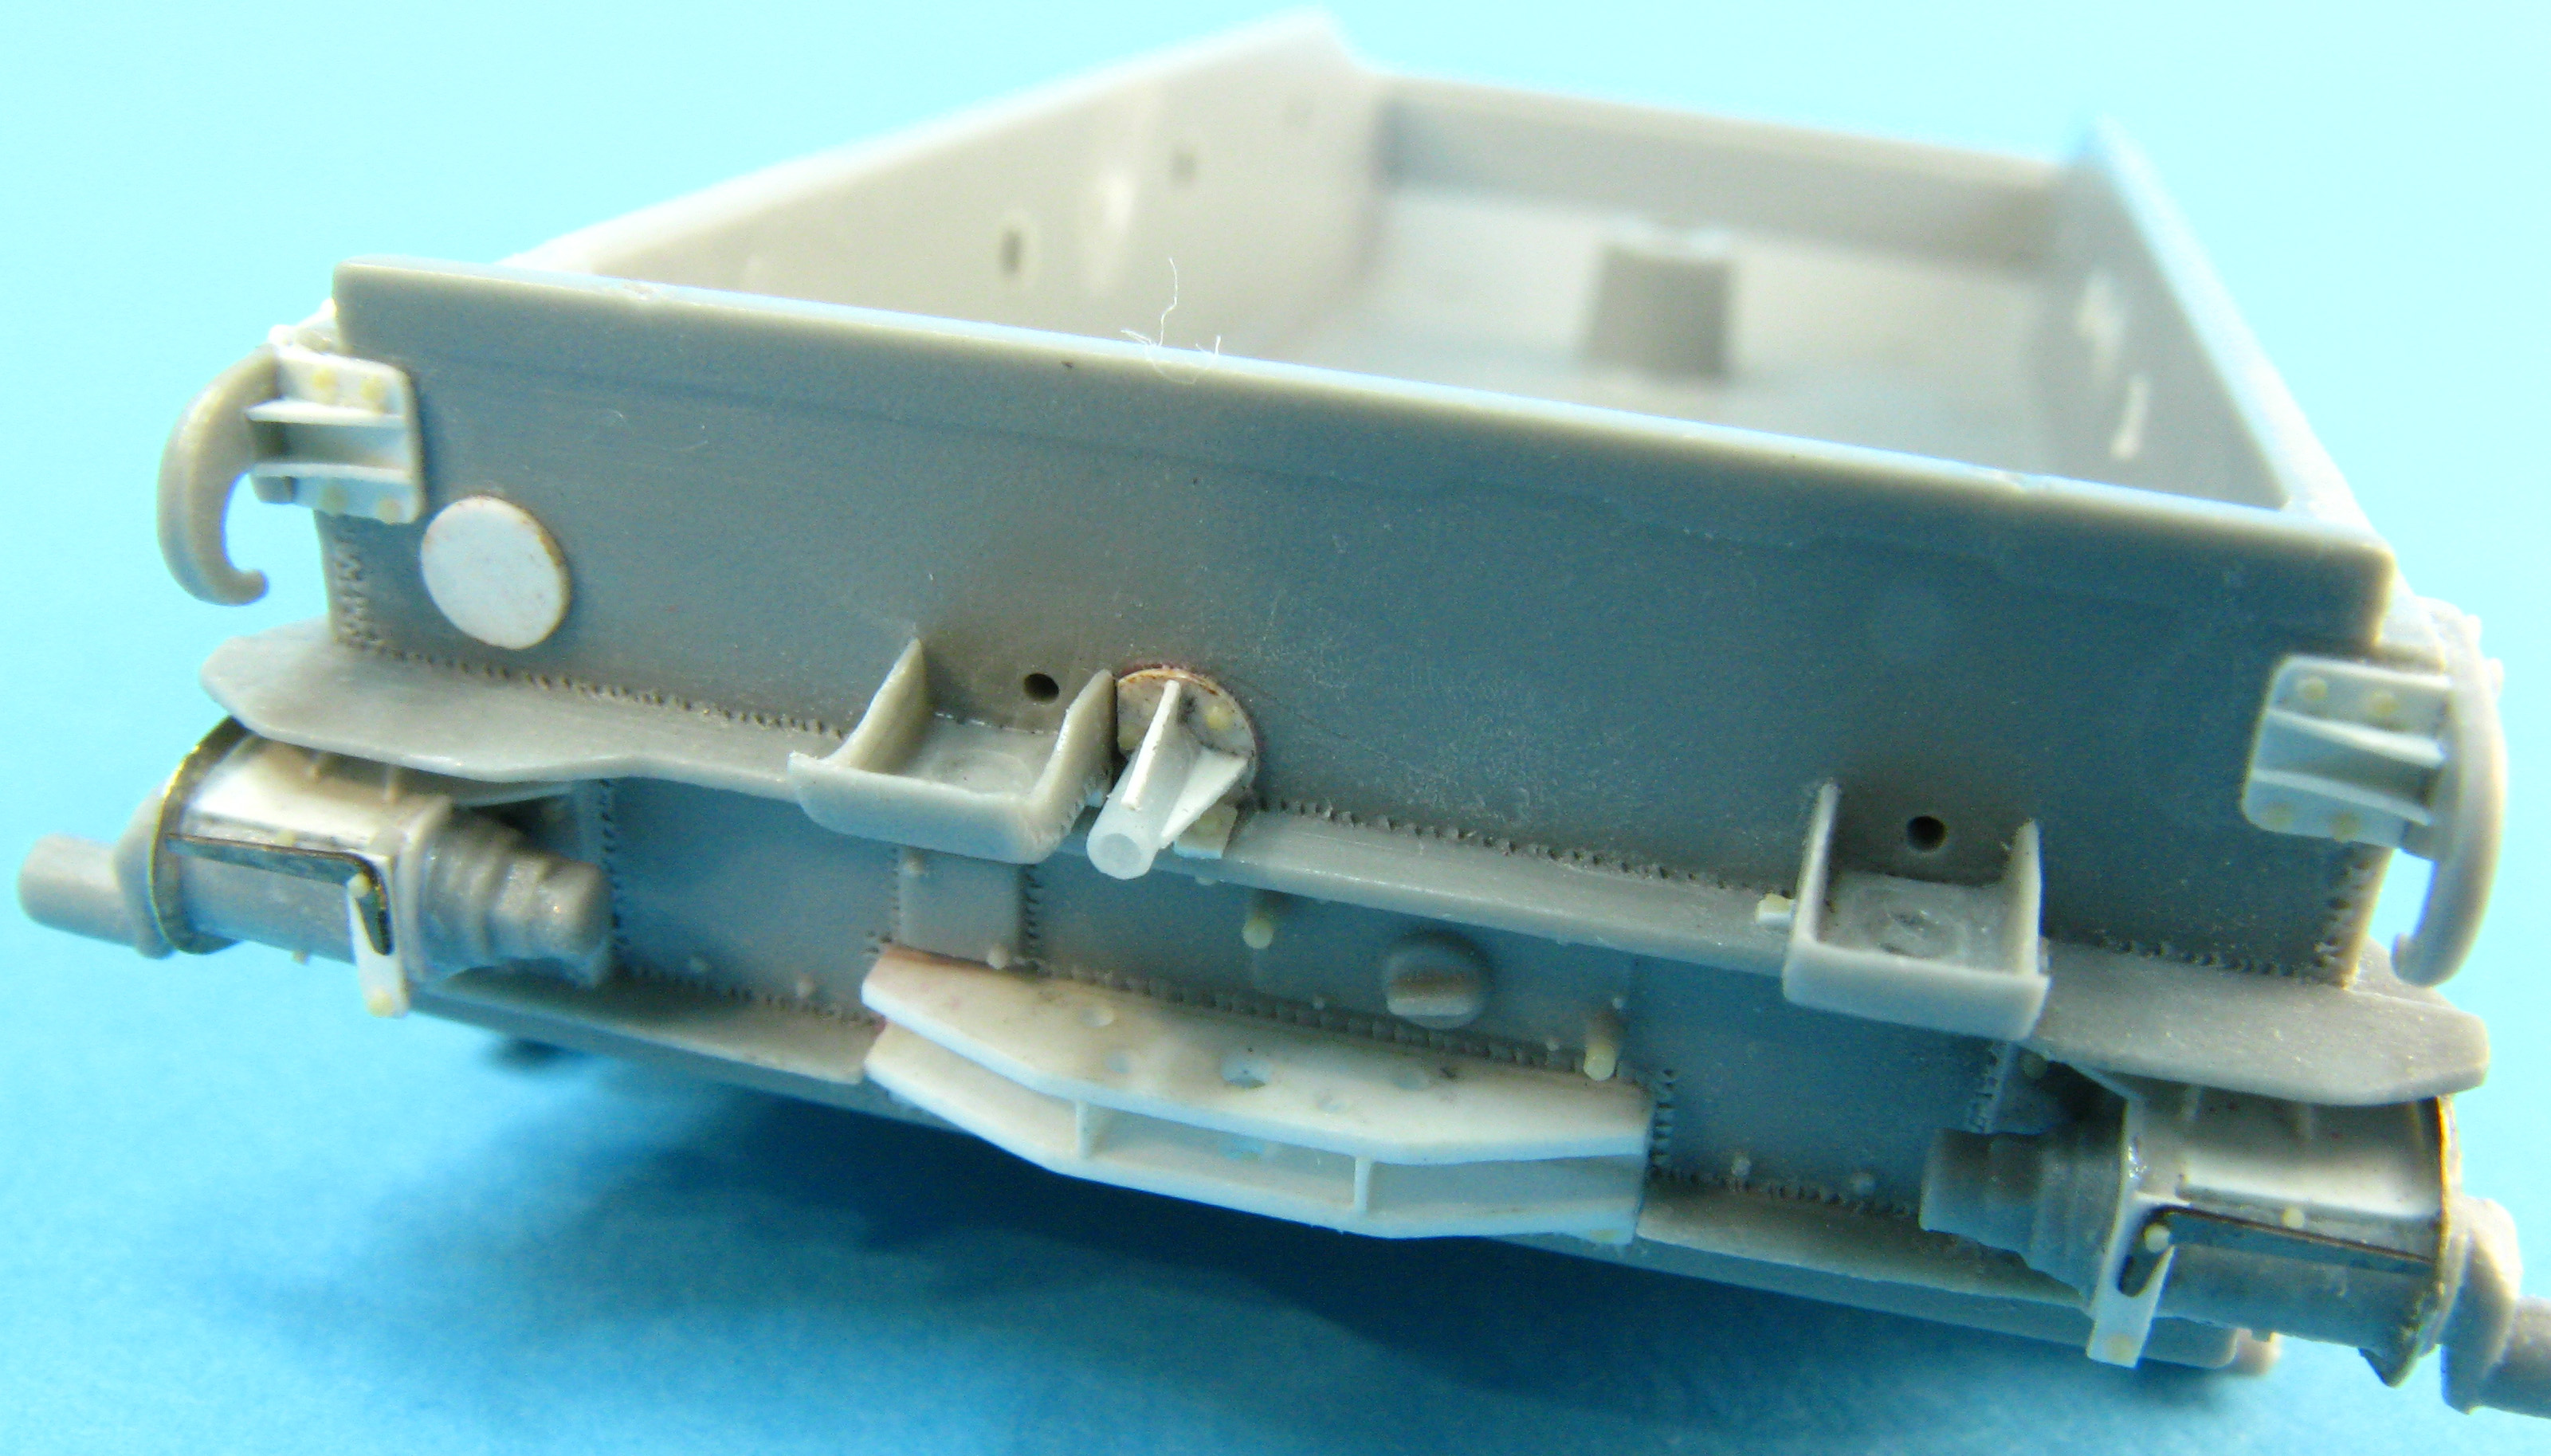
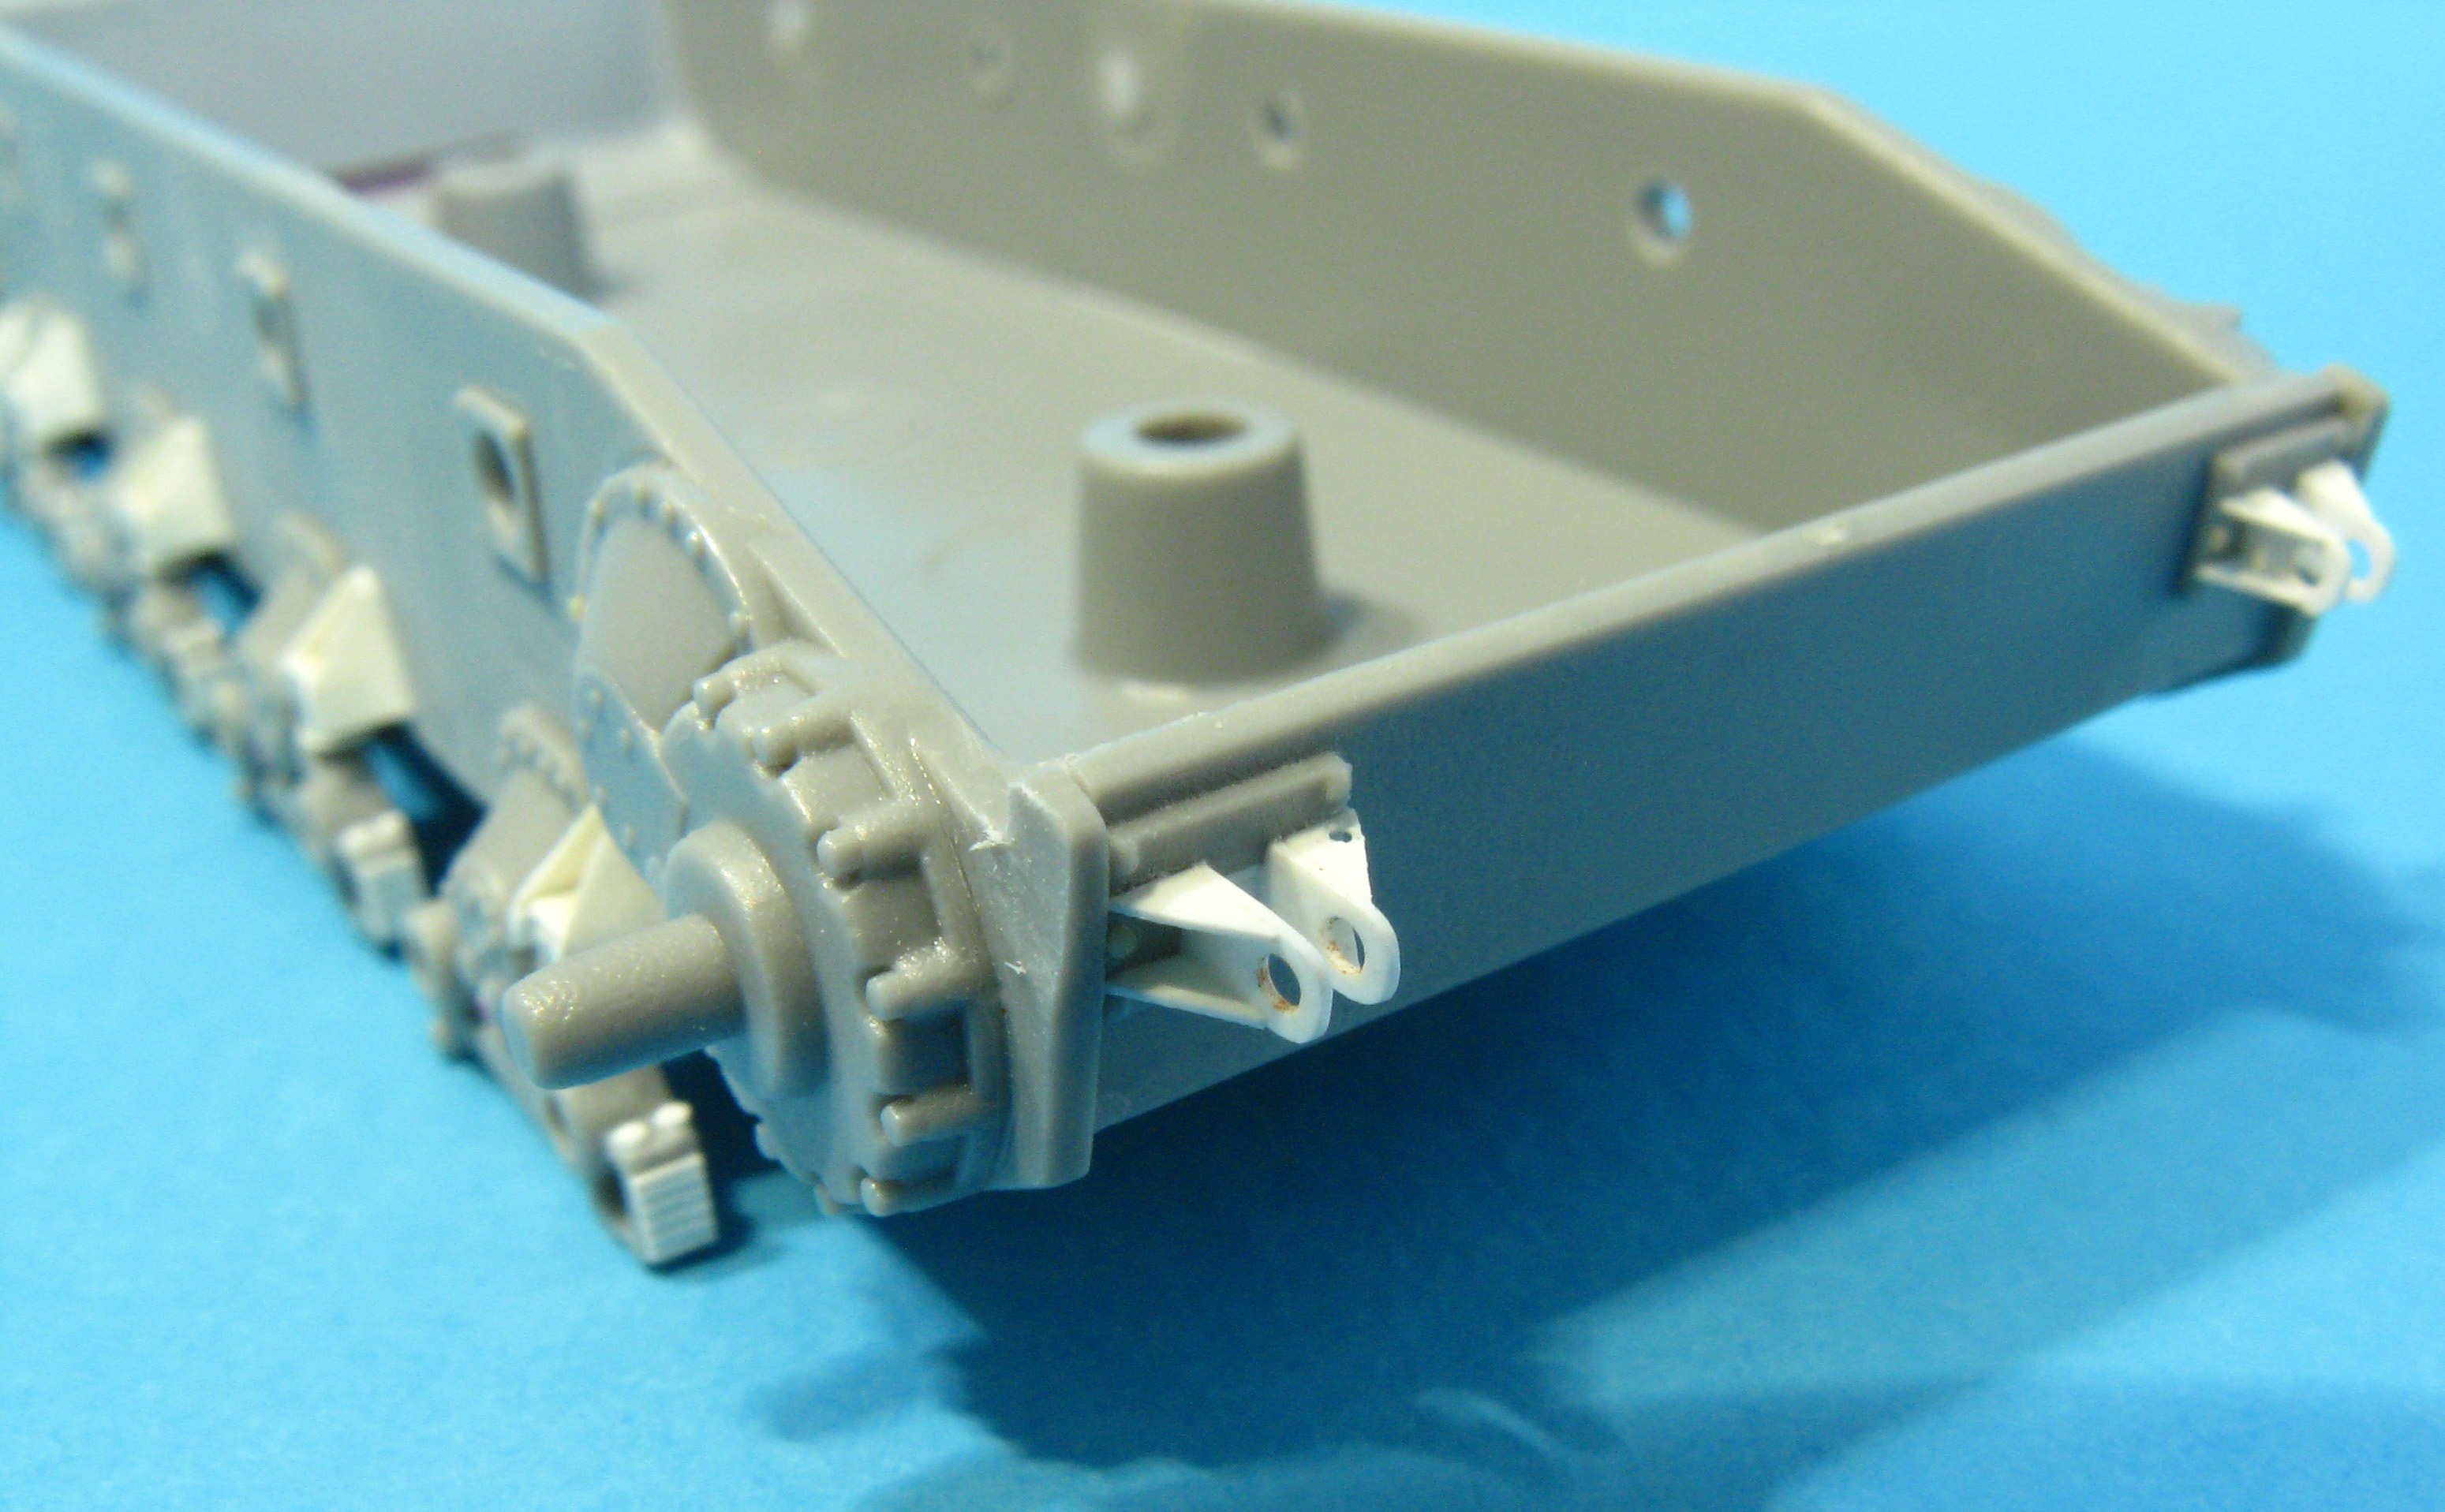
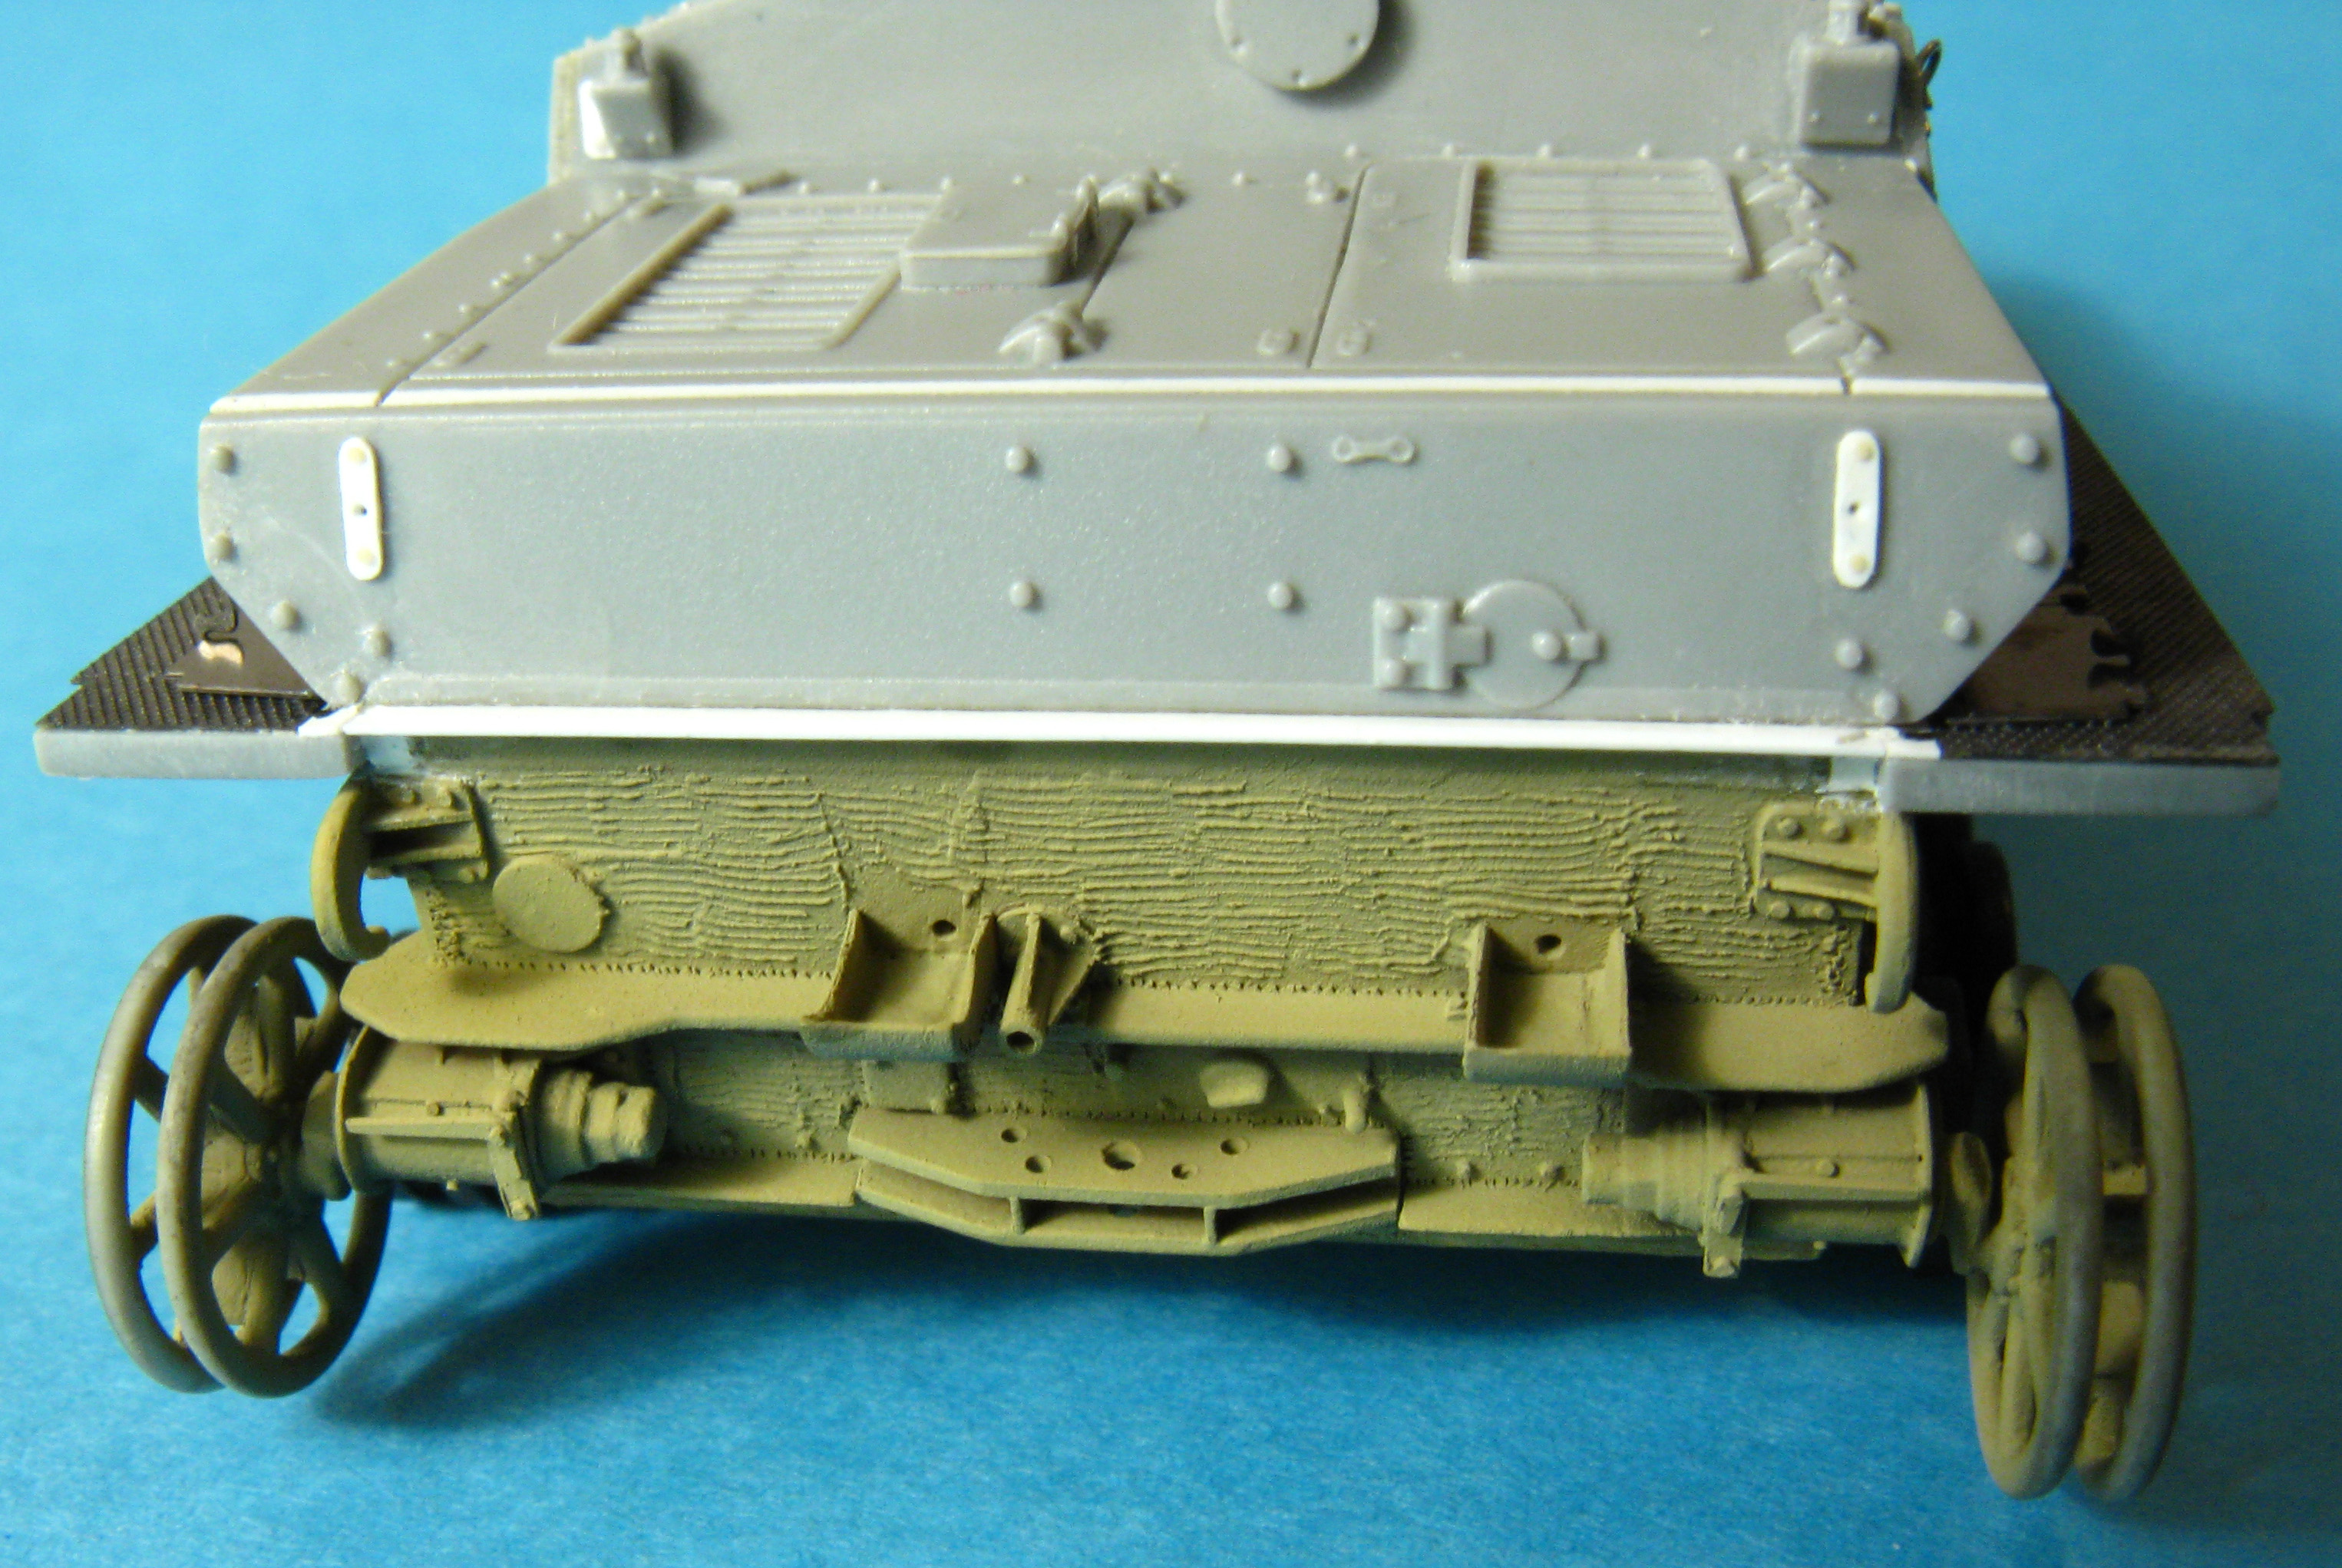
The rear plate is dimensionally correct,
I just thinned the horizontal strakes and substituted the tow hook
assembly. The idler wheel/track tensioning assembly is approximate
and needs some detailing.
I replaced some parts with more accurate, scratchbuilt items. The exhaust positioning holes are misplaced in the kit, I corrected the exhaust positions thanks to the J-D drawings. Weld beads have been added everywhere where needed, etching the plastic with a sharp 10A scalpel tip.
The front armor plate was detailed with new tow rings -a difficult work to get them right- but the end result is convincing to my eye. If you're interested in figures (I'm not usually, but this time I was curious to know) the lower hull has about 320 parts added to the original Dragon pieces. I must point out that the added parts just improve accuracy, as the basic shape is correct and the position of all of the elements is accurate except for the exhausts, suspension stops, and return rollers.
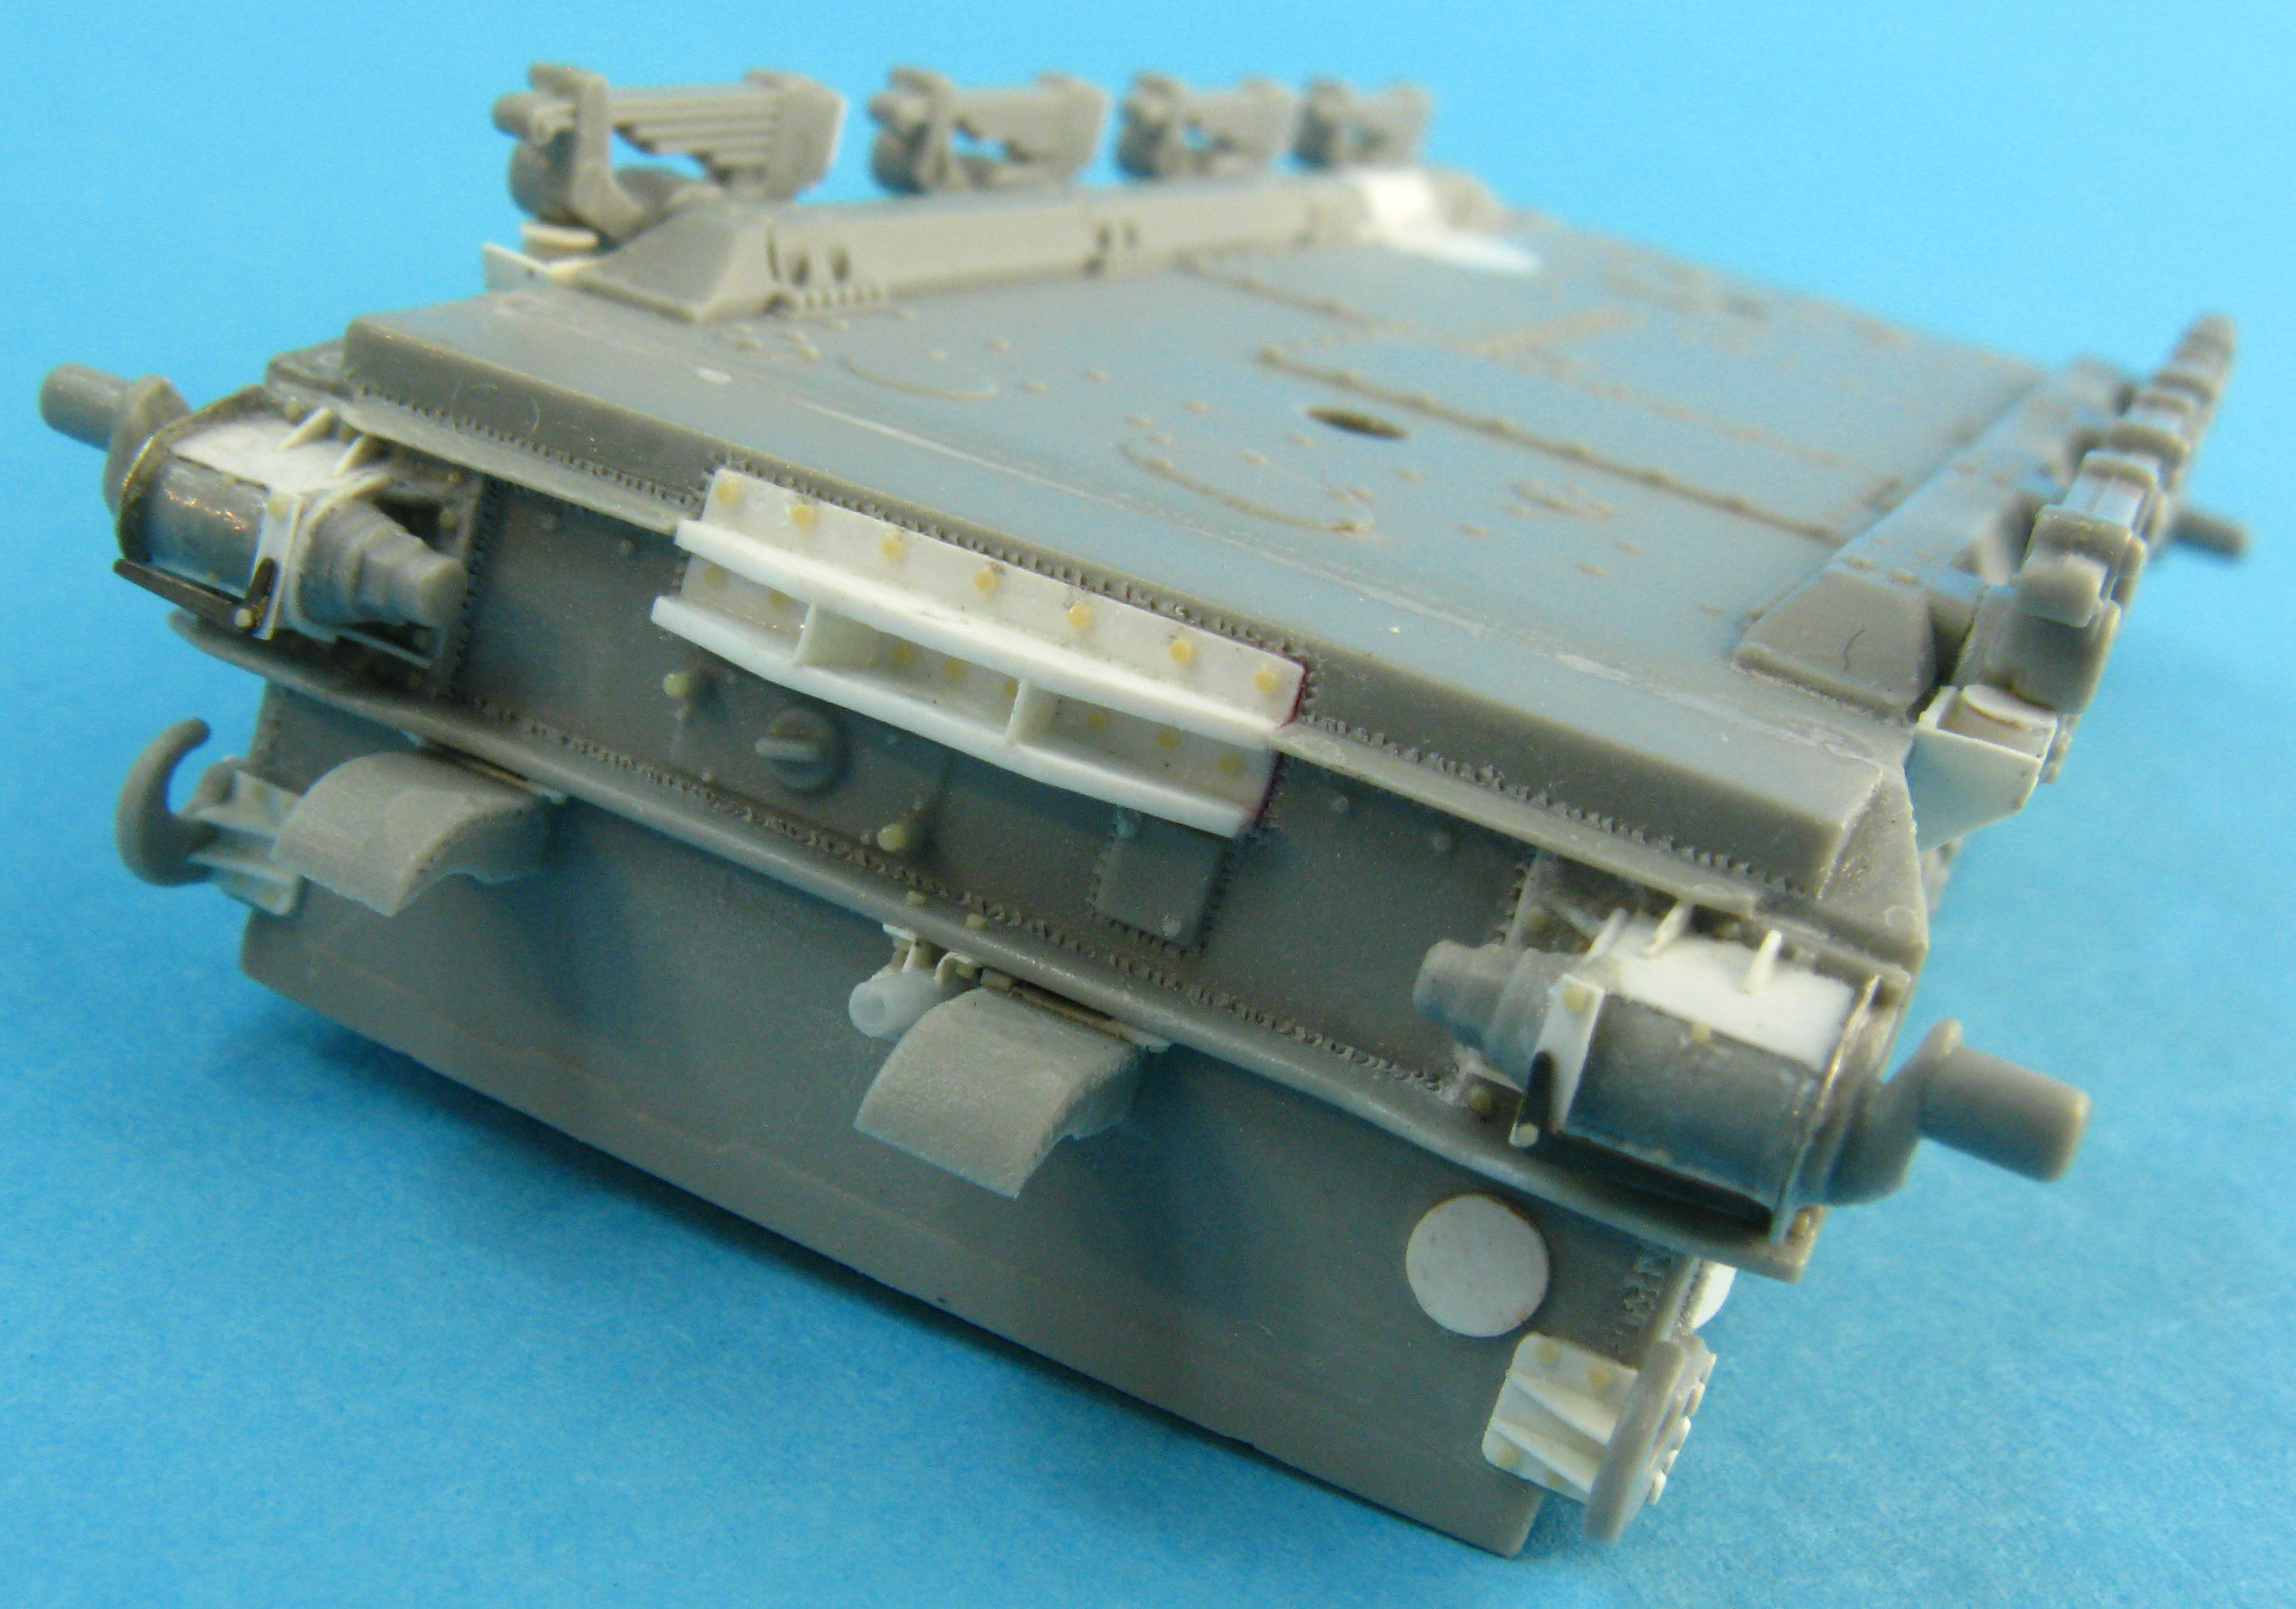
Upper hull/casemate
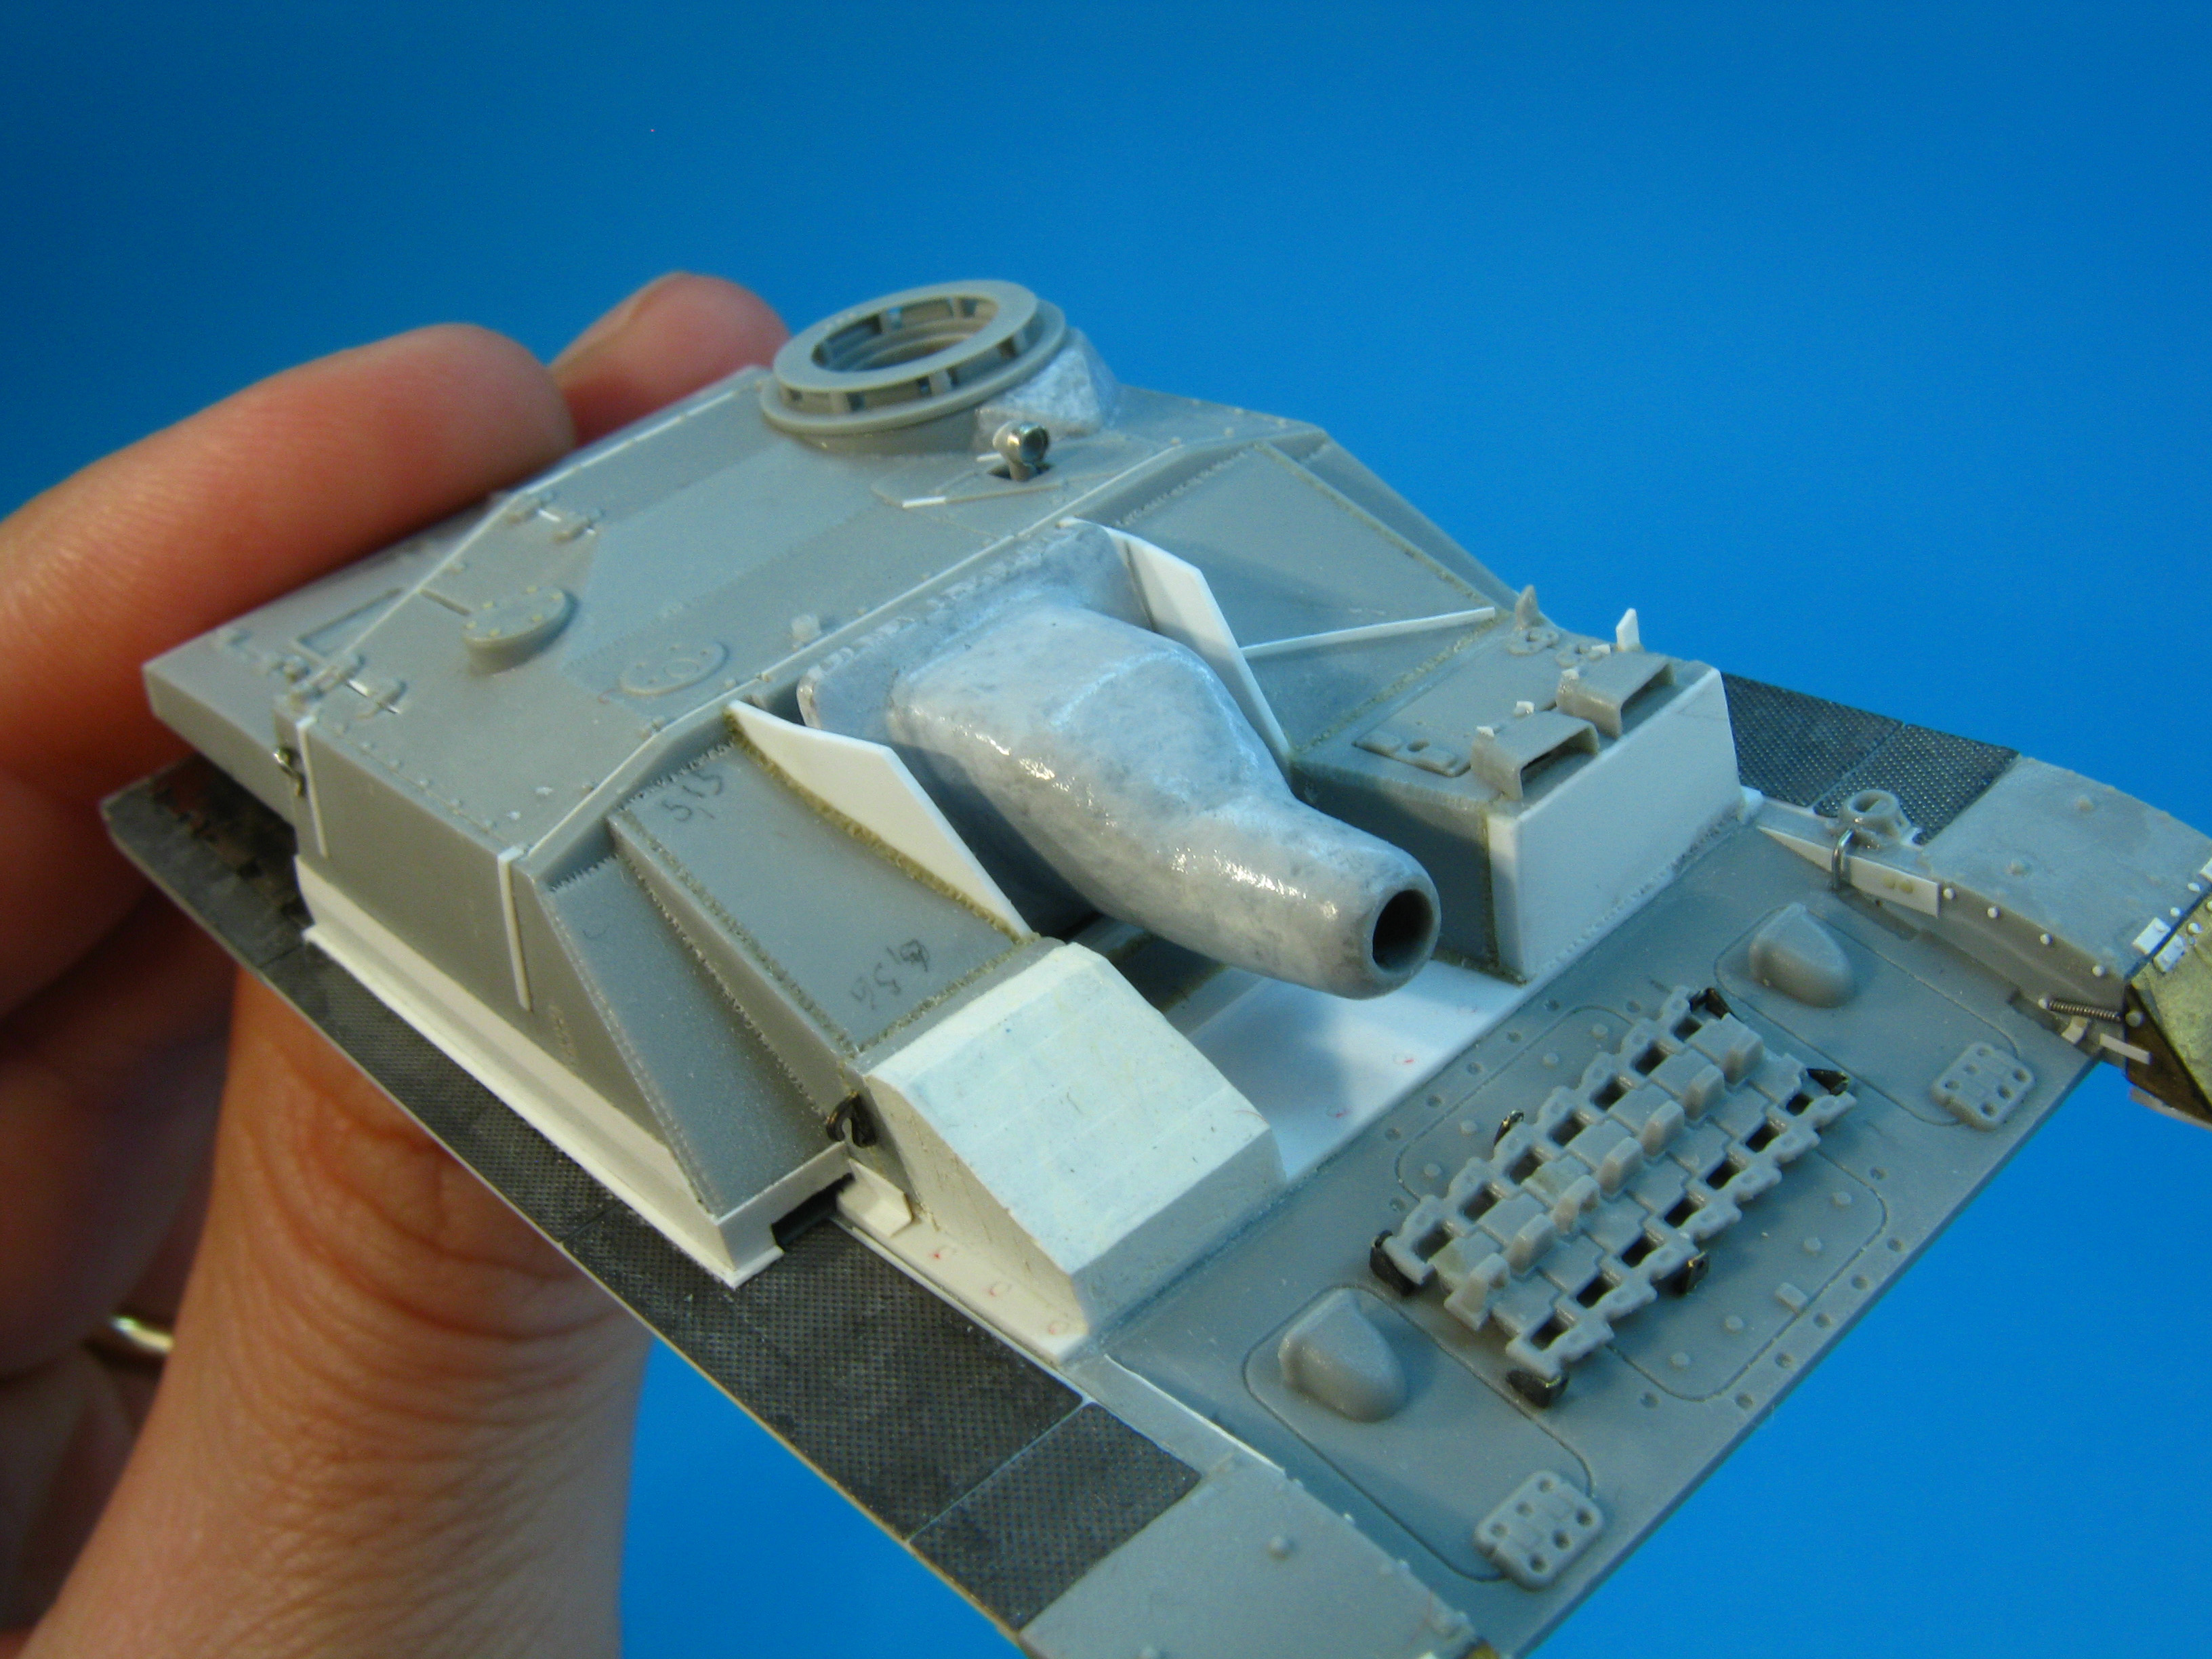
The kit's Saukopf mantlet is plainly
horrible. It's too squarish and, worst of all, oversized in width
by more than 1mm. If you modify the casemate opening to the correct
width, the shield won't ever fit inside the corrected opening...
so again I took J-D and reshaped the manlet, turning the front part
in a lathe and shaping the rest with files and sandpaper. Before
reshaping takes place, you should be careful to fill the mantlet
with epoxy putty- otherwise the sanding process will open holes
in the top "corners" of the saukopf. The end result is
correct to the tenth of a mm, at least for the dimensions that can
be measured with my faithful caliper. Good news? The gun opening
diameter is correct (about 2mm) so the replacement barrel will fit
just right.
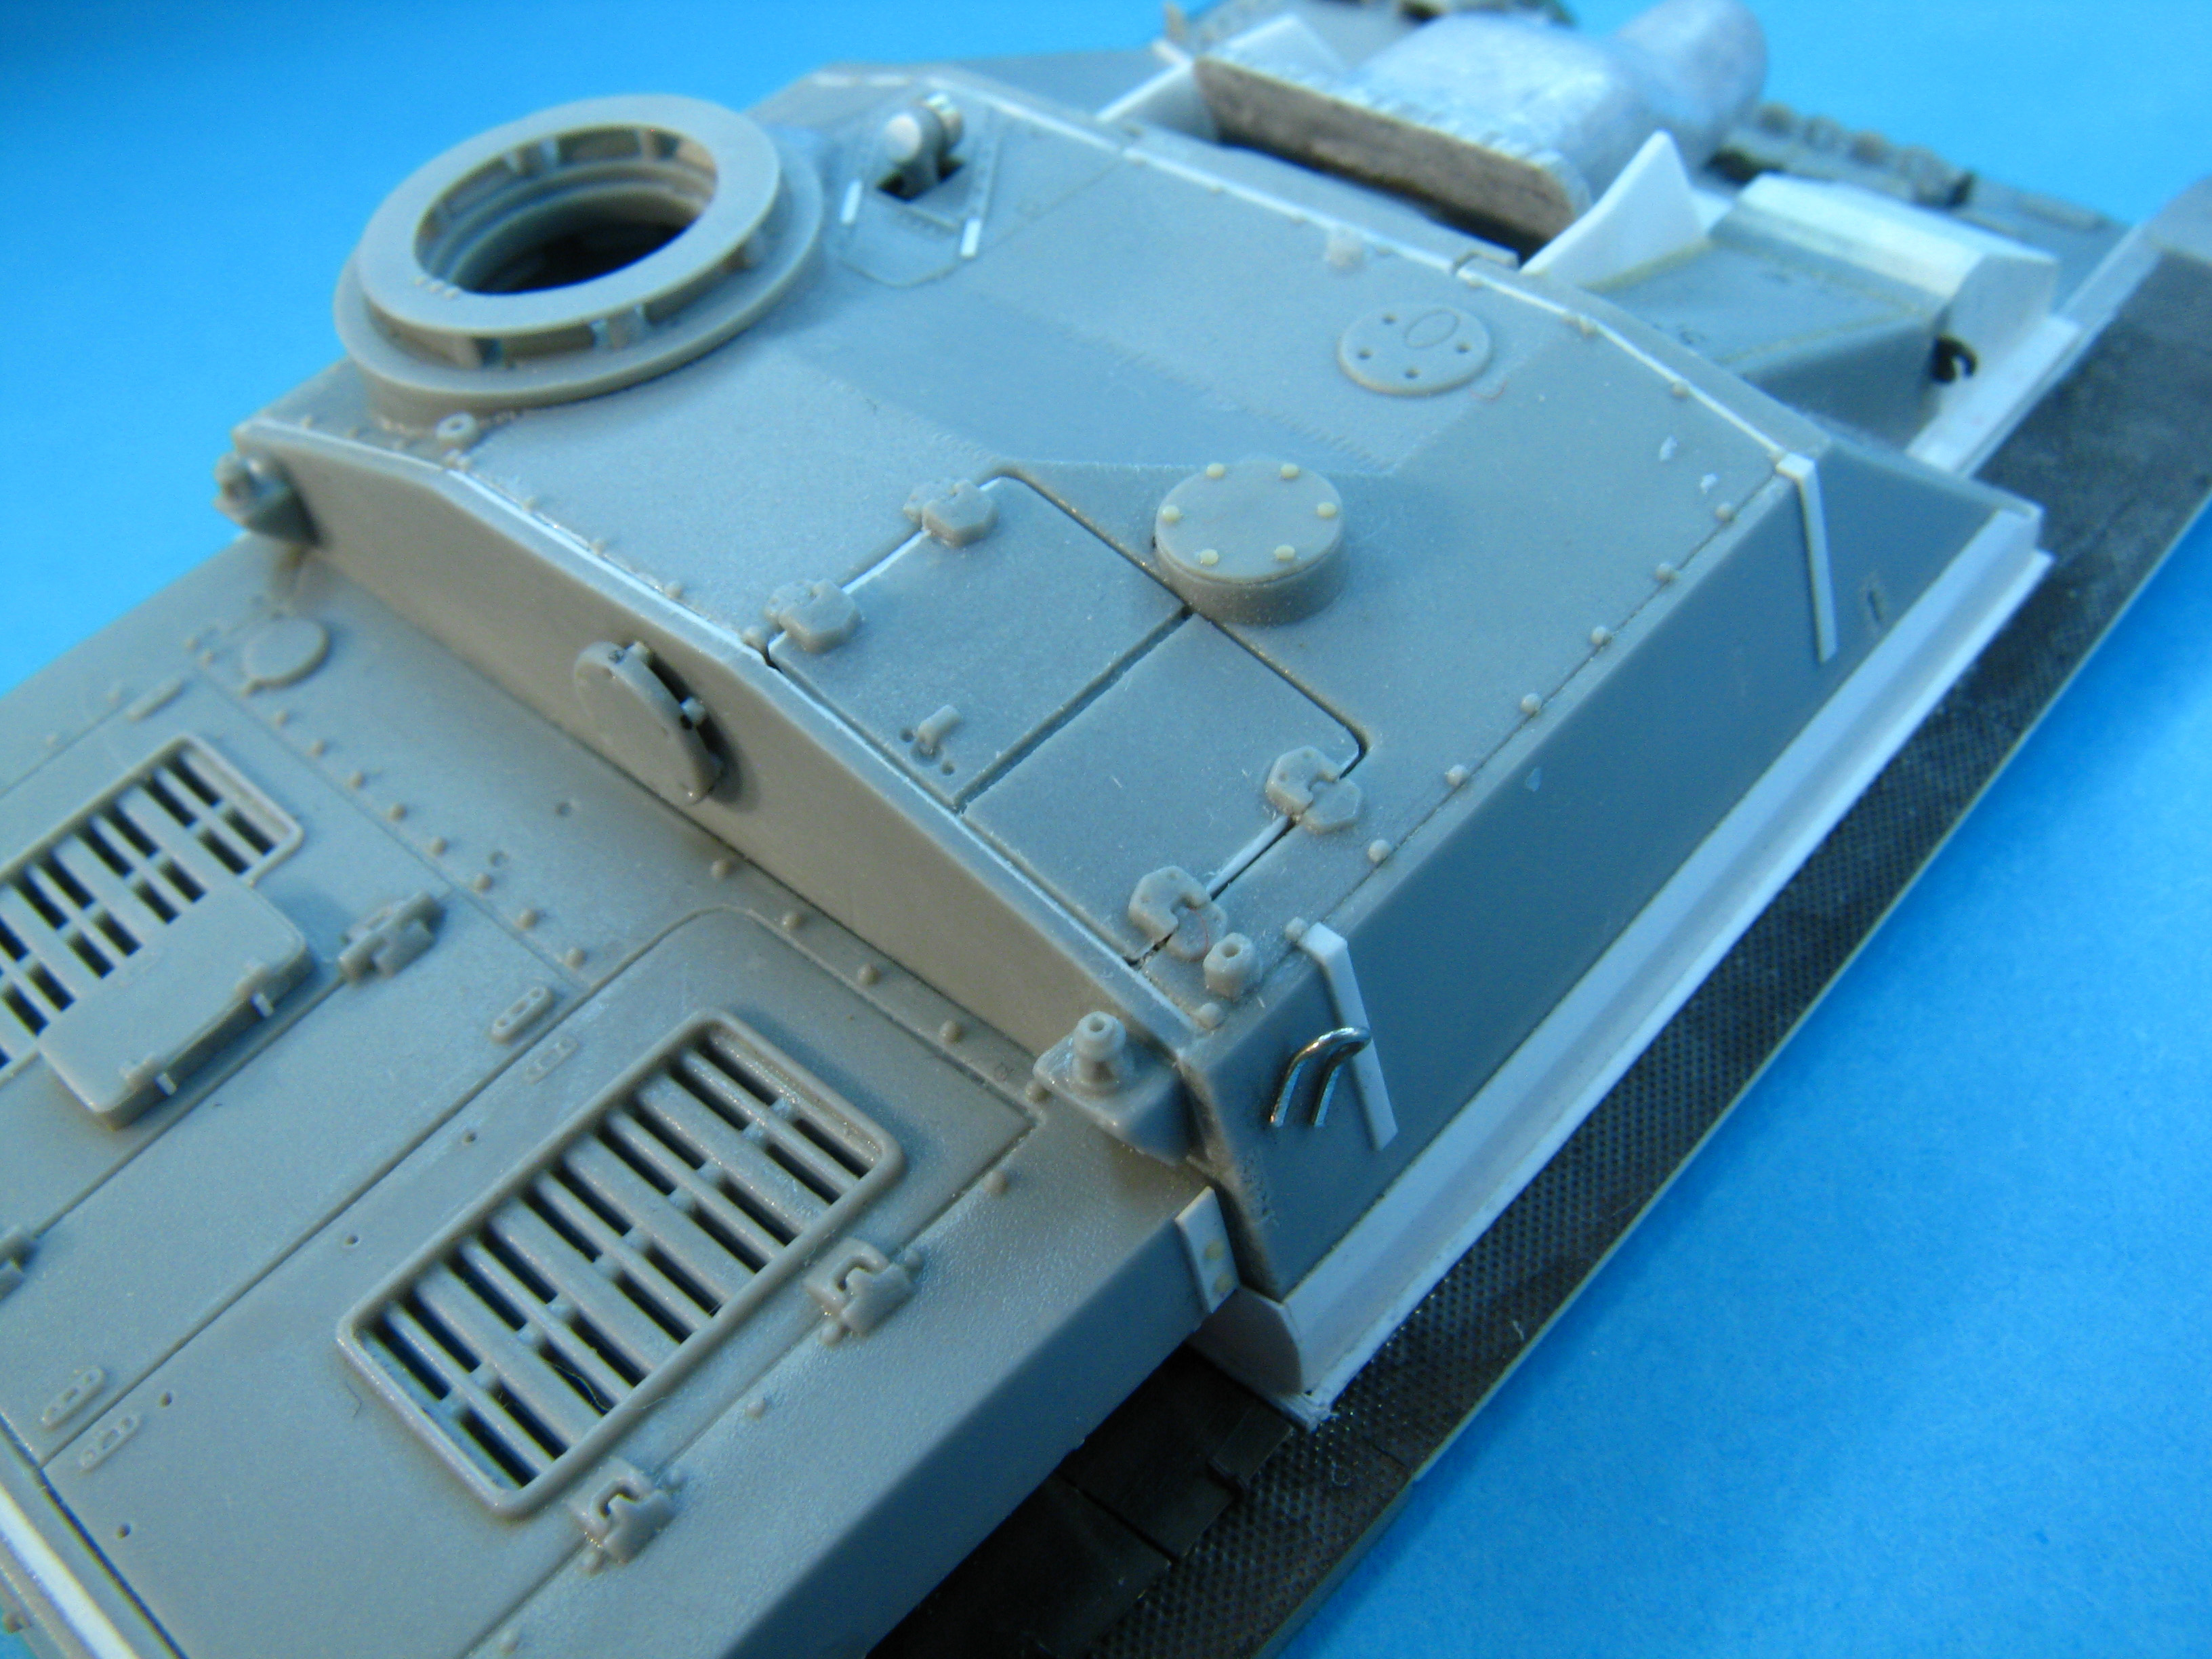
I scratchbuilt the casemate skirts, used a refined Dragon StuG III cupola (some adjustment is needed to fit it), antenna mounts, and fan cover. The pic of the casemate roof of "23" shows that the MG is not mounted, while the Nahverteidigungswaffe seems present (odd enough?). Also, the three-pilzen configuration is well apparent. At this point many hull details are still missing, they will be added after the "rough handling" required for the assembly of the lower hull.
Wheels, or How To Ruin Your
Entire Week
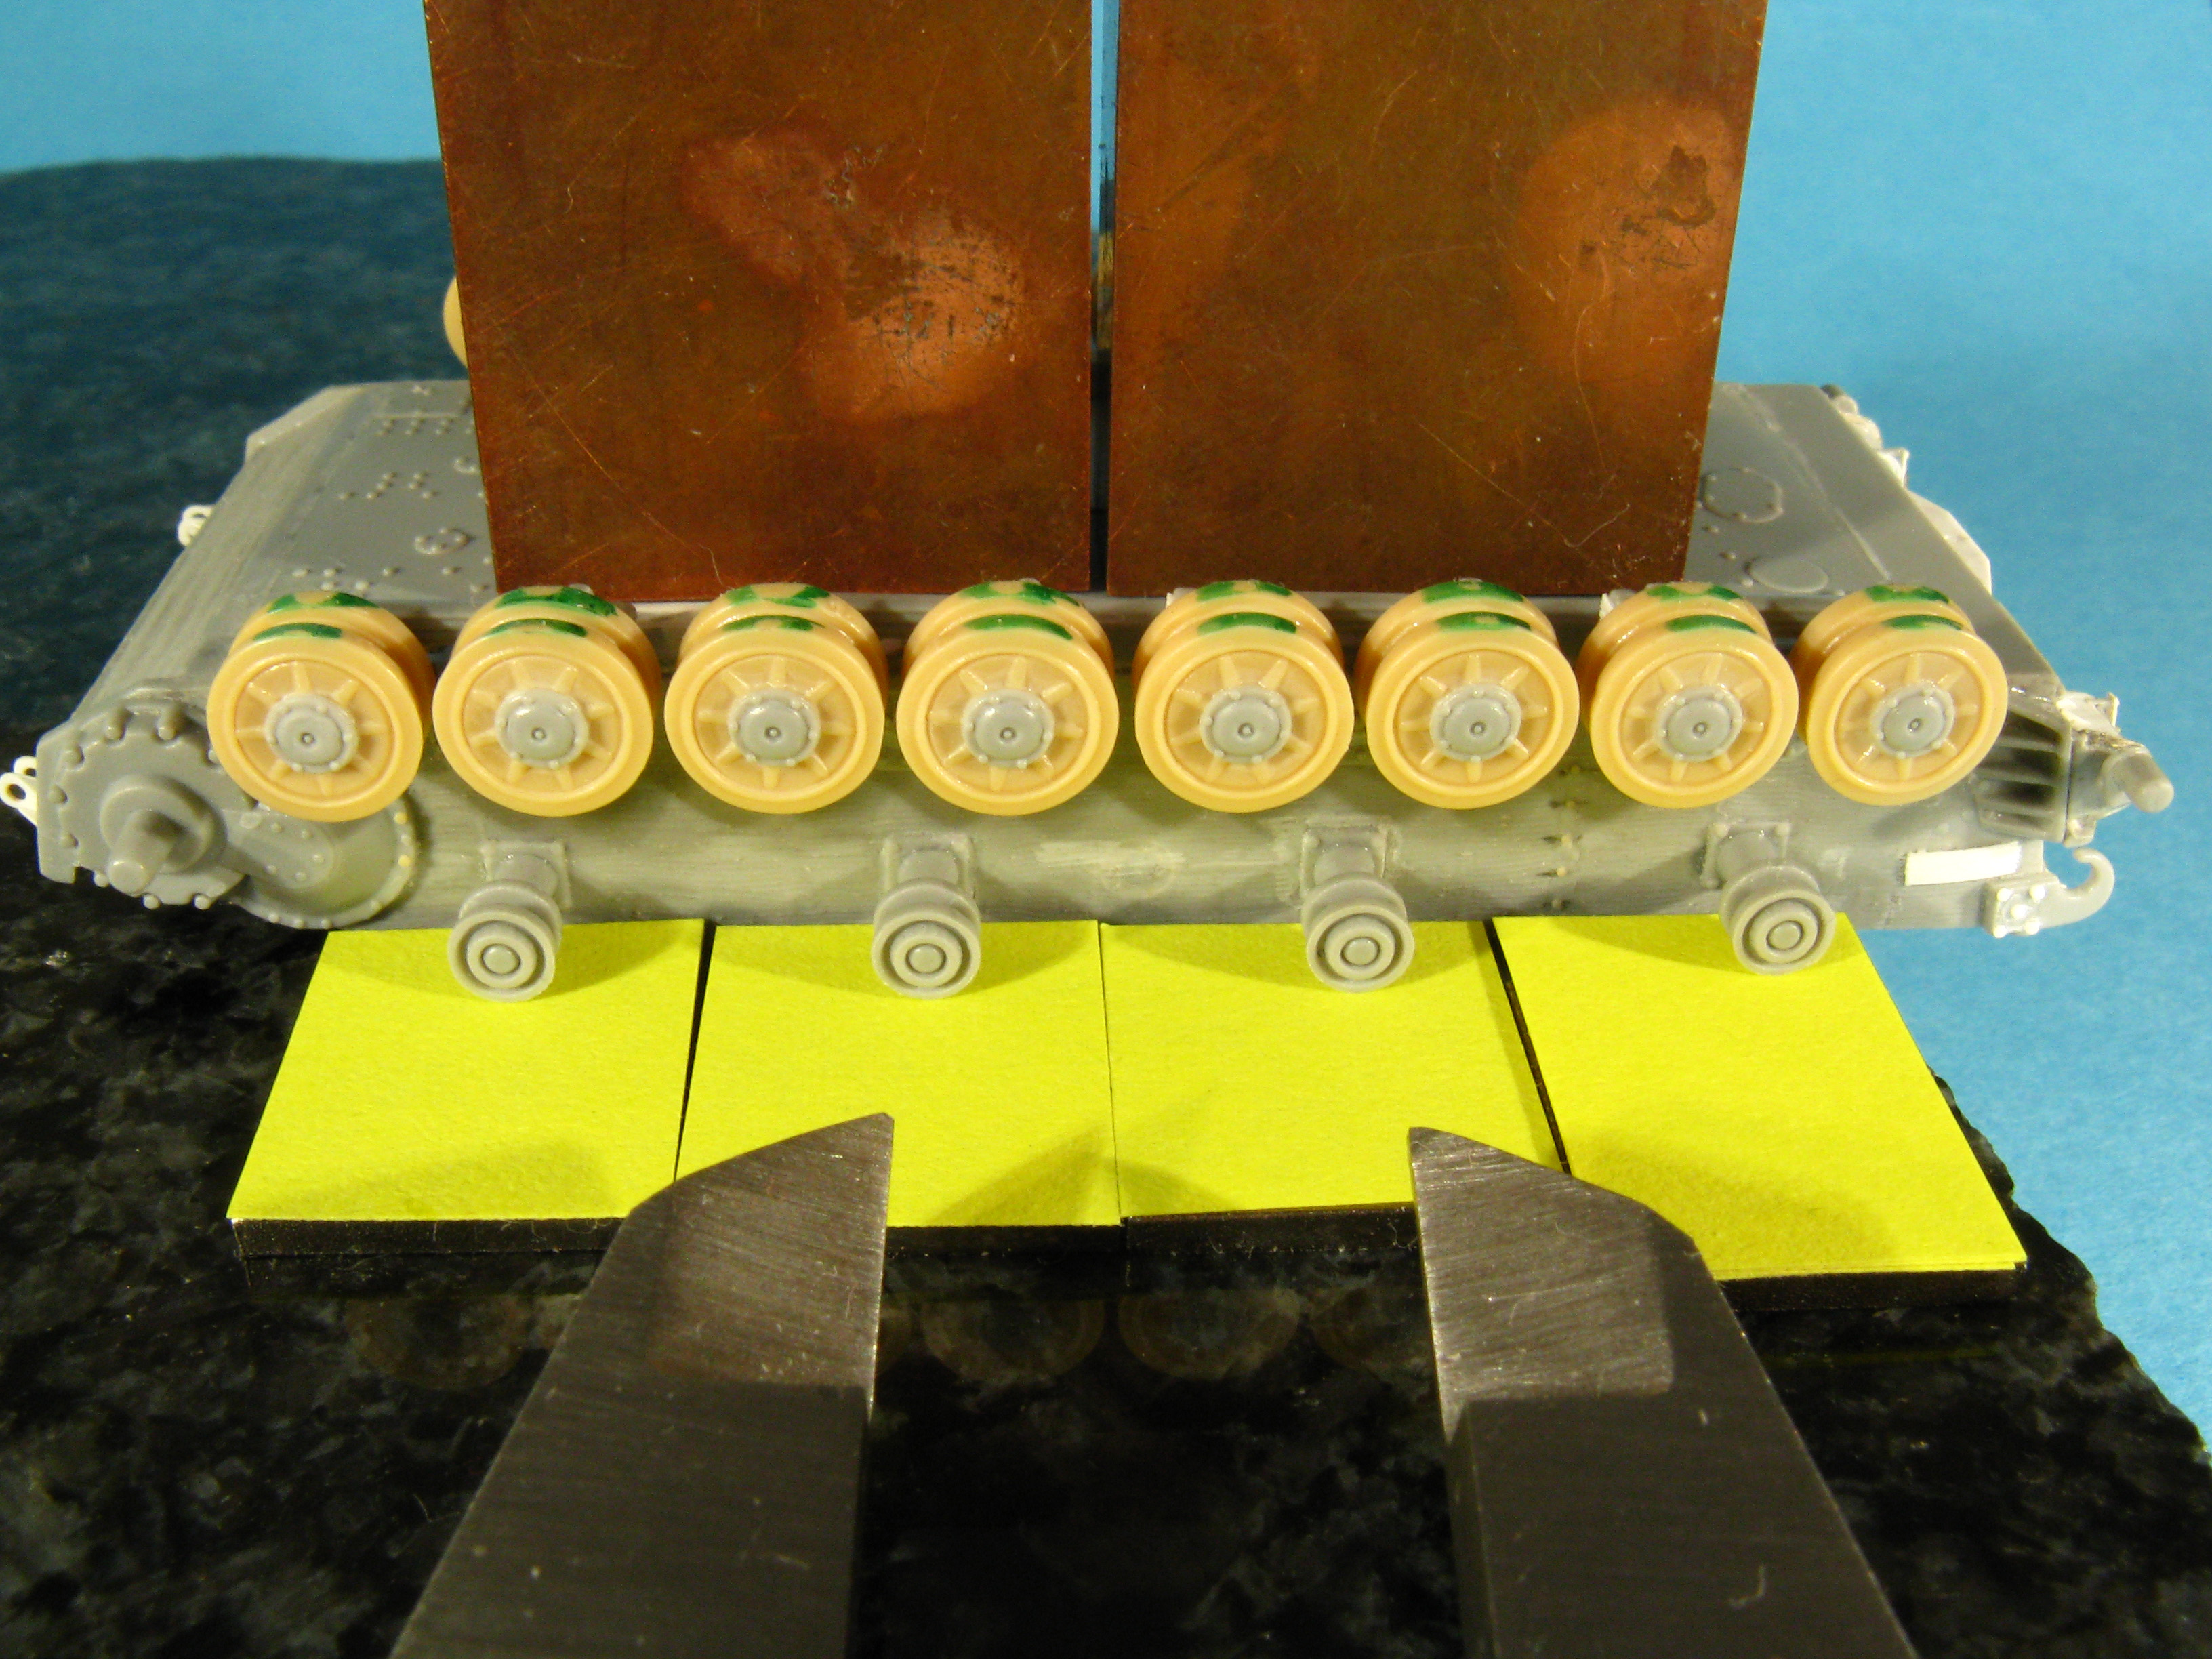
First step: how to get them aligned?
At this point I inserted and glued
the hull in place, reinforcing with cyano glue. Et voilà, after breaking the
gig and extracting the hull you can see the yellow wheel spacers
still in place.
Now, the gig ensures that the wheels are well aligned in a row, but the two rows are not aligned reciprocally if the hull is twisted. I marked with a green marker the wheels bottoms then sanded lightly over an abrasive planar base until seeing all of the green marks touched a bit by the sanding operation. Now the wheelbase is flat with the terrain.
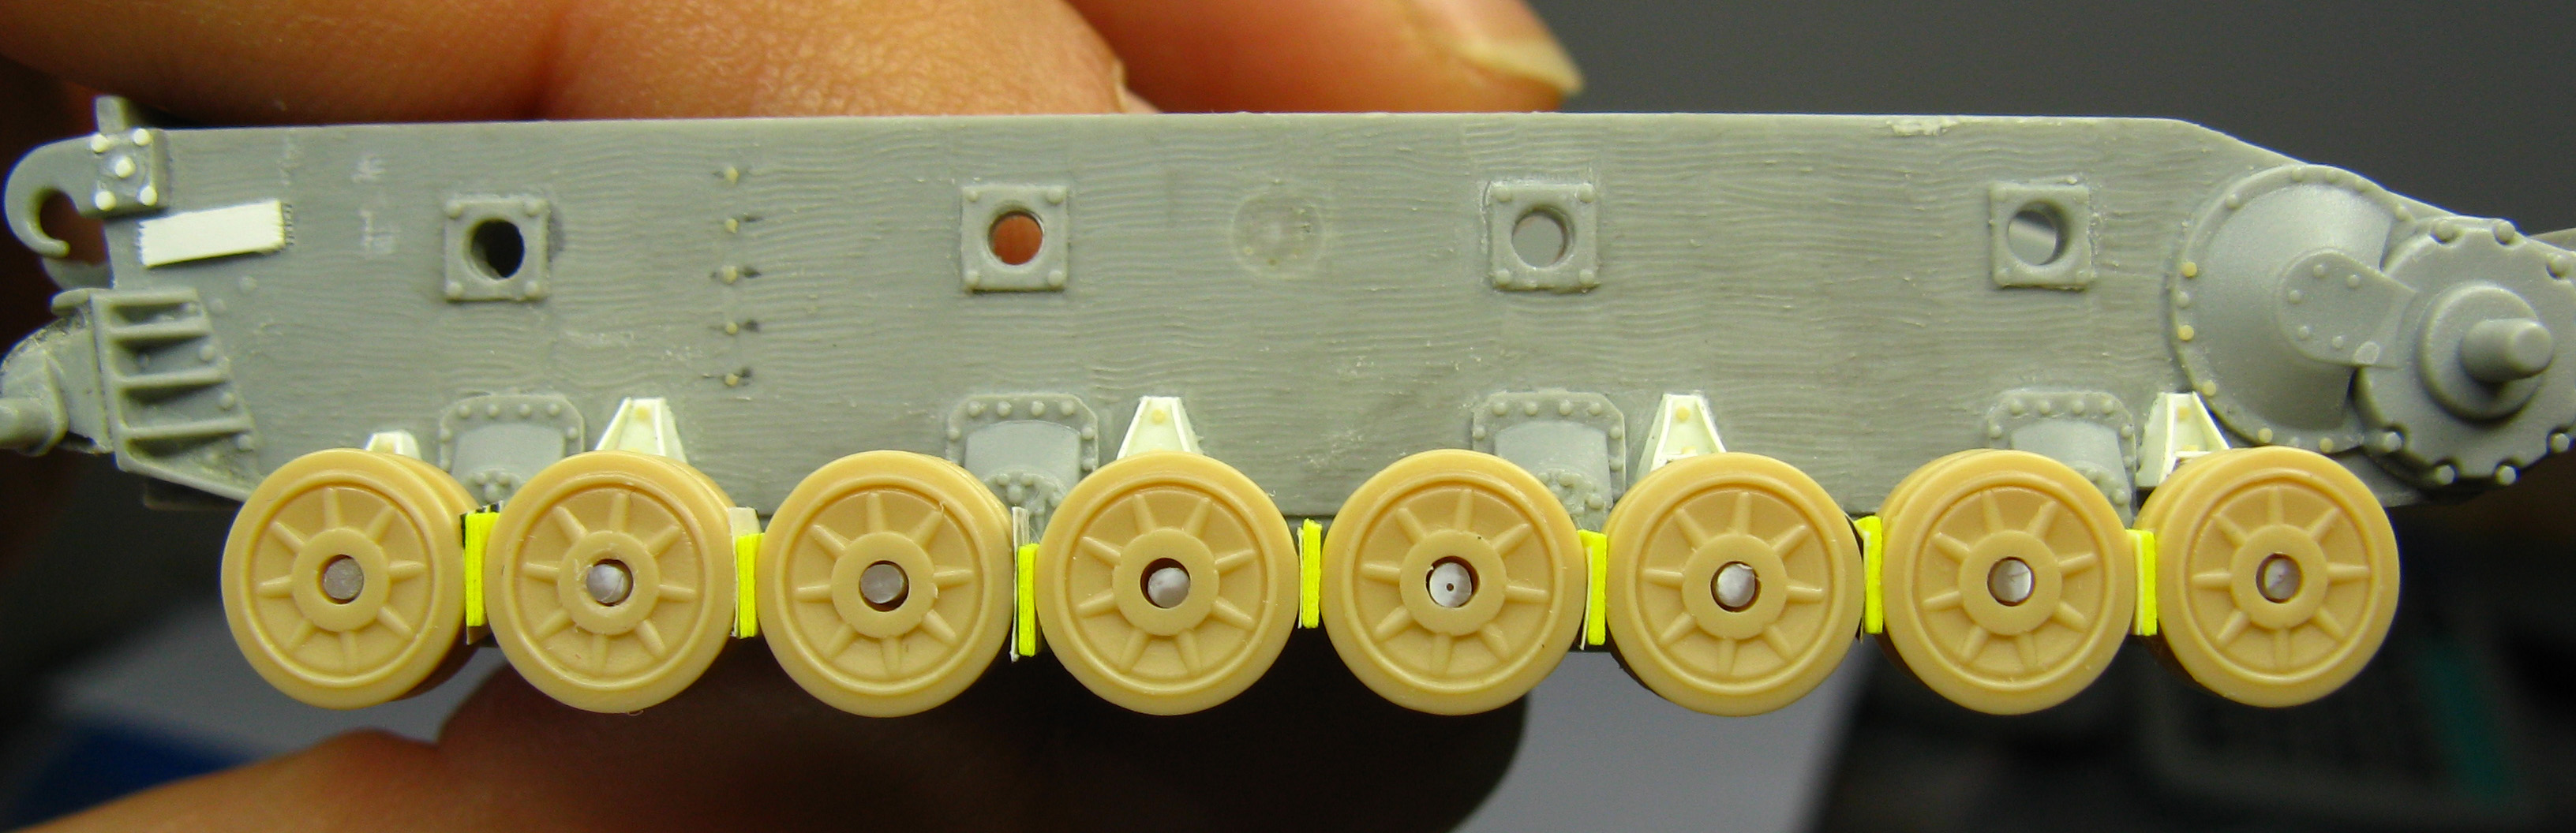
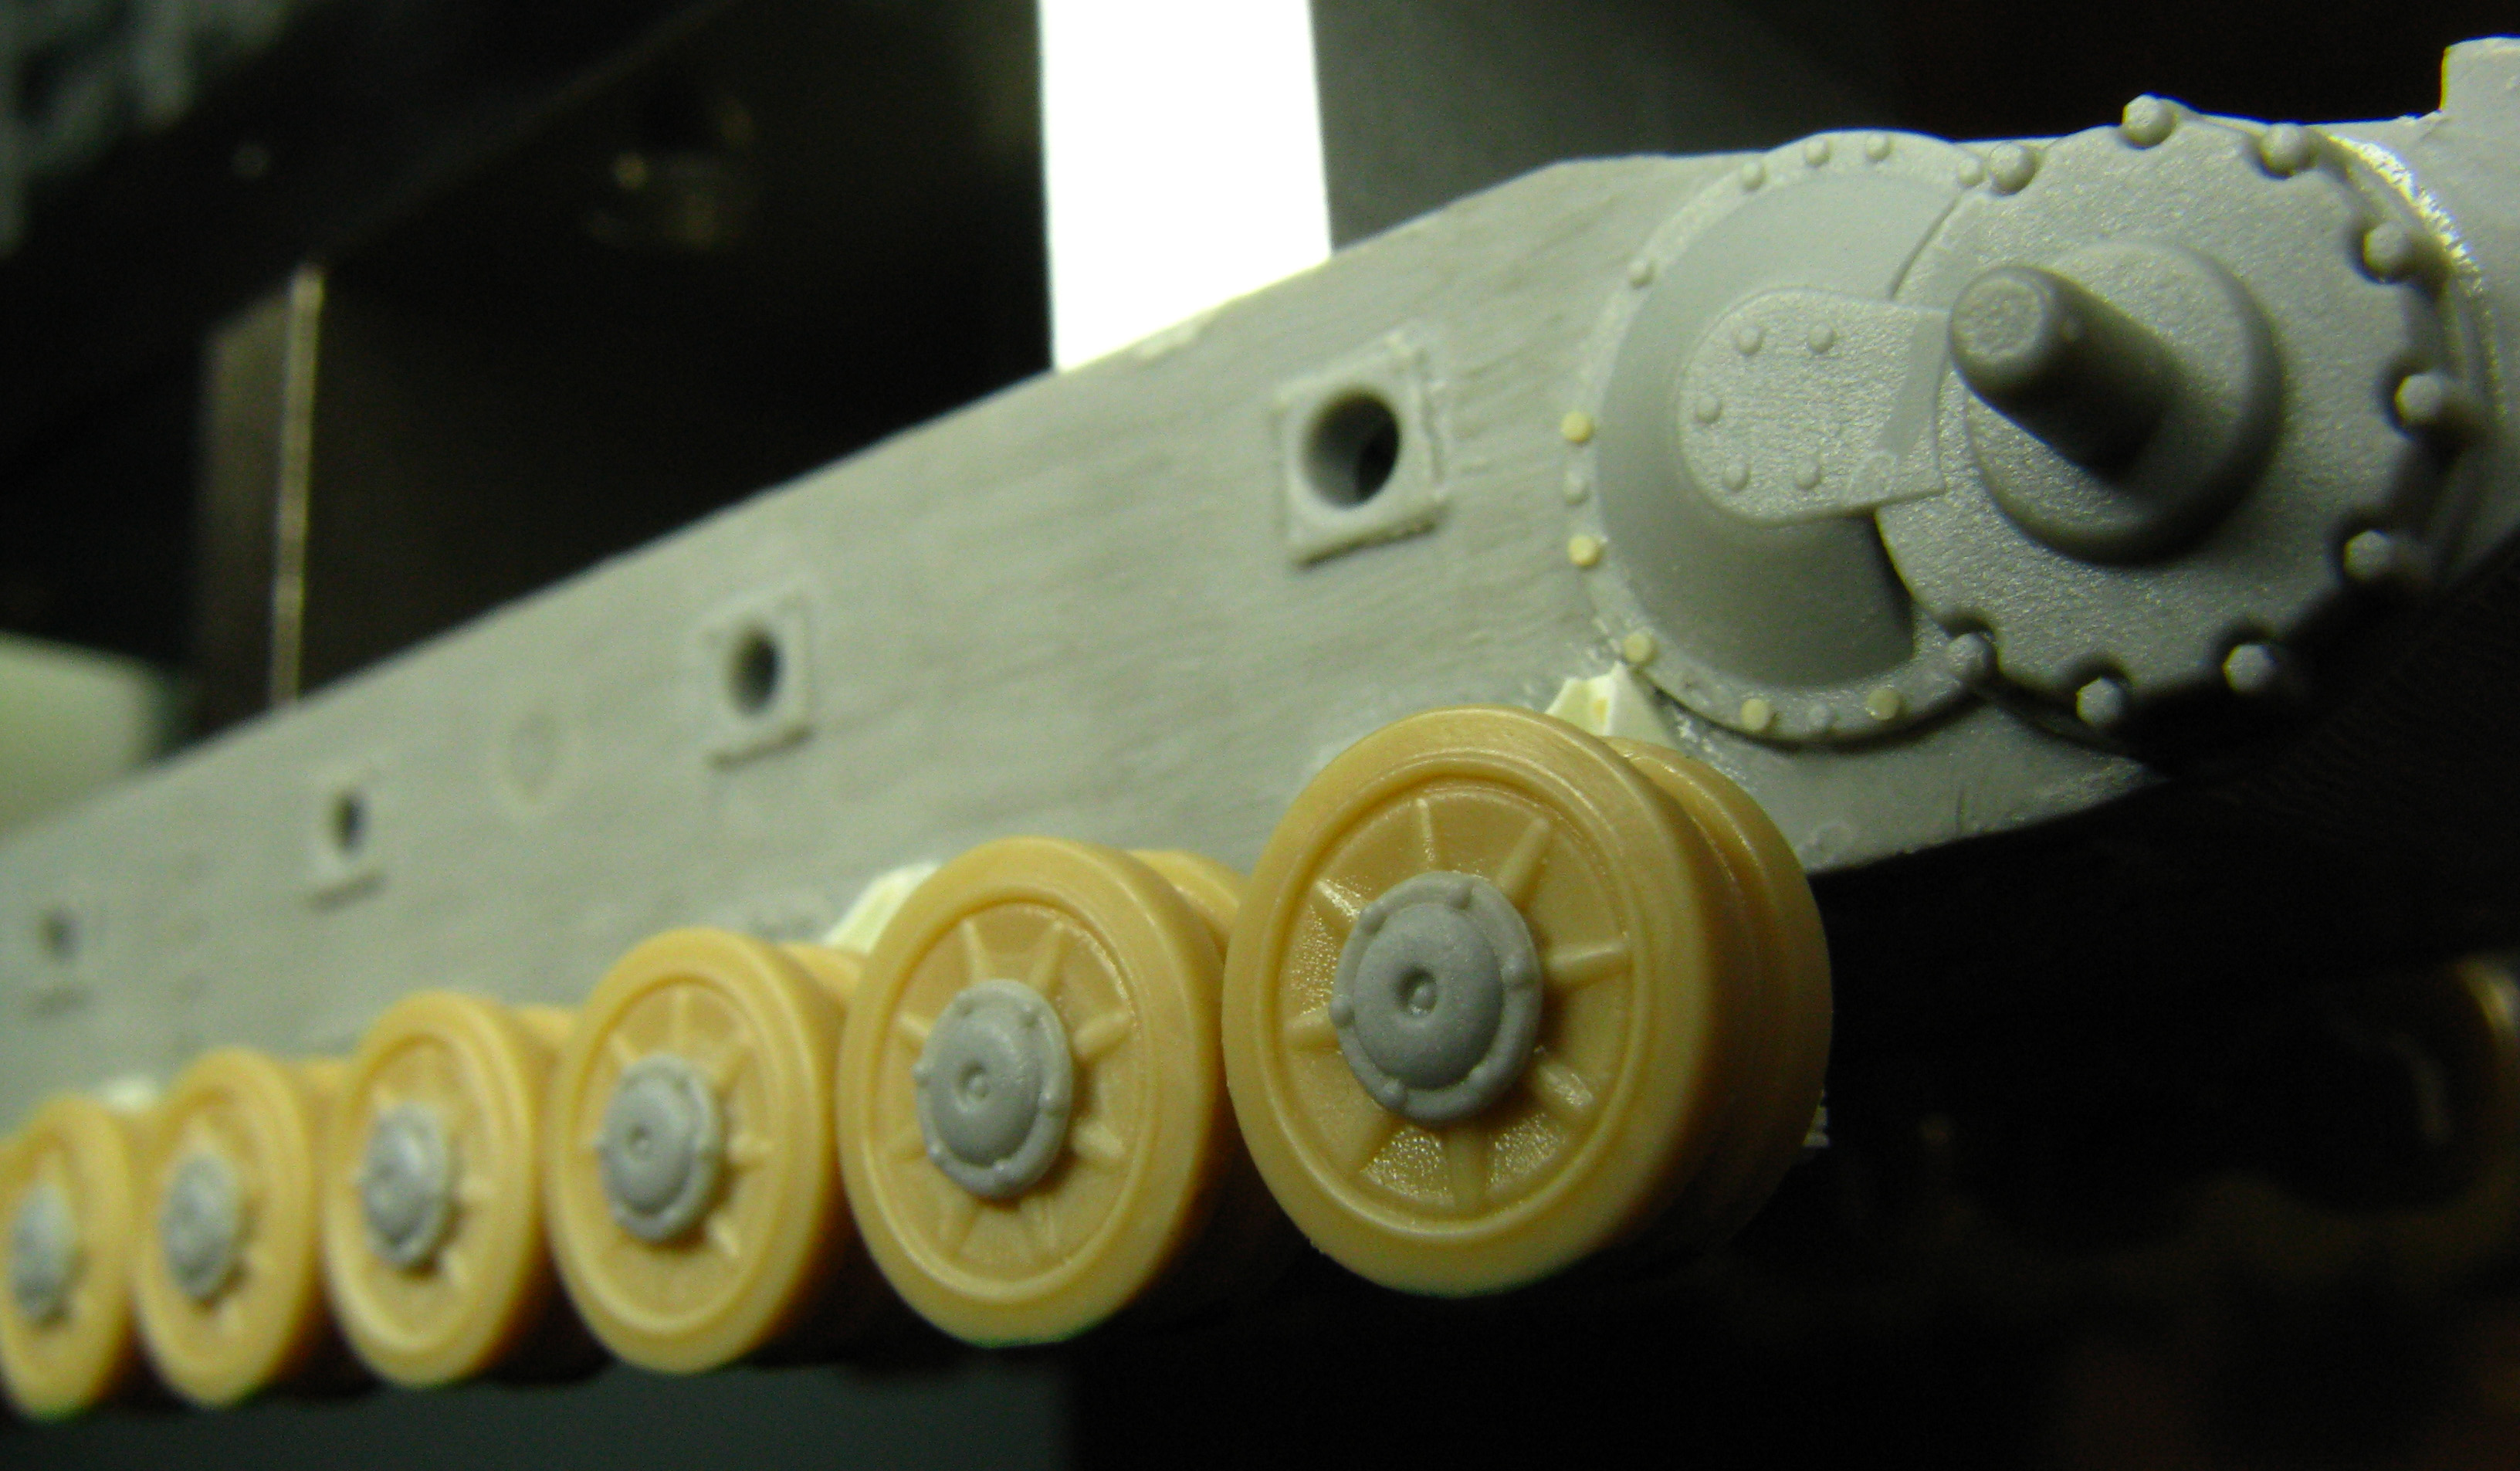
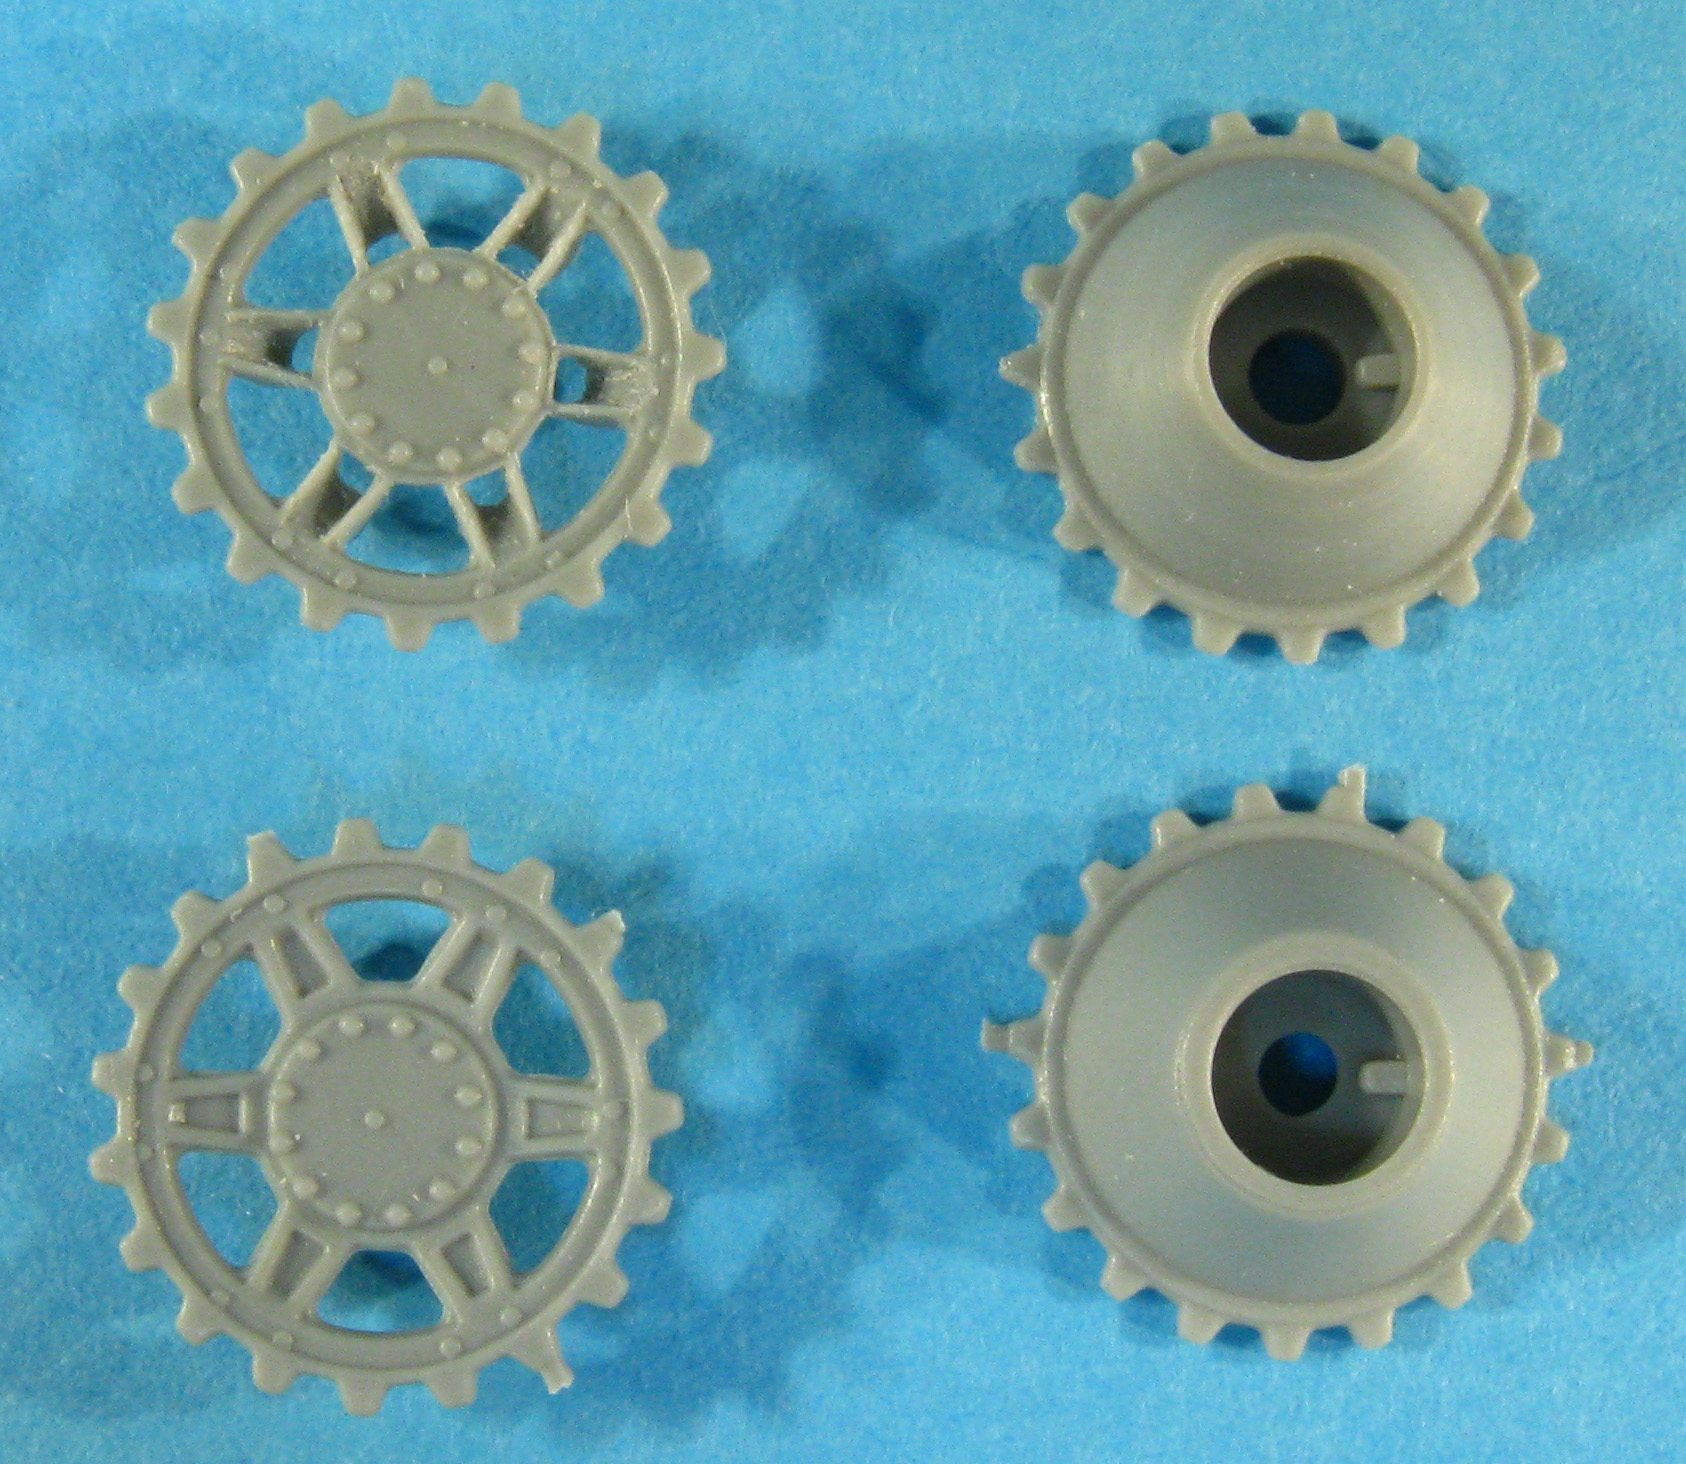
The hubs are explanted from the Dragon
rims and transplanted. Difficult/scary++ operation... ...but the result is nice indeed (at least I think so!)
The sprockets had the rims hollowed out; I also reduced the hub diameter, so that I had to modify the cone of the lower part; this was quickly done in a lathe. The hollowed rims will give a great improvement to the realism of the finished model.
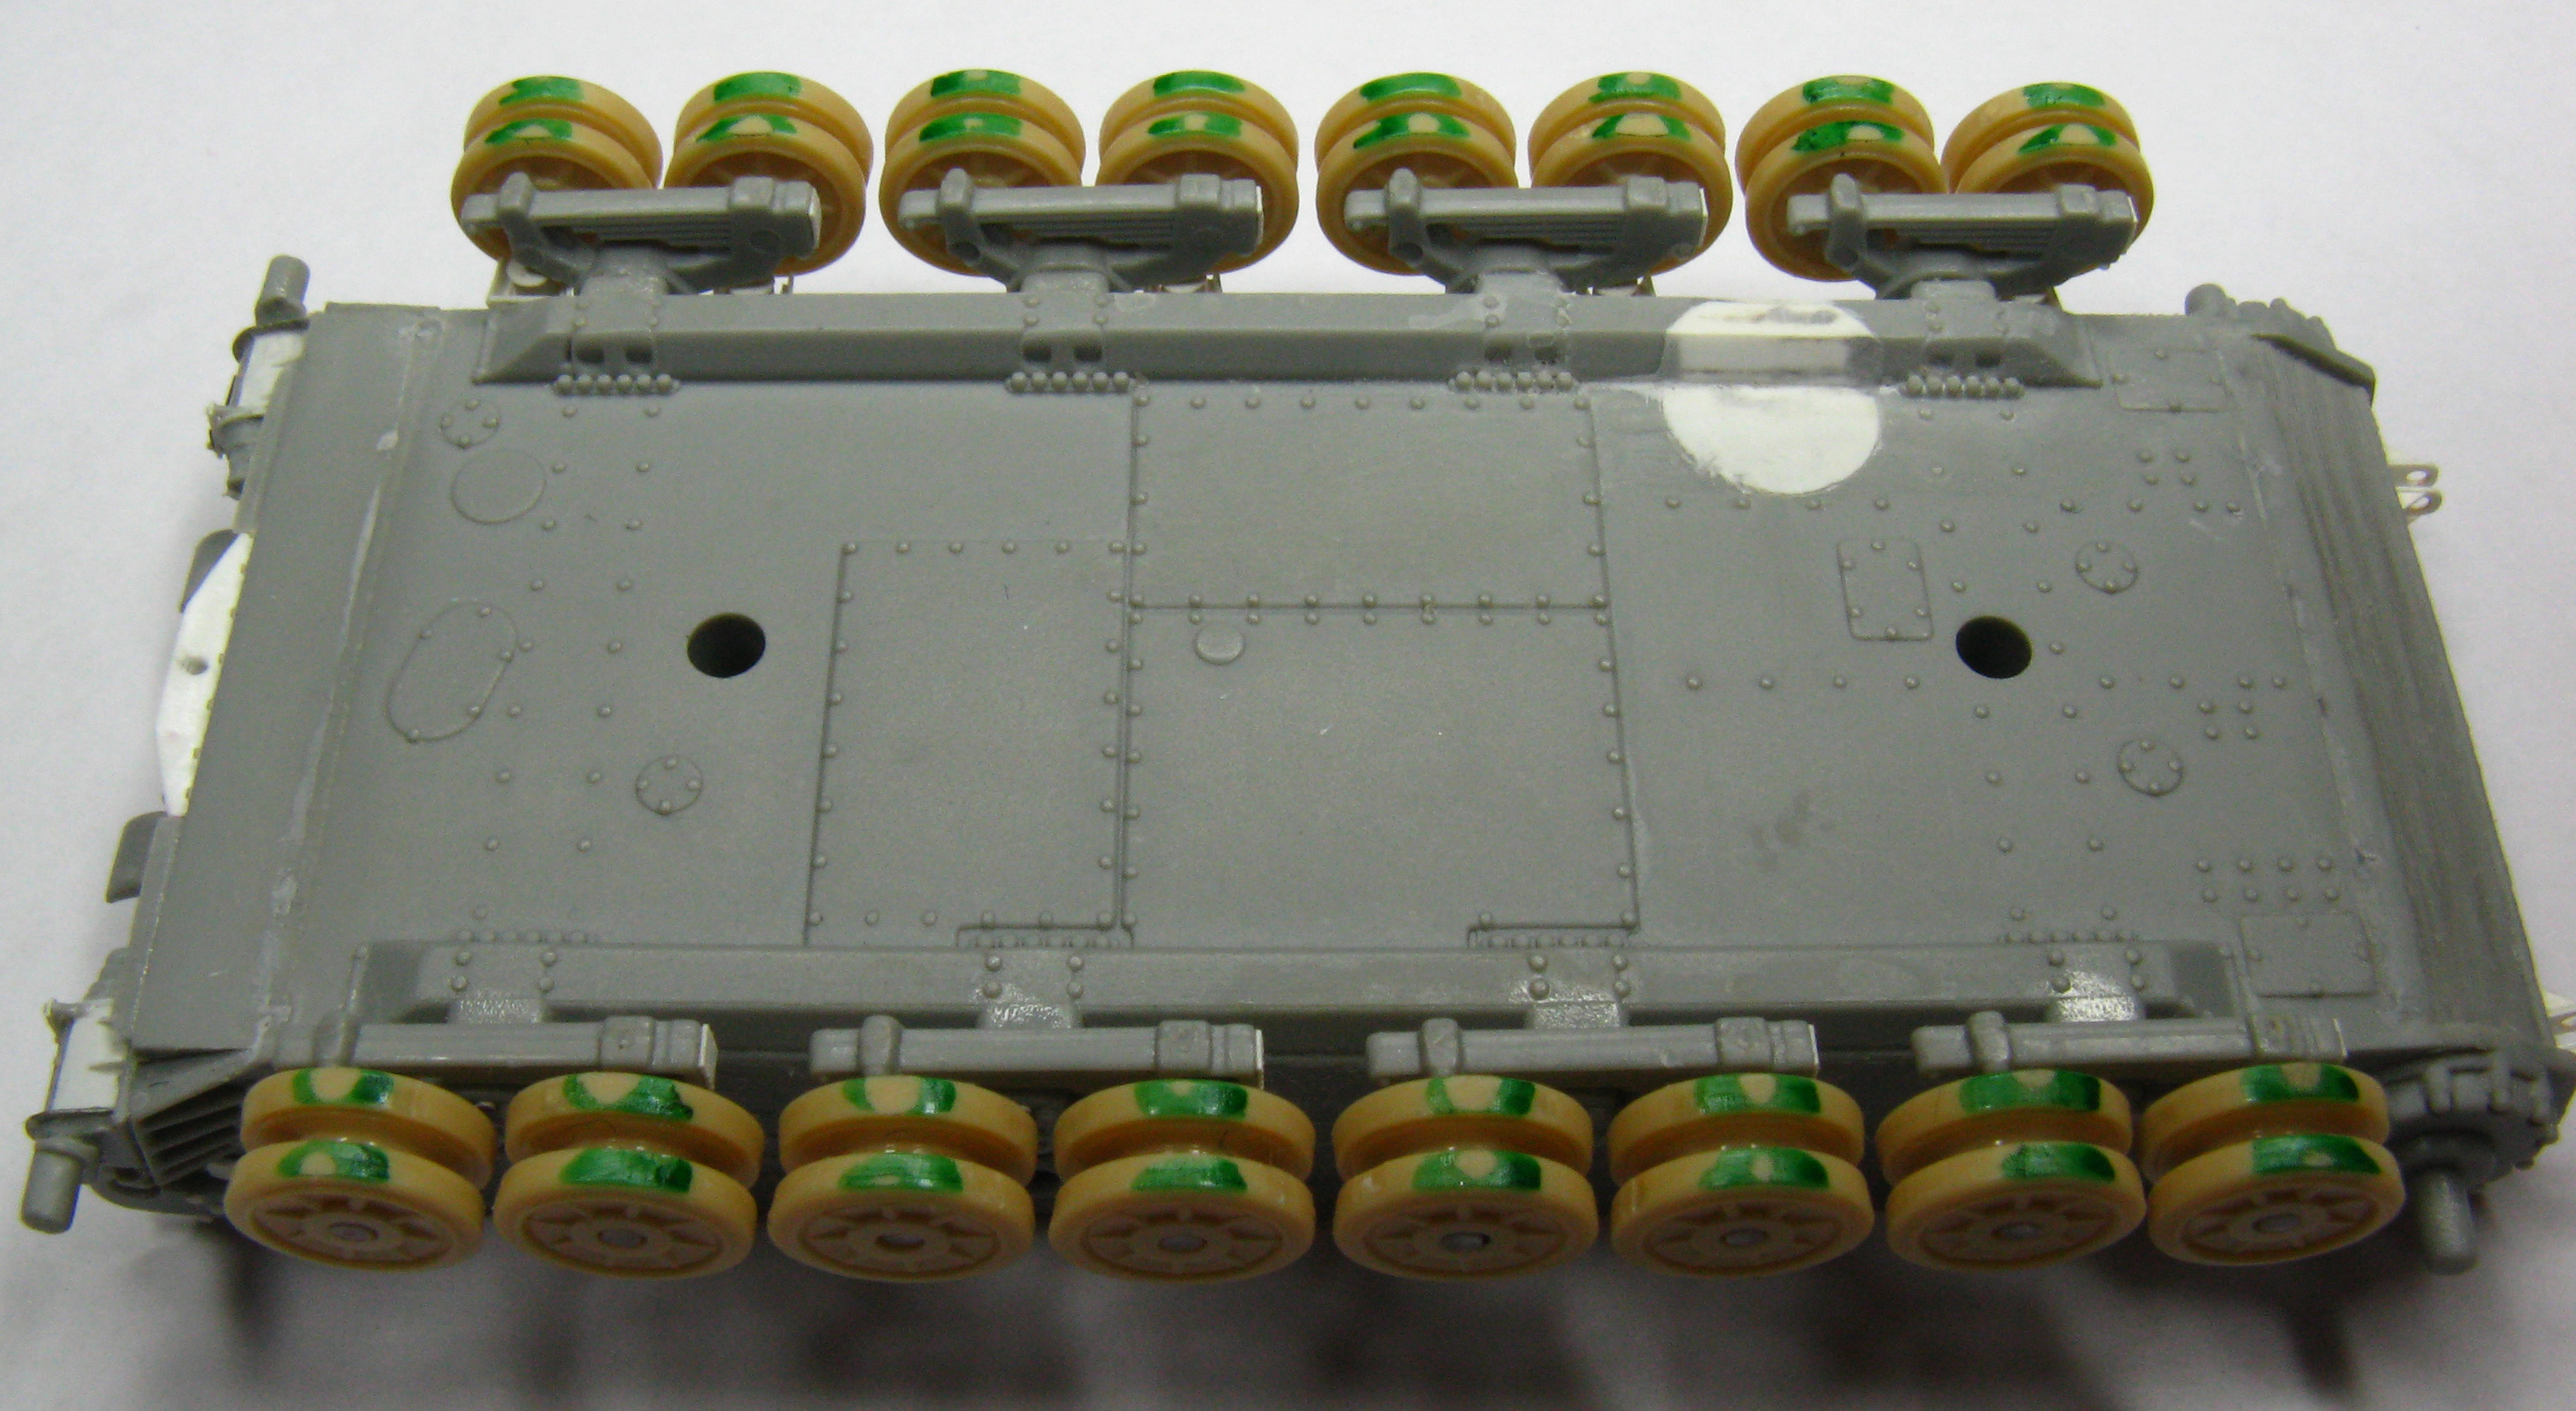
Installing the return rollers.
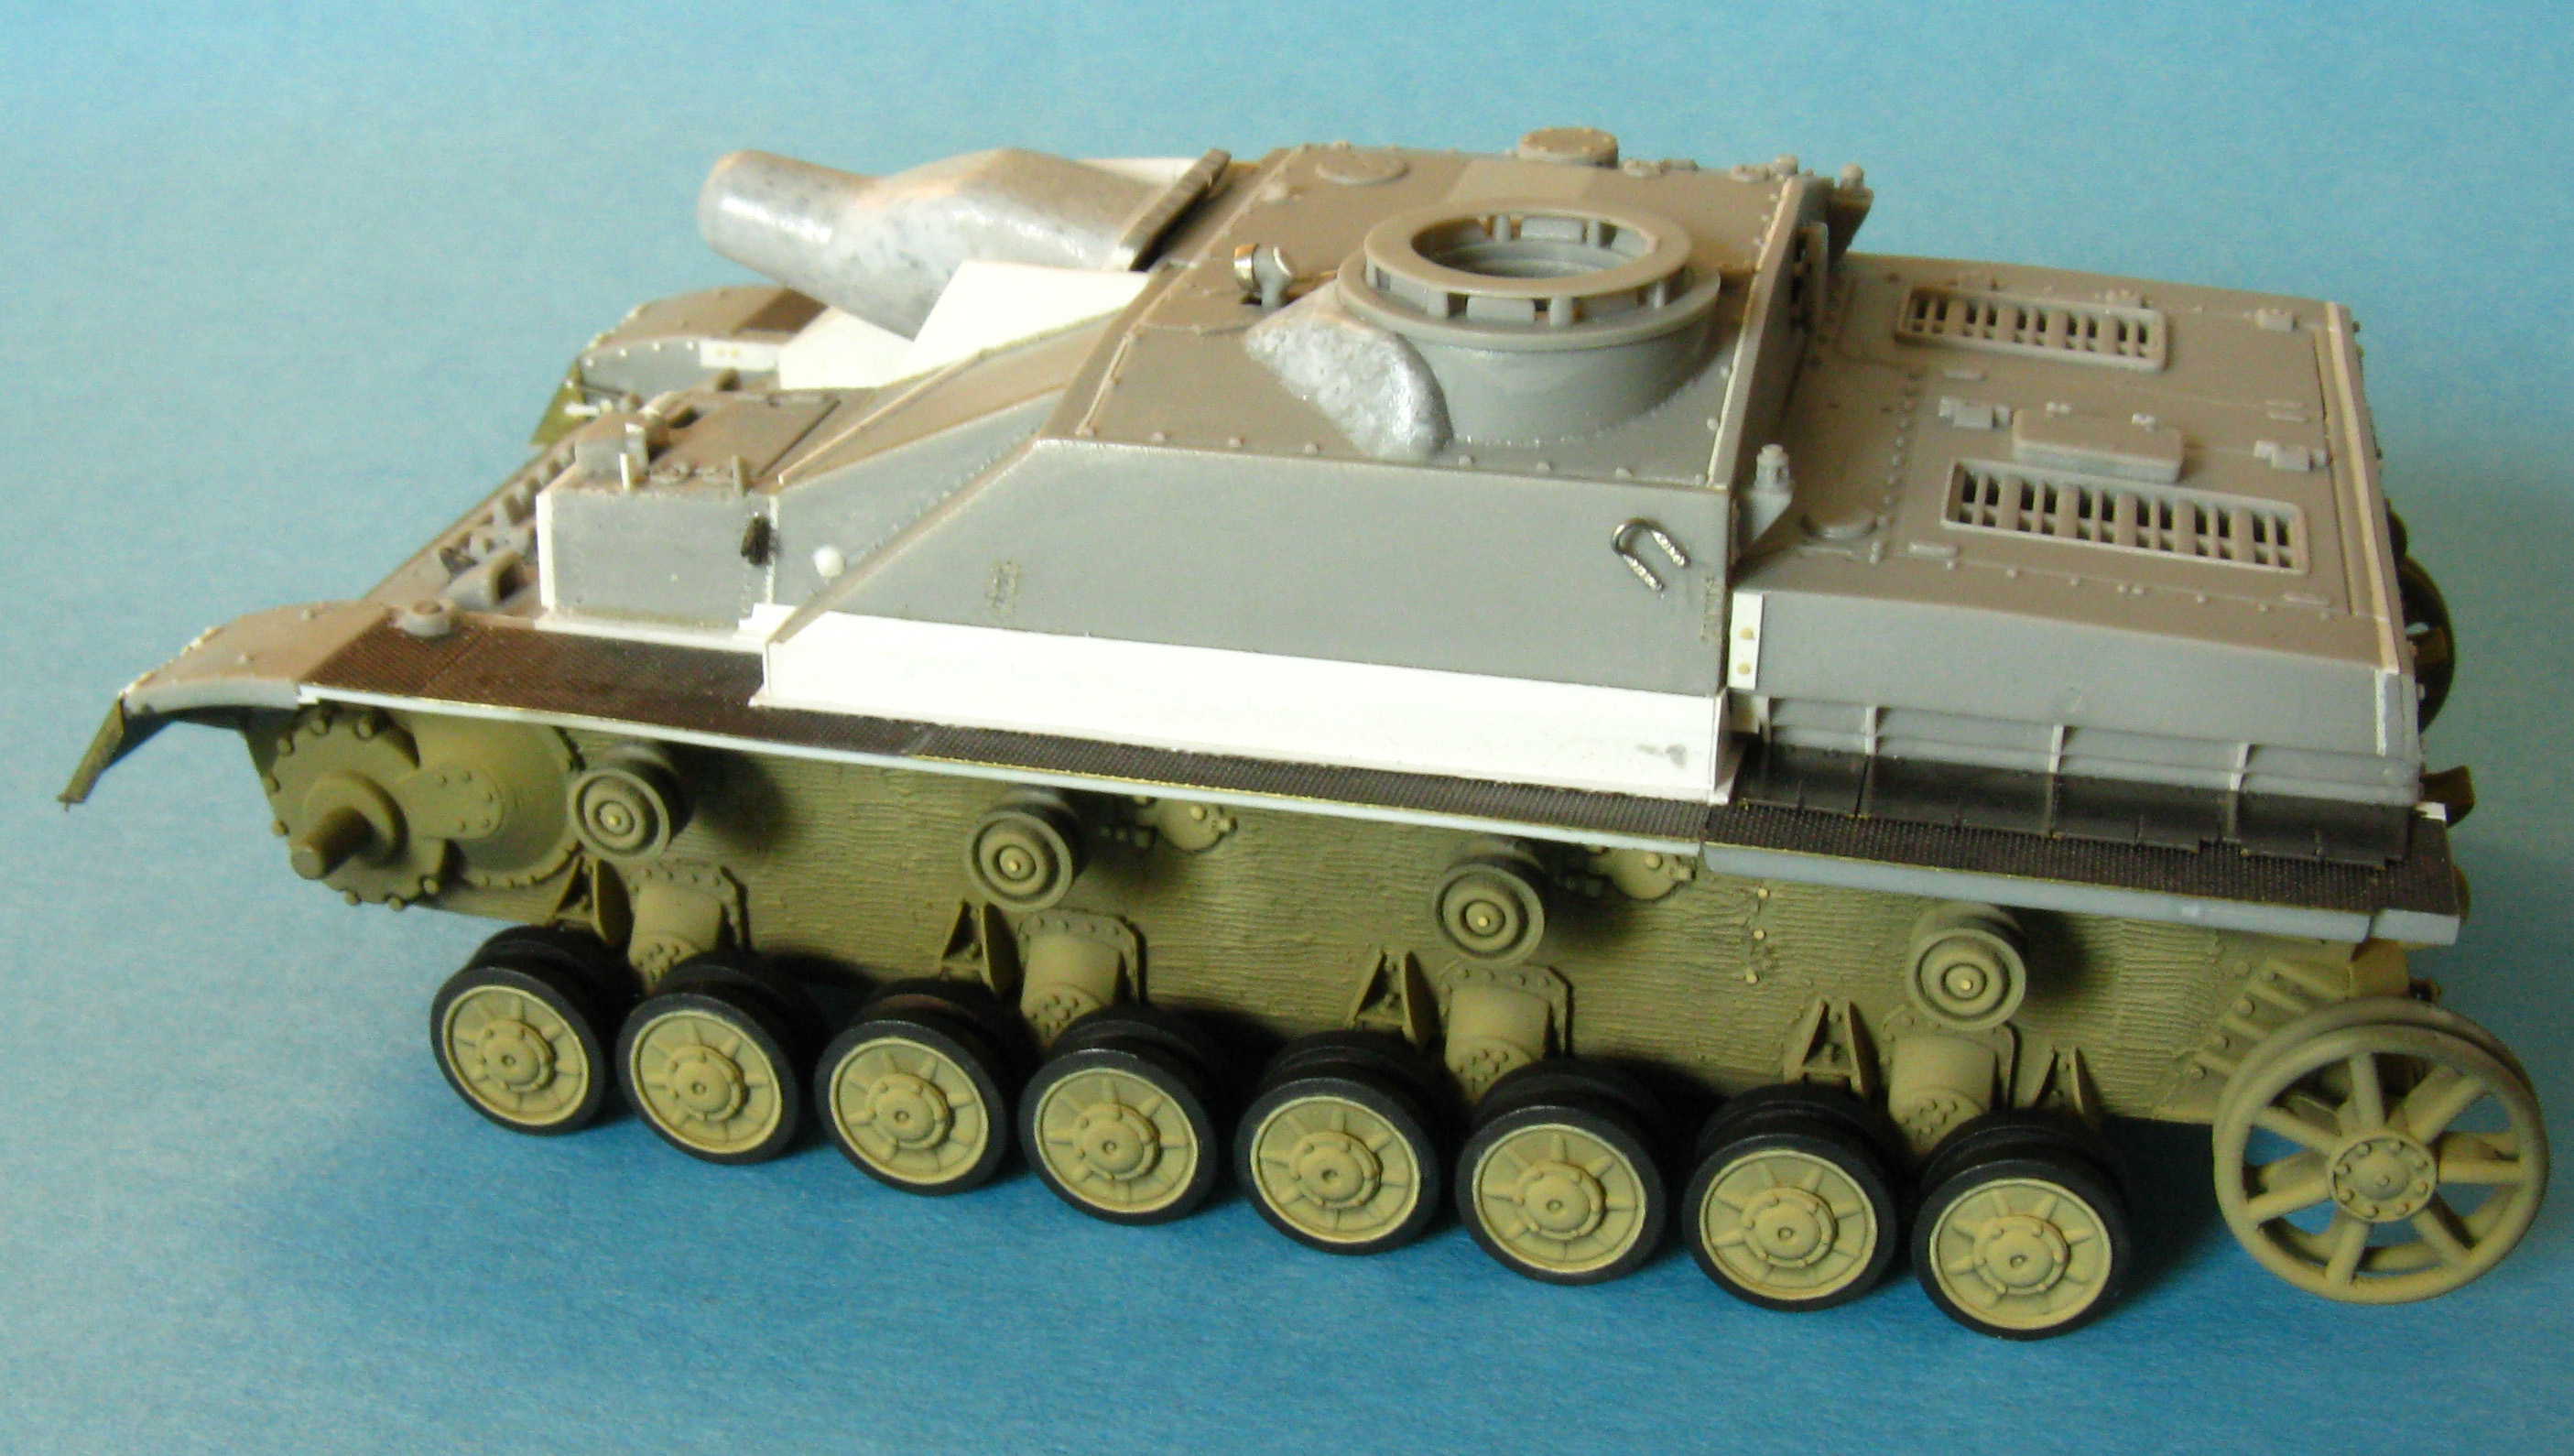
The model today: lower and upper
hull are cemented together, and the driver compartment has been
modified.
The lower hull has been pre-painted
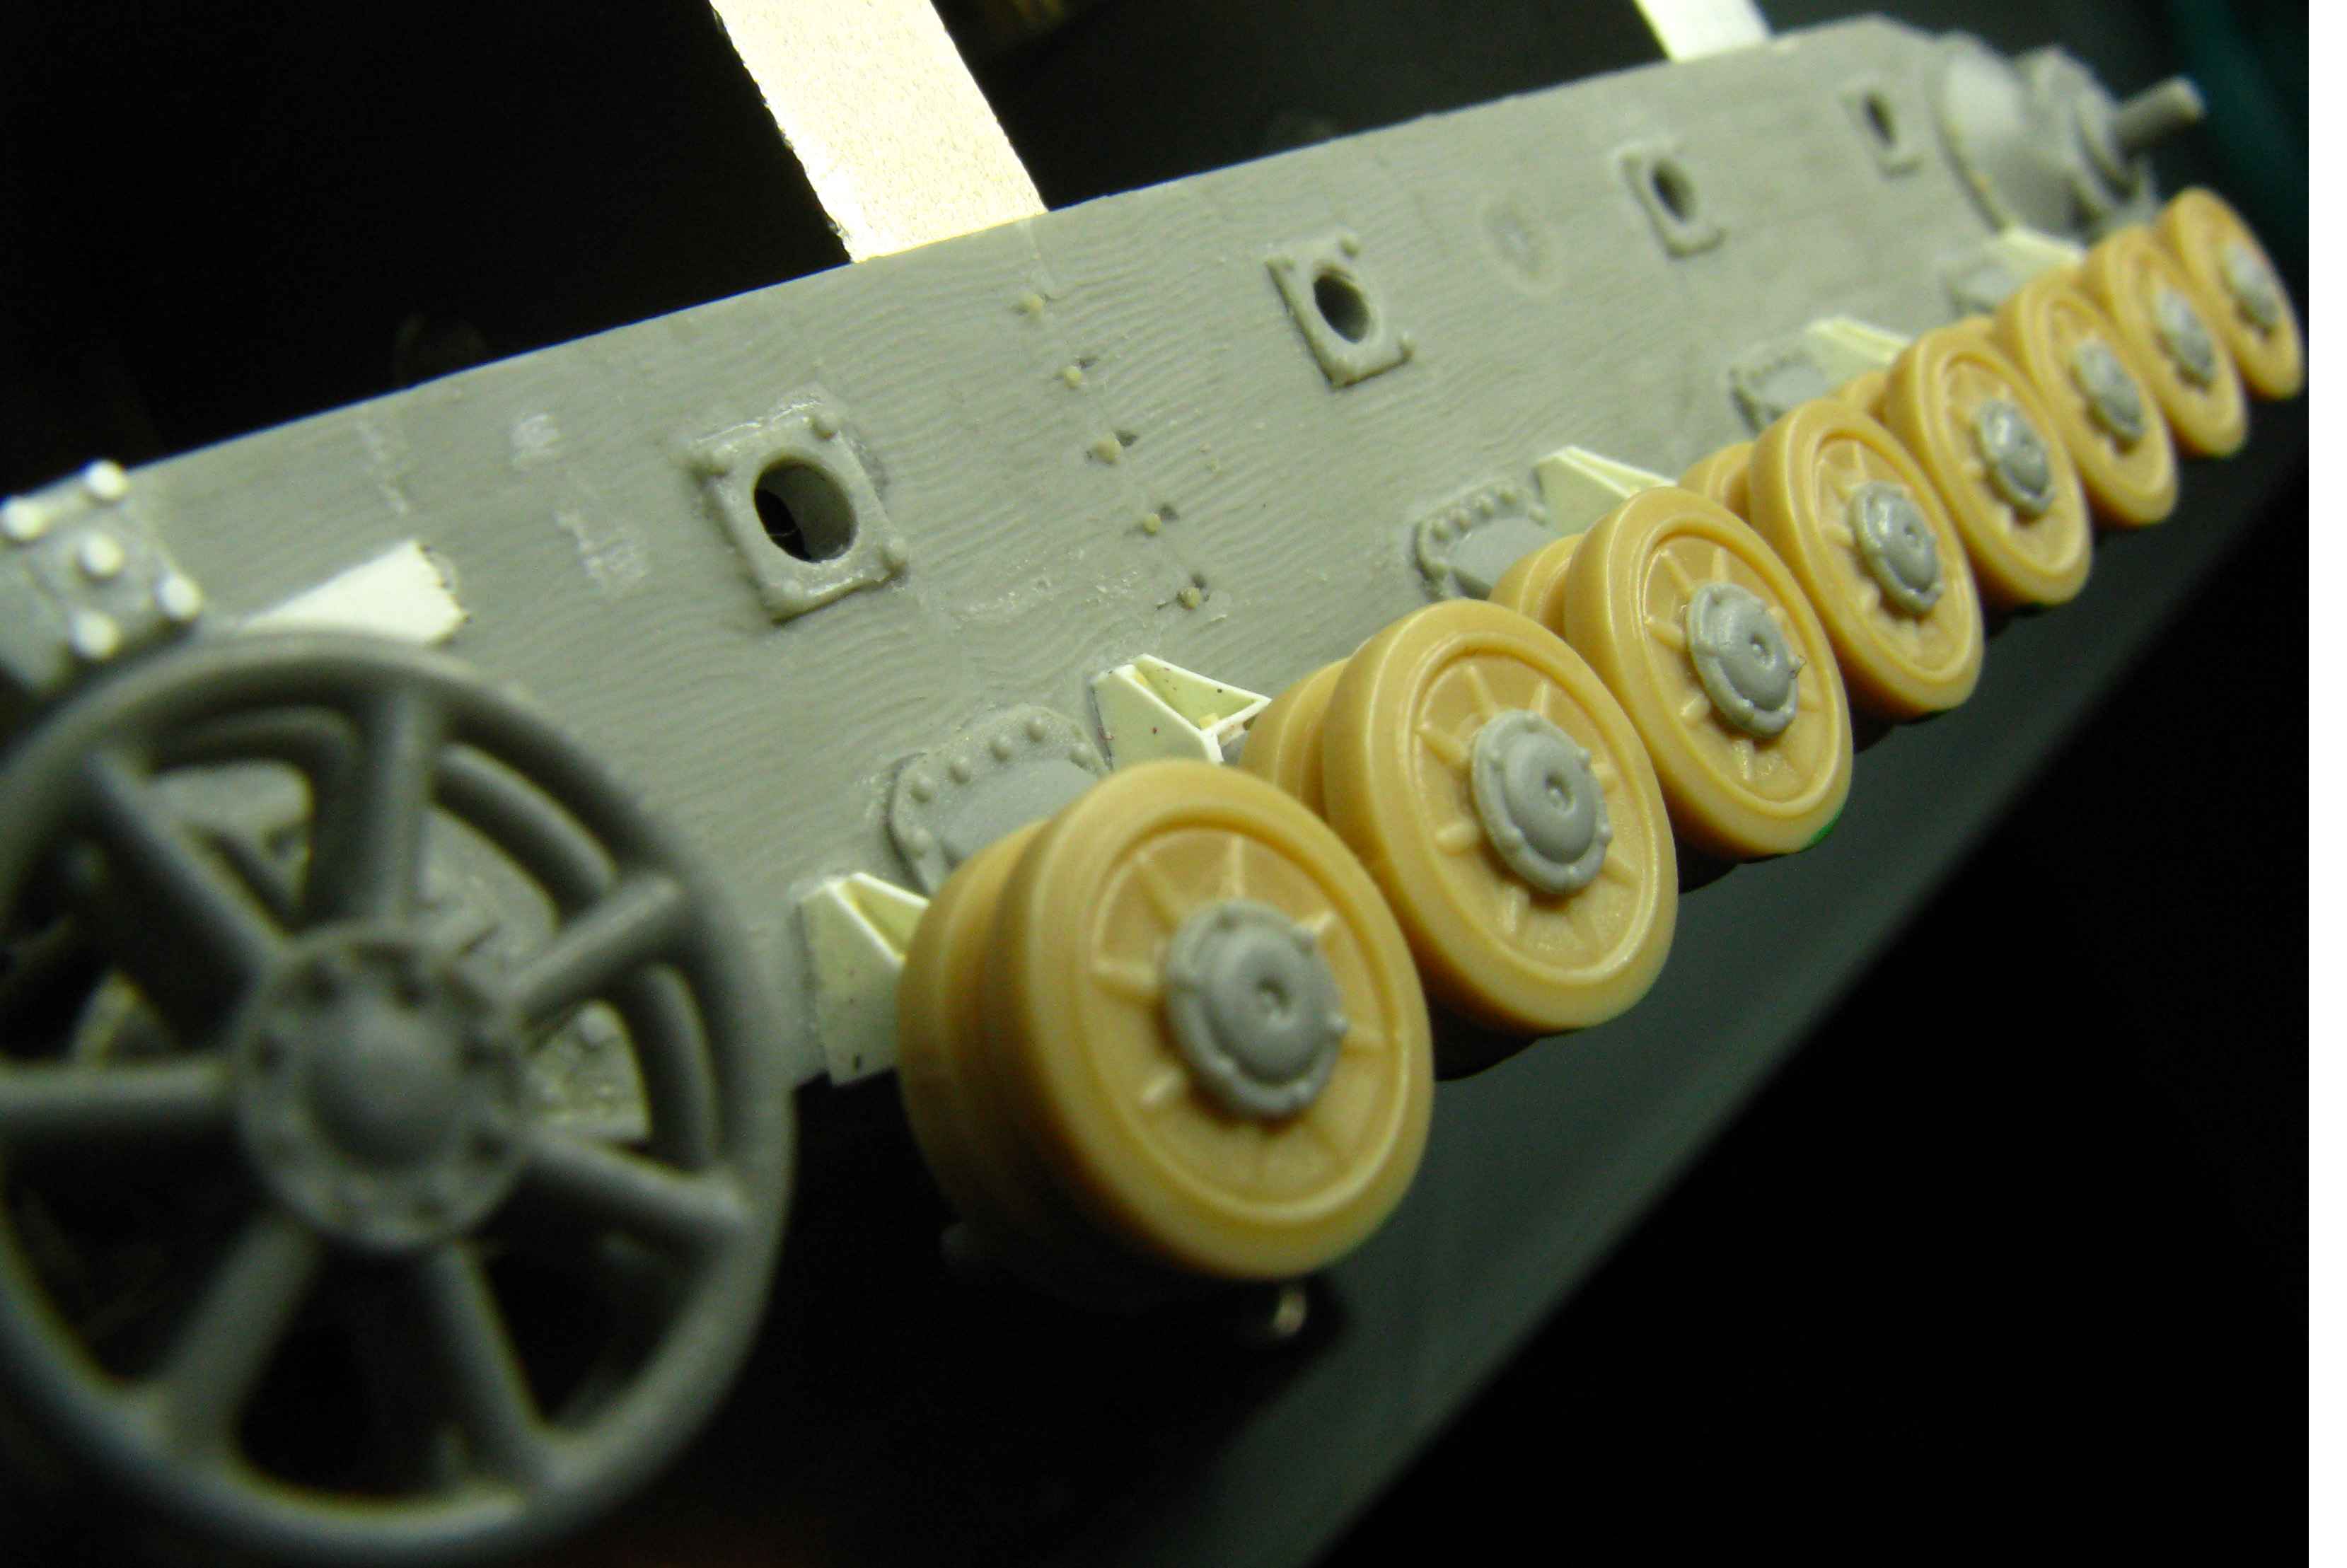
with dark yellow.
The hull is now modified with the
correct slope of the compartment on the right front of the hull:
I sawed away a wedge of it, pressed down the front part, glued then
puttyed and sanded it plain. Now it has a correct slope and the
protruding front armor plate.
At this point I'll start with the final detailing phase, then paint will follow, then tracks will be installed, then the weathering process... I hope to get there soon, but it will be difficult... baby cries at the horizon!
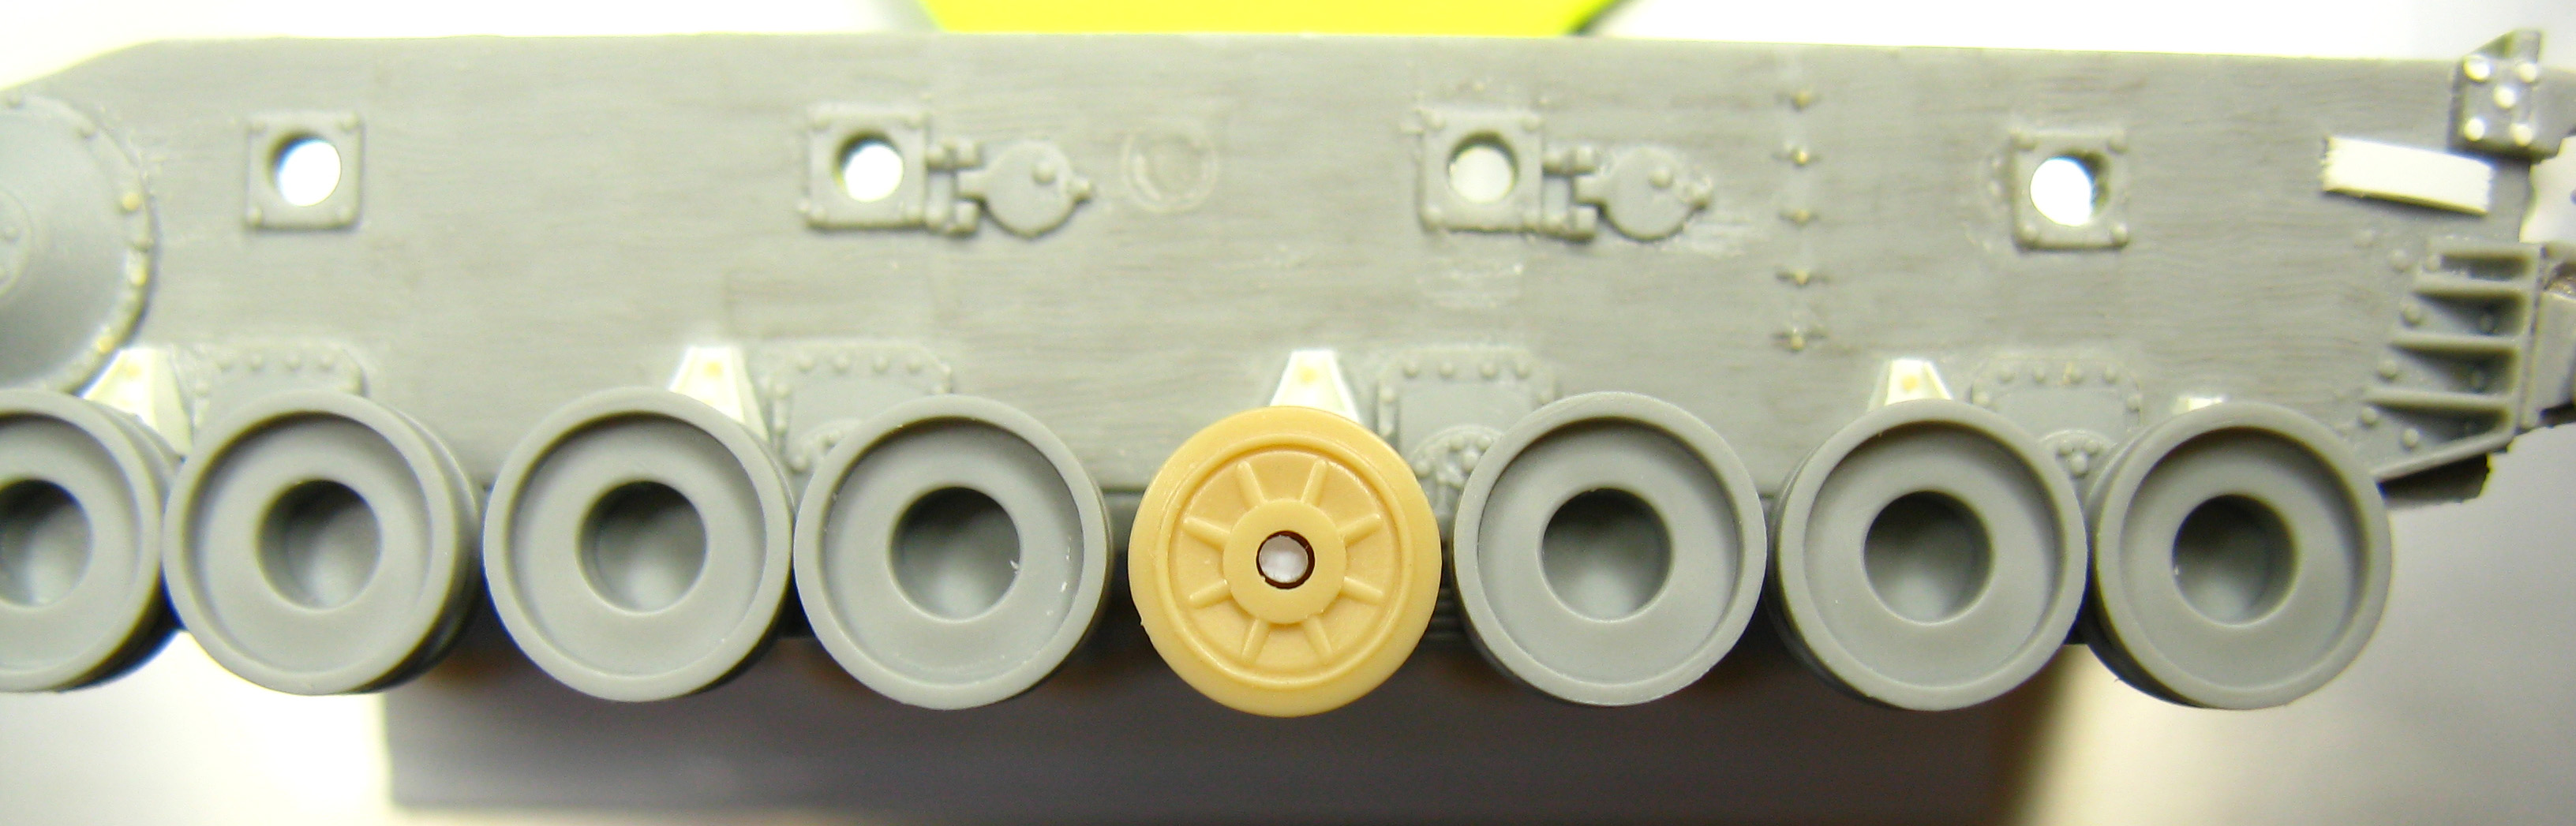
Post Scriptum 3. About the Zimmerit, I used a fairly exotic technique. it's a photosensitive cement applied with an odd spatula-tool of mine, and is about 0.08mm thick... I tried this method for a full month before even starting with the model. 4. About the roadwheels: after looking at pics of the real thing I noticed that the Revell hubs are too thin; actually the entire rim is quite shallow, while Dragon's is much better. I choose a compromise in accuracy, while the best way to have a correct roadwheel would be reducing the diameter(s) of the Dragon parts. Anyway it's just a matter of personal preference; in the past months I've appreciated the beautiful Stug of Alex Clark in which a masterful use of lights/shadows gives the Revell rims much more a 3D look than they actually have! |
| Back to Dragon Kit List | Back to Home Page |
| Article Last Updated: 13 October 2009 | Back to Article list |