|
Kitbashing a 7.5cm IG37 using the Attack and Dragon kits
Brief History
This gun was originally designated as the 7.5cm Pak37, but later named the 7.5 cm Infanteriegeschütz 37. Work started in 1944 using the barrel of a
defunct gun designed by Krupp for the 7.5cm Infanteriegeschütz 42, dating back to 1942. The carriage was from redundant 3.7cm Pak 36 gun or from captured copies of
the nearly identical Soviet 37mm M1930 anti-tank gun. By the end of the war some 1,300 units were operational.
Building the IG37
As far as I know Attack is the only manufacturer that offers this gun in kit form (RE 72326). From past experiences with other Attack resin kits I knew
that casting quality would most likely be marginal, so my plan to build a good display model of the gun was as follows.
I obtained an Attack kit to use what I could from it. This was purchased for an inexpensive price from a hobby shop
that was going out of business. Inspection of the kit through its clear packaging confirmed its crudeness, though the barrel looked usable. I also obtained
a Dragon 3.7cm Pak 35/36. These are fairly common coming in a variety Dragon releases, though not available separately. This kit is quite well done and would
provide the majority of the parts - carriage, mount, shield, wheels, etc. The Dragon gun has very poor spades so I decided to graft a set from the generally poor
Pak35/36 kit offered by UMmt (kit no. 606).
Step 1: The gun barrel
This had to be removed from the Attack kit. Some careful cutting and sanding eliminated the molded on cradle. Next I started to open up the holes between the baffles in the
muzzle brake but abandoned this when it became apparent that I was wasting my time. As I removed the resin I exposed numerous subsurface pin holes and the baffles
were starting to look like lilliputian slices of Swiss cheese. The only option was to build a new muzzle brake from scratch using small slices of plastic strip, and
after two tries I got an acceptable brake. I did take the easy way out with the bafffles and didn't add any rearward slant to them. It was difficult enough
as it was, and adding a slant would have resulted in me tearing my hair out in frustration.
Lastly the muzzle end was drilled out and a few pinholes along the barrel's underside were filled. This was the critical path of the build and once I had a
usable muzzle brake I knew I would be able to finish the remainder of the gun with comparative ease.
Step 2: The trails
The Dragon Pak35/36 has terrible spades. It is probably the weakest part of the kit. The fix for this came in the form of a set of spades taken from
an UMmt Pak35/36 kit. I had purchased it with the intention of seeing how it stacked up against the Dragon kit. When I found
it wanting in most aspects it was relegated to the parts box. First I removed the Dragon and UMmt spades from their trail legs.
Then I drilled a hole in the end of the UMmt spades and grafted them to the end of the Dragon trails. Afterward I trimmed the handles from the Dragon spades
and glued them to the UMmt spades.
Step 3: The rest
With the two hard parts out of the way I moved on to the remainder of the Dragon gun. It is easy to assemble (refer to my Dragon 3.7cm Pak 36
review here), though two more simple modifications are needed for the IG37.
The first is the removal of the Dragon barrel from its cradle. Not too difficult a task
with some
judicious cutting, scraping and sanding. A small channel must be added along the cradle's length to allow the barrel from the Attack kit to fit.
The second item is a
modification to the opening in the shield. This is much bigger and rectangular to allow the larger barrel to pass through
(see reference photo below). Note: The muzzle brake is too big and has to be attached after the barrel is slipped through the opening.

Designed primarily as a light support gun, it should have at least one of the red & white striped aiming poles. With no definitive answer as to where it/they
mount I didn't add any. If I ever find out exactly where they go I will add them in the future.
Conclusion
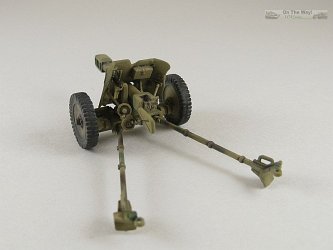
When all is said and done, this is an easy conversion. Combining the best parts from three different kits produces a nice display model, much better in my mind than
one would get from the Attack kit alone.
References
[1] German Light & Heavy Infantry Artillery 1914-1945, Wolfgang Fleischer, Schiffer Military/Aviation History, Atgen, PA 1995 ISBN: 0-88740-815-X
[2] panzerarmee.com
[3] valka.cz
[4] wikipedia

|
|
|
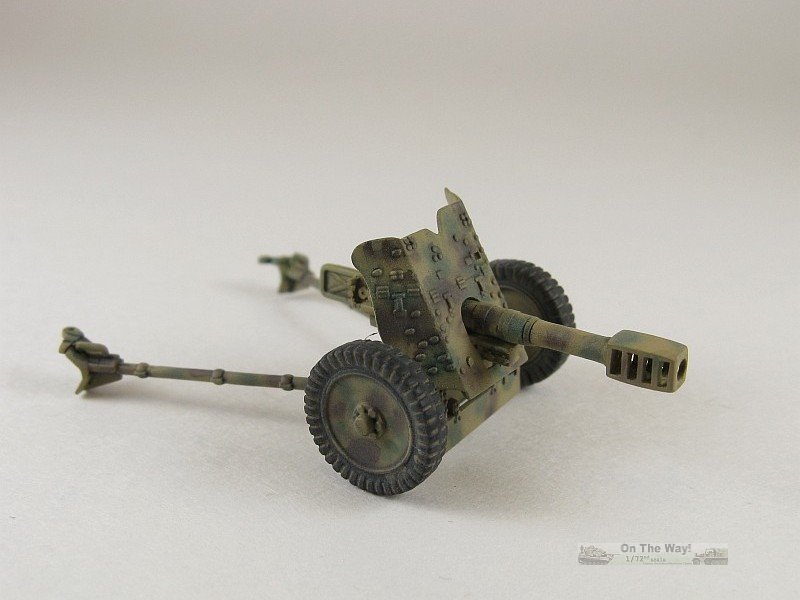
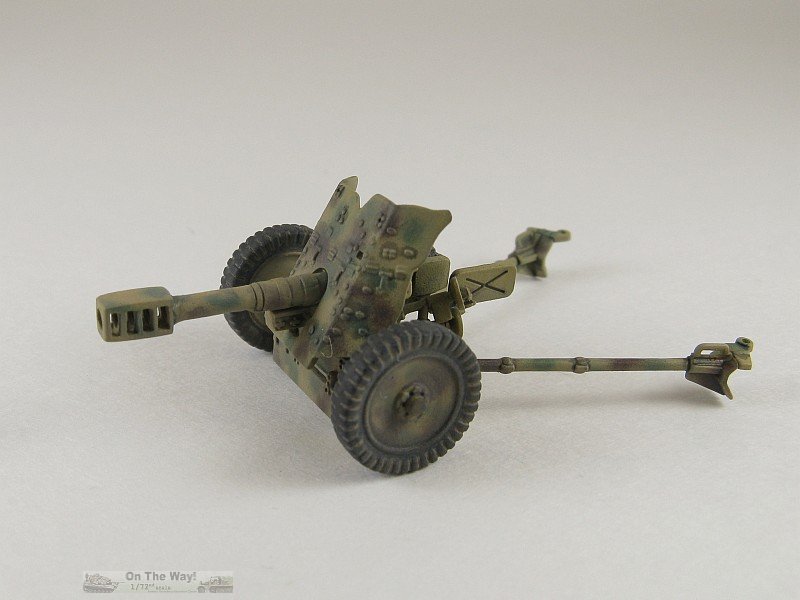
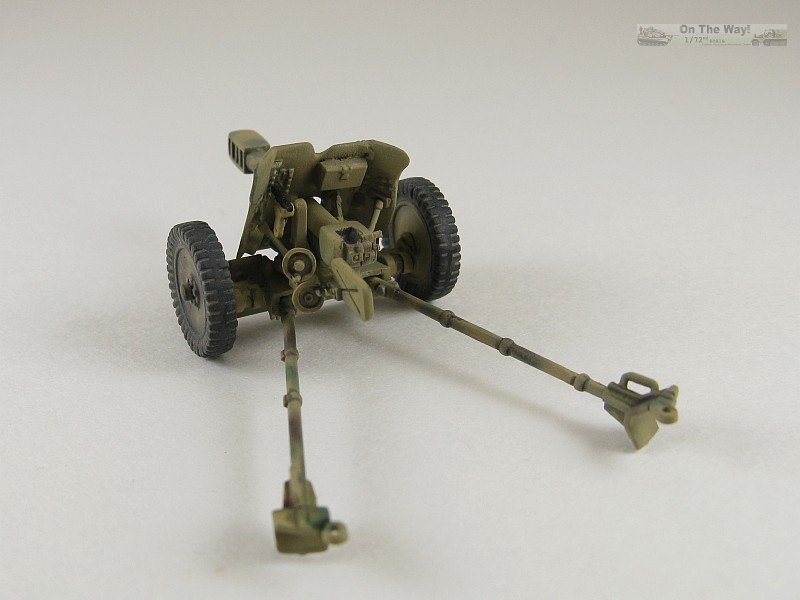
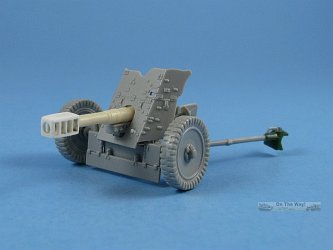
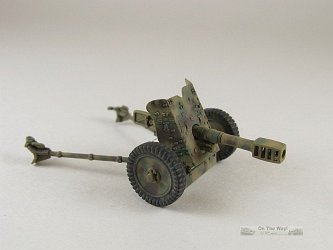
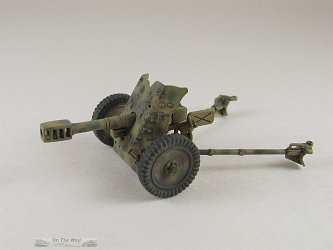
The above two pictures show the gun prior to painting. The tan/yellow barrel is from the Attack kit.
The white muzzle brake is the plastic scratchbuilt replacement.
The green spades are from the UMmt kit. The remainder of the light grey parts come from the Dragon kit.
|
|
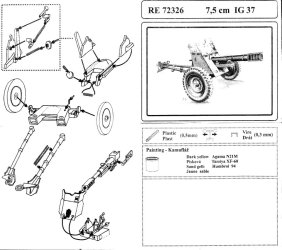
For those who may care, here is the
instruction sheet for the Attack kit.
|
Dragon & Attack products are available at

|